EC2 Launch Instance Wizard
EC2 Launch Instance Wizard: Adding and Configuring Instance Options on AWS
Adding Storage
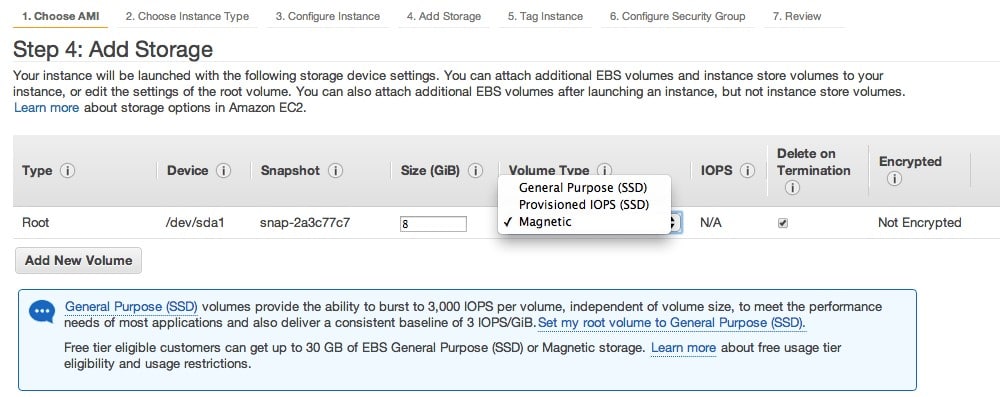
EC2 Launch Instance Wizard – adding storage
AMI: has multiple volumes of storage (root device volume).
From the Add Storage page, set more volumes for attaching to the instance through selecting Add New Volume. You may start configuring every volume as needed, and select Next: Add Tags.
– Type: Choose instance store or EBS volumes to get them associated with an instance. The instance chosen is what affects the types of volume found in the list.
– Device: Choose one found in the list of device names for the required volume.
– Snapshot: Fill in the name or ID of the snapshot you wish to restore a volume from, or just search for an available shared snapshot through filling the text into the Snapshot field. Descriptions: case-sensitive.
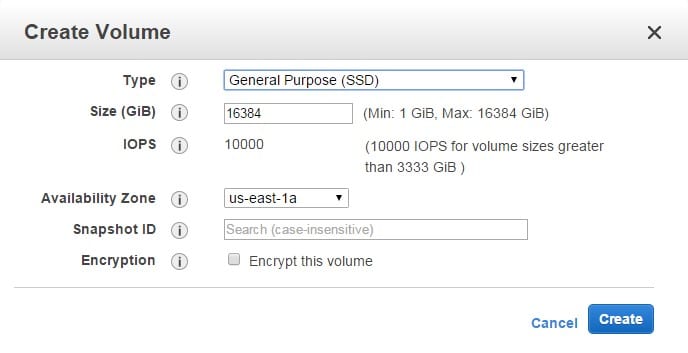
EC2 Launch Instance Wizard – create volume
– Size: A storage size may be specified for EBS volumes. Even with an AMI and instance made for free tier, users need to maintain being under 30 GiB of maximum storage.
– Volume Type: Choose a type to set for EBS volumes.
– IOPS: For Provisioned IOPS SSD volume type, fill in the number of I/O operations/second which can be supported by the volume.
– Delete on Termination: Choose this check box for EBS volumes for the sake of deleting the volume upon instance termination.
– Encrypted: For instance types supporting EBS encryption, set the encryption state. If encryption is enabled by default for your Region, you get a default CMK. Another key may be chosen or encryption may be disabled.
Adding Tags
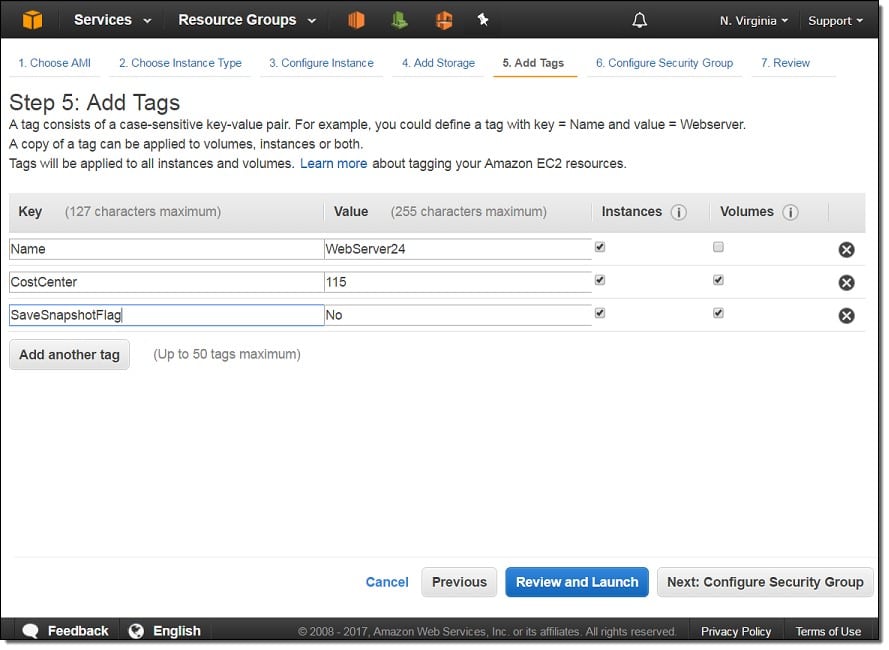
EC2 Launch Instance Wizard – add tags
For Add Tags page, set the tags you need through filling in keys and values. Instances, volumes or both may be tagged.
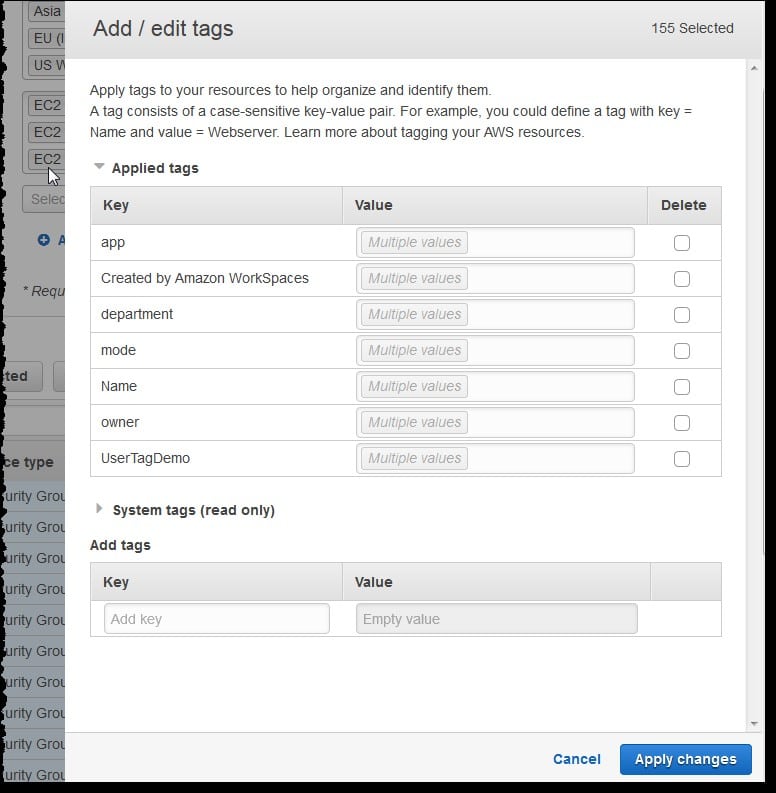
EC2 Launch Instance Wizard – add and edit tags
Spot Instances: Tag merely the Spot Instance request.
Select Add another tag for the sake of adding even more tags to resources.
Select Next: Configure Security Group after finishing.
Configuring Security Group
From Configure Security Group page, choose a security group for instance firewall rules. They set an incoming network traffic to deliver to the instance. Other traffic will be ignored. Choose or make a new security group as needed, and click on Review and Launch.
- For a pre-existing security group, click on Select an existing security group, and choose one of them. Its rules cannot be edited, but they can be copied to new groups through the Copy to new Later on, rules may be added as shown in next step.
- For a new security group, select Create a new security group. The launch-wizard-x security group is automatically defined and an inbound rule gets created so that you can connect to the instance by SSH.
- Rules can be added for the sake of what you need. (e.g. For a web server instance, ports 80 and 443 are opened for letting in internet traffic).
For adding rules, select Add Rule, choose what protocol you want to open to network traffic, and set the source. Select My IP found in the Source list so that the wizard can get your computer’s public IP address added. Yet, by using an ISP or behind a firewall with no static IP address, the range of IP addresses that are being utilized through client computers need to be found.
Be careful:
Rules allowing every IP address (0.0.0.0/0) access to your instance (SSH or RDP) are not considered safe for any production environment. Simply authorize selected and known IP addresses or range of addresses.
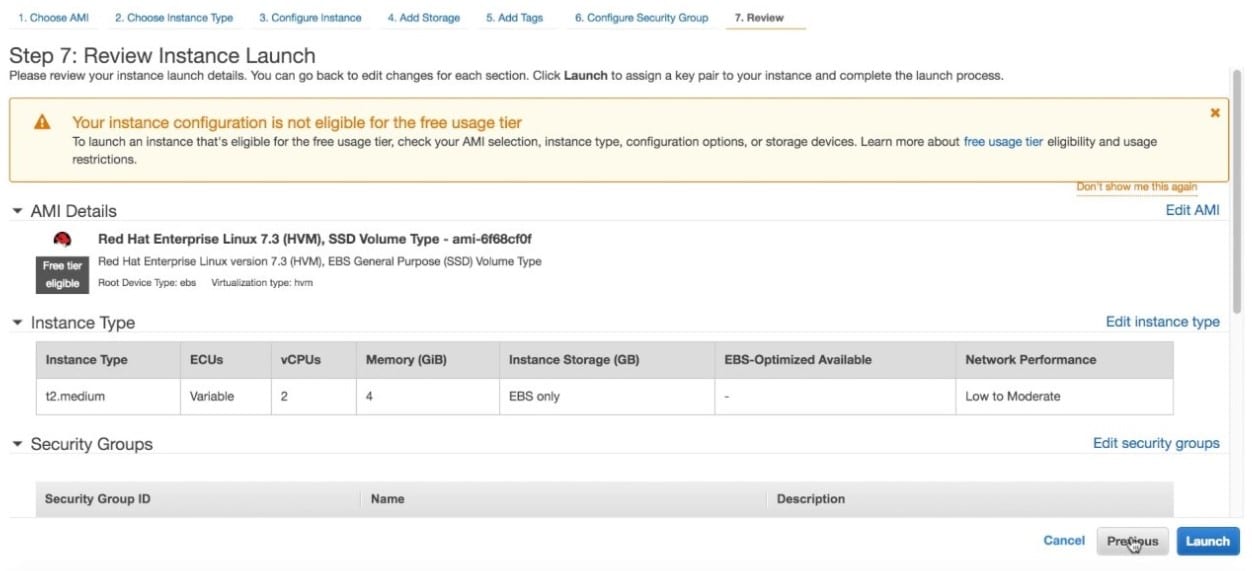
EC2 Launch Instance Wizard – review instance launch
Reviewing Instance Launch & Selecting Key Pair
From Review Instance Launch page, review the details, and perform the alterations needed through selecting an eligible Edit link.
Upon finishing, select Launch.
Inside “Select an existing key pair or create a new key pair” box, select a pre-existing key pair, or make a newly created one. (e.g. select Choose an existing key pair, and choose the key pair newly created while setting up)
For launching the instance, choose “acknowledgment check box”, and click on Launch Instances.
Note:
For the Proceed without key pair selection, it won’t be possible to connect to the instance without selecting an AMI which is configured for giving users other ways for logging in.
It’s optional for you to create a status check alarm and extra fees may be applied. In case you’re still not certain that you need it, you have the choice to add it another time. When reaching the confirmation screen, select Create status check alarms the go on as the directions state.