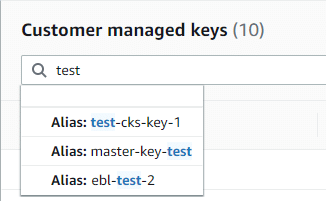
Symmetric CMKs
Create your Symmetric CMKs:
Symmetric CMKs may either be created using the Management Console or through the use of AWS KMS API.
Symmetric key encryption: It is a process which utilizes one same key for the sake of encrypting data and decrypting it.
How to create symmetric CMKs using the console?
It is possible to utilize the Management Console in order to get CMKs created.
- Login to the Management Console then head straight to the KMS console using the following link https://console.aws.amazon.com/kms.
- For the sake of changing the currently selected Region, you will need to utilize the Region selector from the top right.
- From navigation pane, select the option Customer managed keys.
- Click on Create key.
- For the sake of creating a symmetric CMK, you will need to select the option Symmetric from Key type.
- Click on Next.
- Enter a particular alias for CMK, but keep in mind that the name of the alias should not start with the prefix aws/ which is originally reserved by AWS for the sake of representing AWS managed CMKs in your account.
What is an alias?

Symmetric CMKs – Symmetric CMK Alias
An alias represents a display name which may be utilized for the sake of specifying the CMK. It is recommended for you to select an alias which specifies which kind of data is to be protected or which app is to be used with CMK.
An alias is necessary upon creating a CMK using the Management Console, and they will be an optional upon utilizing the operation of CreateKey.
- You can optionally type a specific description for your CMK, which describes which kind of data is to be protected or which app you will be utilizing with this CMK. Be careful not to utilize the description format which was originally intended to be utilized for managed CMKs.
You are capable of either entering a description currently or you could just get it updated whenever you want, but make sure that the key state is not at Pending Deletion. For the sake of changing, adding or simply deleting the description of a customer managed CMK, you must start by editing the CMK using the Management Console or through utilizing UpdateKeyDescription operation.
- Click on Next.
- You can optionally enter a tag key and optionally type a tag value. For the sake of adding multiple tags to your CMK, select the option Add tag.
Upon adding tags to resources, a cost allocation report will be generated having the sections of usage and costs that are being aggregated through tags.
- Click on Next.
- Choose which IAM users and which roles you’d like to grant permission to administer the CMK.
Keep in Mind
IAM policies are capable of granting different IAM users and different roles the permission needed for managing the CMK.
- It is optional for you to choose to prevent the chosen IAM users and roles from having the ability to delete this CMK, by going to the Key deletionsection located below the page and then clearing out the check box for Allow key administrators to delete this key.
- Click on Next.
- Choose which IAM users and roles are to be given the ability to utilize the CMK for cryptographic operations.
Keep in mind

Symmetric CMKs – Symmetric CMK Cryptographic Configuration
The root user will be given by default total permissions. Consequently, whichever IAM policies capable of granting users and roles permission will need to utilize the CMK for the sake of performing cryptographic operations.
- You may also optionally provide access for different AWS accounts to be able to work with this CMK for their cryptographic operations. For this to happen, you will need to head to the Other AWS accountssection located below of the page, select the option Add another AWS account and type in the required AWS account identification number of the needed external account. For adding even more external accounts, you must go over this same step.
Keep in Mind
For the sake of granting the possibility for principals in external accounts to work with the CMK, the Administrators of external account will need to get IAM policies created which will grant them the required permissions.
- Click on Next.
- Go over the key policy document which got created using your own choices, and it’s possible to get it edited as well.
- Click on the option Finishfor creating your CMK.
How to Create symmetric CMKs using the AWS KMS API?

Symmetric CMKs – Create Symmetric CMK using KMS
The CreateKey operation may be utilized for the creation of a symmetric CMK.
The below examples have the AWS CLI, however it is possible to utilize a different language of supported programming.
Performing such an operation does not need any specific parameters. Yet you may desire the utilization of Policy parameter for the sake of setting a key policy. It’s possible to alter key policy which is referred to by PutKeyPolicy then get some optional elements added like tags or a description whenever you want.
In addition, in case of getting a CMK created for imported key material or one in a custom key store you will need to use the Origin parameter.
Below you will find a call for the CreateKey operation while having no parameters whatsoever. It uses every single default value, and gets a symmetric CMK created for the sake of encryption and decryption using key material which was generated through the KMS.
$ aws kms create-key
{
“KeyMetadata”: {
“Origin”: “AWS_KMS”,
“KeyId”: “1234abcd-12ab-34cd-56ef-1234567890ab”,
“Description”: “”,
“KeyManager”: “CUSTOMER”,
“Enabled”: true,
“CustomerMasterKeySpec”: “SYMMETRIC_DEFAULT”,
“KeyUsage”: “ENCRYPT_DECRYPT”,
“KeyState”: “Enabled”,
“CreationDate”: 1502910355.475,
“Arn”: “arn:aws:kms:us-west-2:111122223333:key/1234abcd-12ab-34cd-56ef-1234567890ab”,
“AWSAccountId”: “111122223333”
“EncryptionAlgorithms”: [
“SYMMETRIC_DEFAULT”
]
}
}
In case there was no key policy set for the newly created CMK, you will find that the default key policy applied by CreateKey is not the same as that of the default key policy which is applied by the console when utilized for creating a new CMK.
Take the example of this call which is made to GetKeyPolicy operation. It is going to return the key policy applied by CreateKey, and grant the account the permission to be able to access CMK as well as give it the ability to get AWS IAM policies created for this CMK.
$ aws kms get-key-policy –key-id 1234abcd-12ab-34cd-56ef-1234567890ab –policy-name default –output text
{
“Version” : “2012-10-17”,
“Id” : “key-default-1”,
“Statement” : [ {
“Sid” : “Enable IAM User Permissions”,
“Effect” : “Allow”,
“Principal” : {
“AWS” : “arn:aws:iam::111122223333:root”
},
“Action” : “kms:*”,
“Resource” : “*”
} ]
}