Create Policy Using Visual Editor
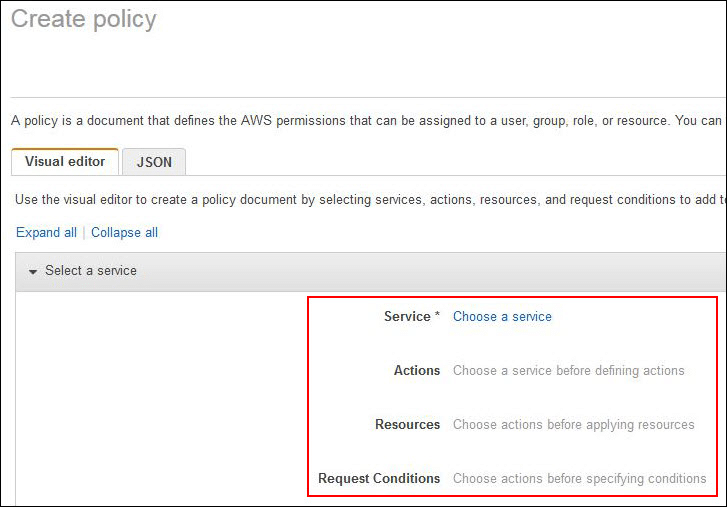
Create Policy Using Visual Editor- Visual Editor Tab
How to Create Policies using the Visual Editor?
You can use the visual editor from the IAM console to learn how to go through the creation of a policy with no need for writing in JSON syntax.
Using the visual editor for creating a policy
- Login to the Management Console then go straight to the IAM console using the following link https://console.aws.amazon.com/iam/.
- From left navigation pane, select the option Policies.
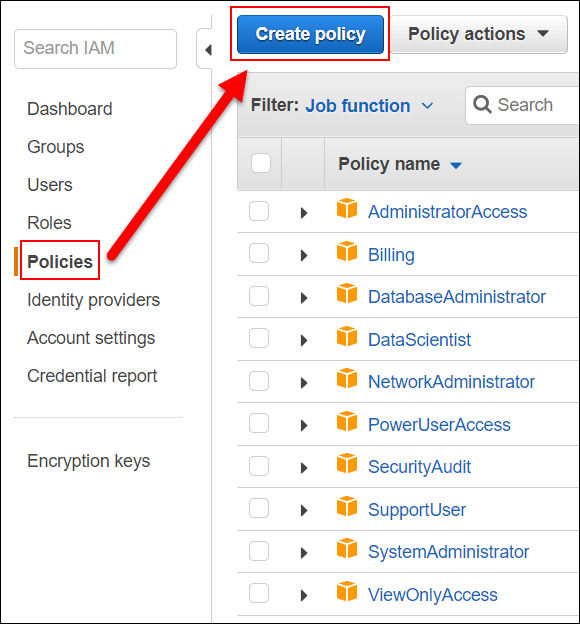
Create Policy Using Visual Editor- Create Policy button
- Select Create policy.
- From Visual editor tab, click on Choose a service. After that, select a specific service for adding it to your policy. It’s also possible to utilize the top search box for limiting the results from the listed services. Merely 1 service may be selected in a visual editor permission block. For the sake of granting access to multiple services, you can add various permission blocks through selecting the option Add additional permissions.
- Click on Select actions then select which actions you’d like to start adding to this policy. Your visual editor will display actions which are actually available in the previously chosen service.
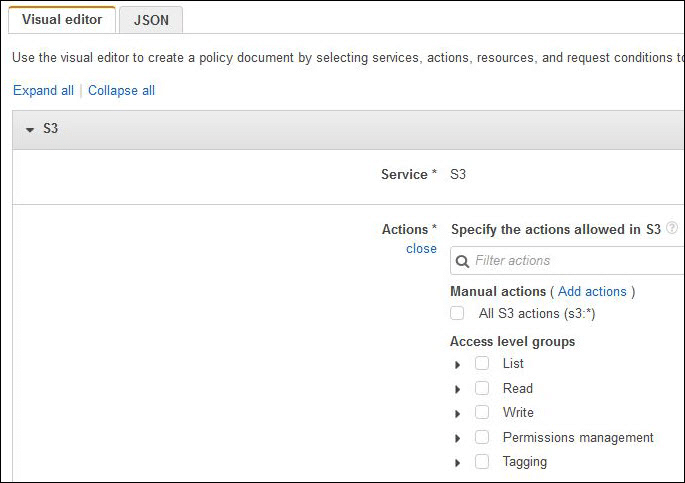
Create Policy Using Visual Editor- Actions section
Actions may be chosen in the below ways:
-
- Utilize check boxes for choosing every single action for the service or every action in 1 of the already defined Access level groups.
- Click on add actions for entering a particular action or utilize the feature of wildcards which is designated by “*” for the sake of setting more than 1 action.
- Open every one of the Access level groups for the sake of selecting individual actions.
The policy being created grants the chosen actions. For not allowing the chosen actions, you will need to select the option of Switch to deny permissions.
6. In case the chosen service and the previously selected actions do not support the selection of certain resources, All resources will be chosen for you with no possibility to get this section edited.
In case of selecting actions which support resource-level permissions, they will be listed using the visual editor, and the option Resources can be chosen for the sake of setting resources for the policy.
Resources may be selected using the below ways:
-
- Select Add ARN for the sake of setting resources according to their ARN. It’s possible to add a wildcard using the “*” symbol, in whichever needed field of the ARN.
- Select Any from the right side of the resource section for the sake of giving permissions to whatever resources having a similar selected type.
- Select Add ARN for the sake of setting specific details regarding the resource. Other than typing a value, it’s possible for you to select Any for the sake of providing permissions for whichever value of your choice for the setting which you have entered. This means that in case you choose the EC2 Read access level group, your policy’s actions are going to support the instance resource type.
It is necessary to set Account, InstanceId and Region values for this resource. In the case that you choose to give your account ID yet select Any for the values of instance ID and Region, this will allow the policy to give the permissions to whichever instance found in your set account.
-
- Select the option of All resources for the sake of selecting every single resource for that specific service.
7. You can optionally select Specify request conditions (optional) for adding conditions to the newly being created policy. Having conditions will limit the effect of a JSON policy statement, which means that you are capable of defining the ability of a user in performing an action on the resources whenever the request of the user takes place at a certain range in time. It is even possible to rely on common conditions for the sake of limiting if there should be authentication required with an MFA device. Otherwise, it’s possible to set this request to be originating from a specific set of IP addresses.
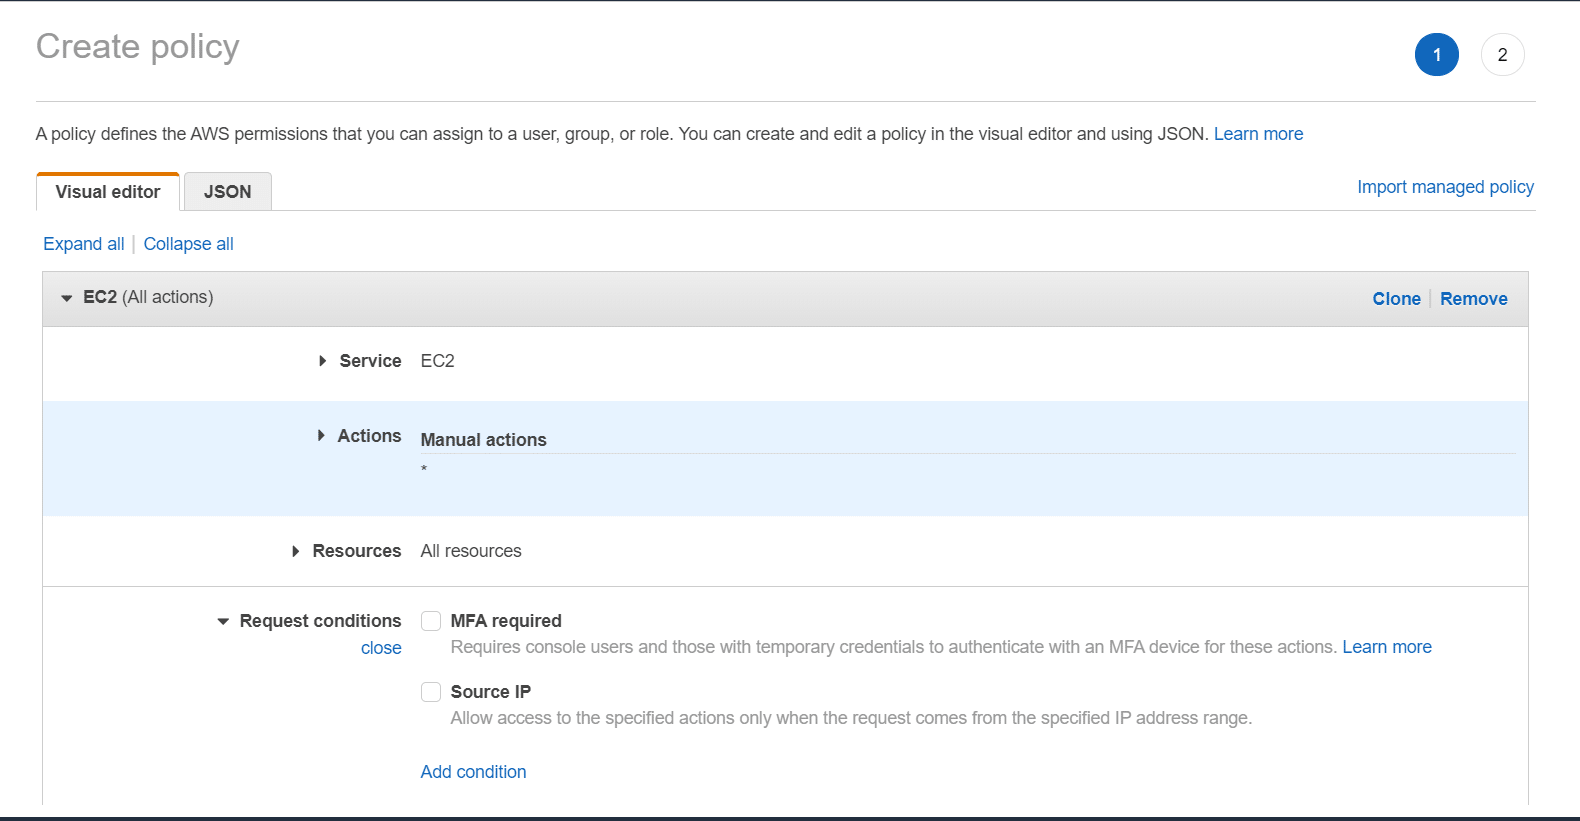
Create Policy Using Visual Editor- Conditions section
Conditions may be selected in the below ways:
-
- You are capable of utilizing check boxes for choosing common conditions.
- Select the Add condition for specifying different conditions. Select the Qualifier, Operator and Condition Key then set for each one a Value. For adding multiple values, select the option of Add new value, and you are capable of considering them connected by a logical “OR” operator. Upon finishing, click on Add.
For the sake of adding multiple conditions, click on the Add condition once more. Follow the same steps as necessary. Every single condition will be applied merely to the current visual editor permission block at hand. The entire conditions need to be true in order to take the permission block as a match. Which means that you should try connecting the conditions by a logical “AND” operator.
8. For the sake of adding multiple permission blocks, select the option Add additional permissions. Then, for every single block, go over the steps from number two till number five.
9. Upon finishing, select the option of Review policy.
Keep in Mind
You are capable of switching from the Visual editor to the JSON tab or vice versa whenever you want. Although remember that in case you choose to make alterations or select the option of Review policy found in Visual editor tab, your policy may then get restructured for the sake of making it optimized for visual editor.
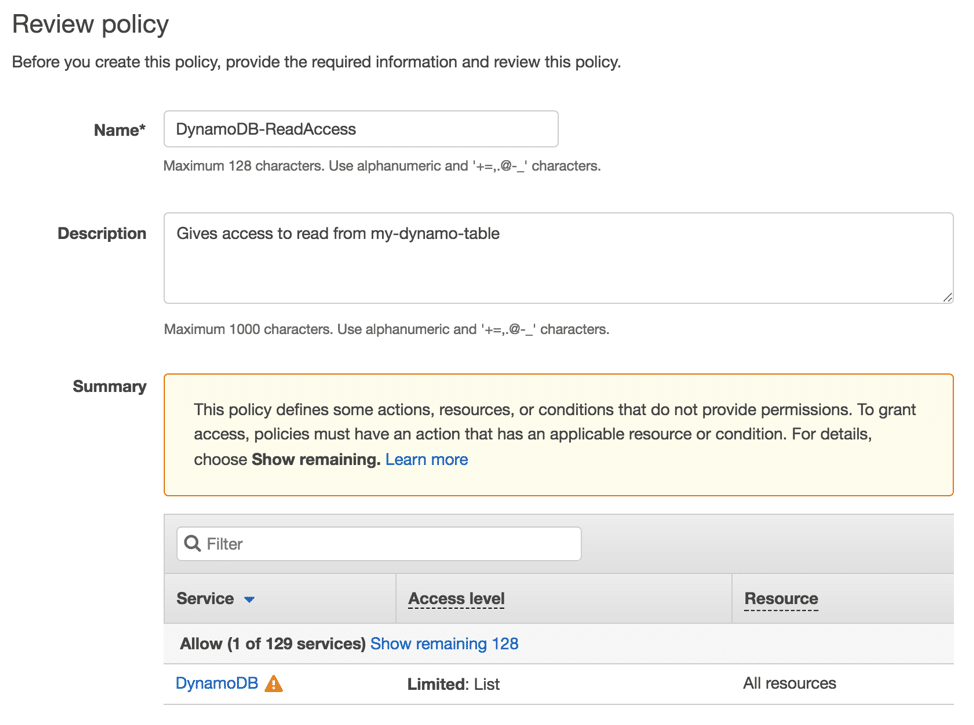
Create Policy Using Visual Editor- Review Policy Page
10. From Review policy page, enter a specific Name and a particular optional Description for your newly being created policy. Go over the policy summary in order to ensure that you have given the needed permissions, then select the option of Create policy for saving the newly created policy.
Upon creating a policy, it will possible to get it attached to users, roles or groups.
create a database with Amazon Neptune