AWS Tagging
How do AWS Tags Work?
Take a look at what AWS tagging is and the way you can use and rely on those tags to improve your AWS experience.
Let’s start with some basic questions that you must be asking yourself:
-
-
What is a “tag”?
-
It’s a label which is assigned to a specific resource.
It consists of two variables, a key and a value, which are both chosen by you.
-
What is it used for?
It helps you in classifying your AWS resources each according to a specific way. For example, you can use a tag to classify your resources by “owner”, “region” or “date”.
-
When do you need them?
You can resort to using tags when you have a large number of resources that are of a similar type. Tags will help you in distinguishing each resource from the other, based on the tags assigned to differentiate between them.
-
Where are they used?
You can use them in AWS Management Console, Amazon EC2 API and AWS CLI.
Take note of the below while naming your AWS resources so that you can be able to differentiate between each and every one of them while giving them a unique tag key and value:
- You should keep in mind that you are capable of adding up to 50 tags only.
- Tag values or tag keys cannot start with the text aws:. (it’s only for internal use).
- A tag can have empty values like pageNumber= “ ” . Tag keys are not capable of being empty.
- 1 tag cannot have various different values. It is possible to get a custom multi-value structure in that 1 value.
- Tag keys and values of tags are capable of having spaces, letters, numbers and the following symbols: _ . : / = + – @ .
- Tag key–value pairs: not case sensitive but preserved so as to not be able to include different Apartment and apartment tag keys.
-
How can you Display Tags?
There are two types to display tags: Displaying Tags for One of the Resources, or Displaying Tags for All of the Resources.
-
Displaying Tags for One of the Resources:
- First you need to open the Amazon EC2 console, https://console.aws.amazon.com/ec2/ then choose a resource specific page.
- Choose Instances from Navigation Pane, and the console will display to you a list of the Amazon EC2 Instances.
- Choose a resource from the list which supports tags so that you can view and manage its tags. (For example, instance.)
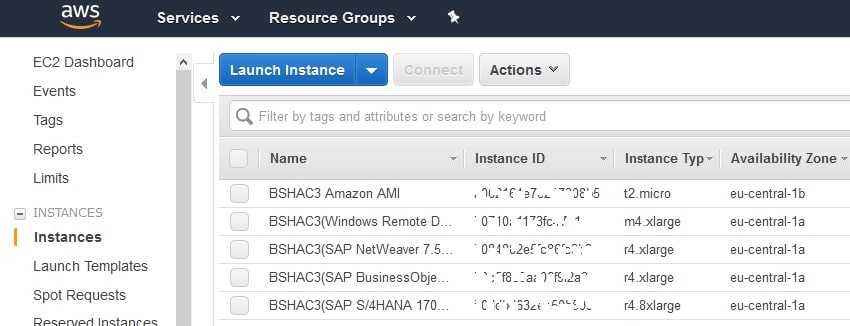
5. Go to the Tags tab on the Details Pane.
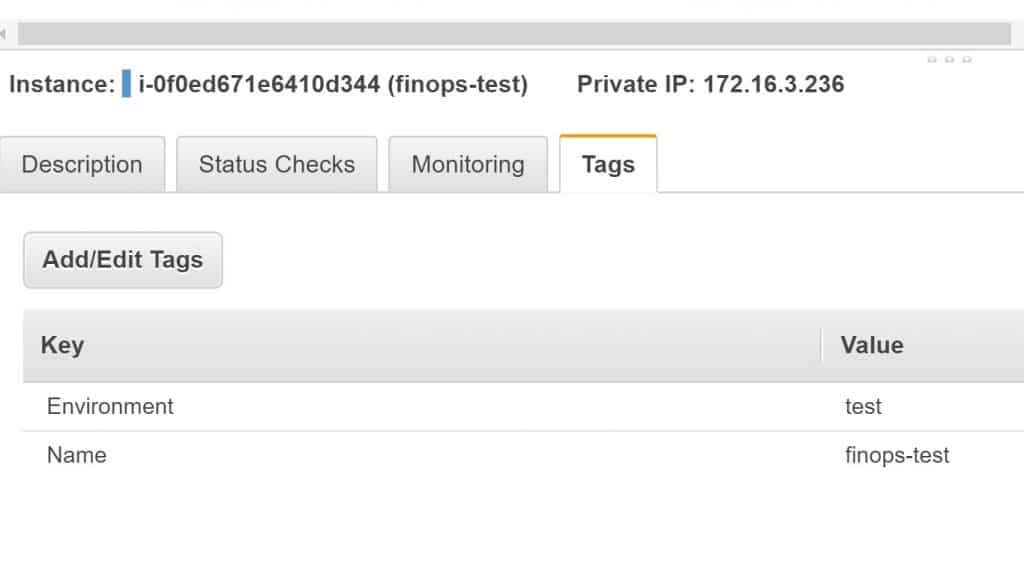
AWS Tagging – Tags Tab in Details
6. From the Tags tab click on Show Column You will see on the console that a new column has been added.

AWS Tagging – Click on Show Column
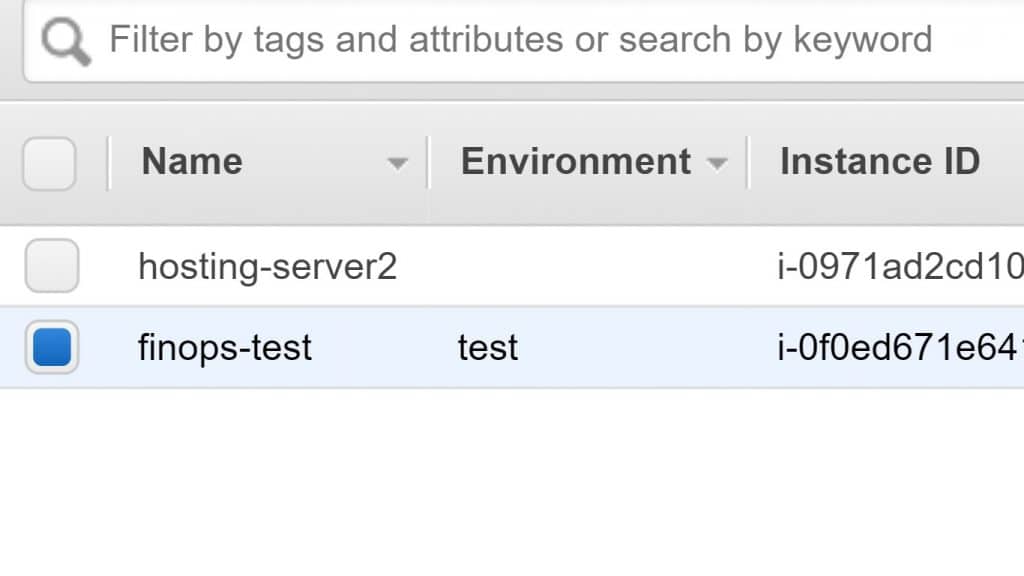
AWS Tagging – Added Column Environment
7. Click on the Show/Hide Columns gear shaped icon.
8. Finally, in the Show/Hide Columns dialog box, select tag key under Tag Keys.
-
Displaying Tags for All of the Resources:
- Select Tags from the Navigation Pane found in the Amazon EC2 Console. (Same as that of the previous process.)
The following picture illustrates all the tags used by resource type in the Tags Pane.
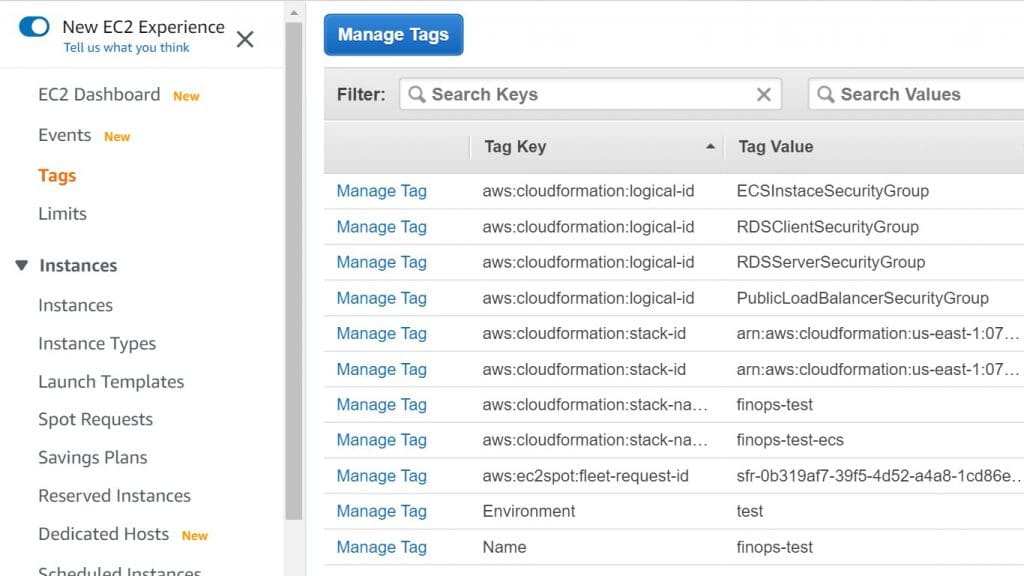
AWS Tagging – Tags Section from the Console to view all tags
-
How can you Add or Delete Tags?
Now let’s get ahead with learning how to add/delete tags:
-
Adding Tags:
- Again, go to Amazon EC2 console, https://console.aws.amazon.com/ec2/.
- Go to navigation bar, and choose the Region you need. This step is important because the number of Amazon EC2 resources that can be shared between Regions are limited.
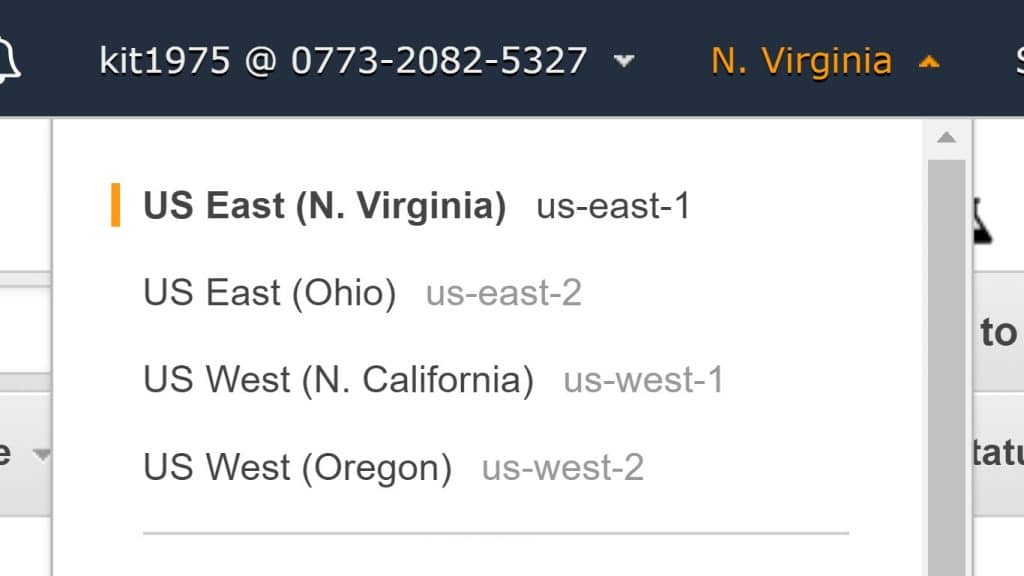
AWS Tagging – Select a Region
- From navigation pane, choose a resource type (Instances).
- Choose the resource from the resource list, then go to Tags, and click Add/Edit Tags.
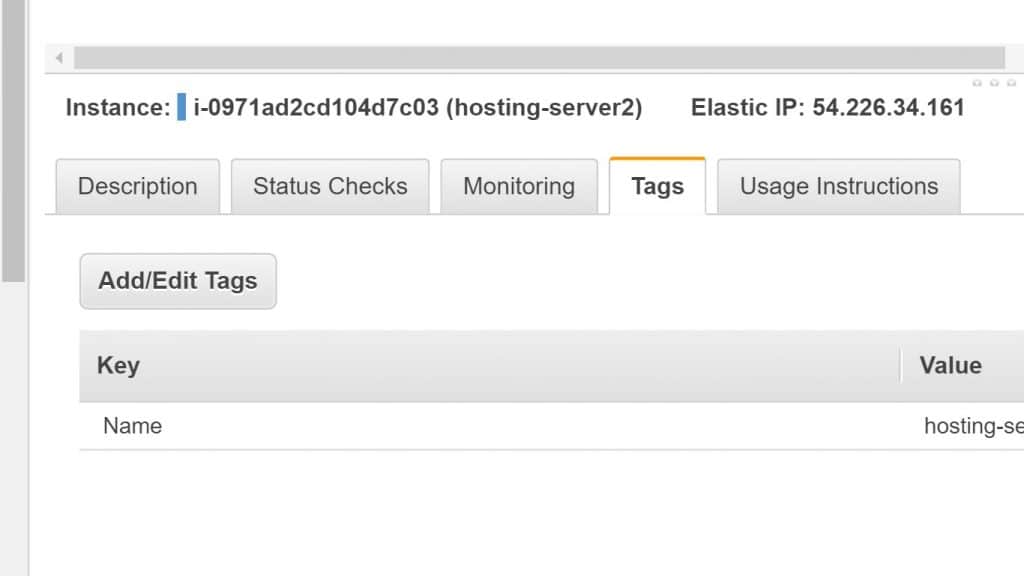
AWS Tagging – Add,Edit Tags
5. When you reach the Add/Edit Tags dialog box, place the key and value for every single tag, and then click Save.
-
Deleting Tags:
- Open the Amazon EC2 console at https://console.aws.amazon.com/ec2/.
- Go to navigation bar, and select the Region that meets your needs.
- From the navigation pane, choose a resource type (for example, Instances).
- Choose the resource from the resource list and click on Tags.
- Go to Add/Edit Tags, select the Delete icon for the tag, and choose Save.
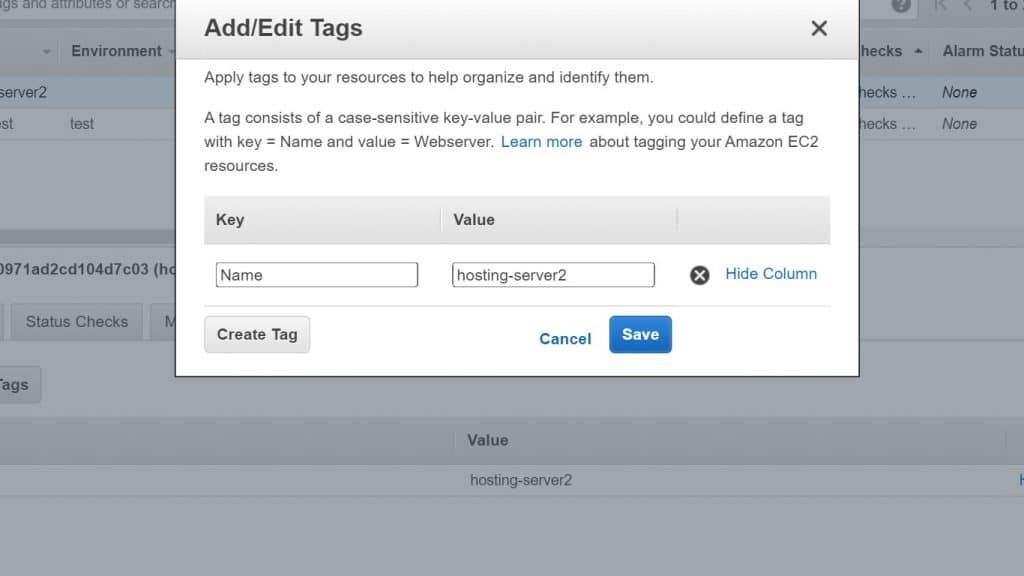
AWS Tagging – Click on Delete icon to delete a Tag