Deploy Without Git Provider
What is the AWS Amplify Console?
It is a full-stack web application hosting service, allowing for everlasting deployment from a selected source code repository. It was introduced in the year 2018 at AWS re:Invent.
How to add the “Deploy To Amplify Console” Button when you’re not using the deploy without Git provider option?

Deploy Without Git Provider – Deploy to Amplify Console
Once you publish your project source code on GitHub, it could be made simple for different developers to start building and deploying your app through adding a “Deploy To Amplify Console” button to the Readme document. When they click on this button, they can open the Amplify Console and propose a 3-step procedure for deploying your code.
It’s simple and easy to add a button to your code repository just like having to add such a line to your Readme document (don’t forget to change the username as well as the repository name found in the GitHub URL):
[](https://console.aws.amazon.com/amplify/home#/deploy?repo=https://github.com/username/repository)Where the part https://github.com/username/repository is replaced by your own repository name.
Also, you have the chance to add this button to whichever HTML document you choose by entering the below code (also need to change repository name):
<a href="https://console.aws.amazon.com/amplify/home#/deploy?repo=https://github.com/username/repository">
    <img src="https://oneclick.amplifyapp.com/button.svg" alt="Deploy to Amplify Console">
</a>
How to Manually Deploy without Git provider?
It’s great to choose to be the one who version controls everything going on, as well as a simple web site for which you are the developer alone. However, in case you choose not to utilize a source code repository to be your deployment source, the Amplify Console provides the ability to deploy one of the following: a zip file, a local folder, an S3 bucket or an HTTPS URL, for example a shared repository on Dropbox.
To deploy without Git provider, follow the below steps:
First, login to the AWS Amplify console using the following link https://us-east-2.console.aws.amazon.com/amplify/home?region=us-east-2#/.
Click on the Get Started Button for the section under Deploy.
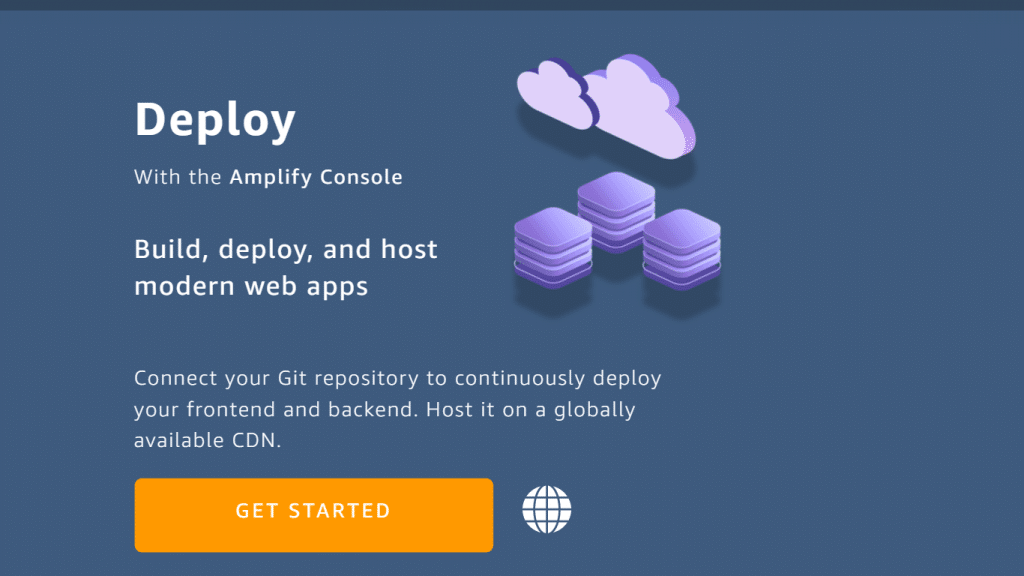
Deploy Without Git Provider – AWS Amplify Deploy
When you start to create a new Amplify Console project, choose the option Deploy without Git Provider option.
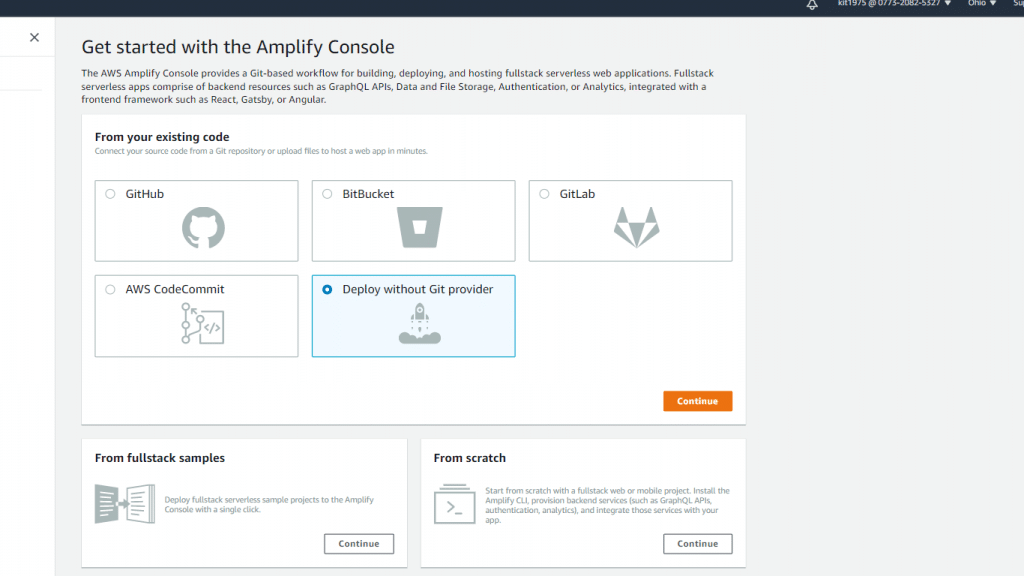
Deploy Without Git Provider – Choose Provider
After selecting Deploy without Git Provider, click on Continue.
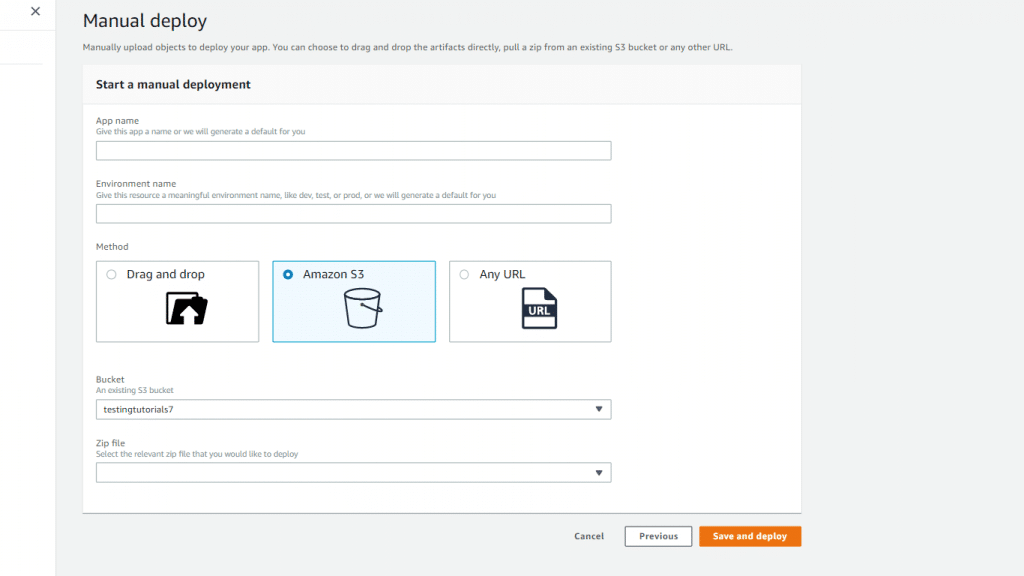
Deploy Without Git Provider – Choose a Method
Start by giving your application a unique App name to identify it from other apps, then enter an Environment name to show what type of environment your app will be hosted at (like testing or development).
Now, you will need to select a source file which can either be from your laptop, from Amazon S3 or from an HTTPS URL.
Choose a Method and fill in the needed settings:
For Drag and Drop – Simply drag your files and drop them into the drag and drop area.
For Amazon S3 – Supply a Bucket name and a Zip File.
For Any URL – Enter the necessary URL.
Once you have completed the required fields, click on the button Save and deploy.
Now you have completed all the needed steps to deploy without git provider and deployed your very own application without a Git provider.
What is AWS CloudFormation Integration?
Developers aim for automation, and the deploying of code or infrastructure is quite similar: always make sure that your infrastructure deployments are perfectly automated and repeatable. Using AWS CloudFormation you can get the chance to automate creating your infrastructure in the cloud based on JSON or YAML descriptions. There are 3 new resource types that have been added by the Amplify Console to CloudFormation:
- AWS::Amplify::App – To create new Amplify Console apps.
- AWS::Amplify::Domain – To define a DNS domain name.
- AWS::Amplify::Branch – To Define the Git Branch.
CloudFormation connects to your source code repository for the sake of adding a webhook to it. Your Github Personal Access Token needs to be included for allowing this to occur, and this article contains every needed detail. However, don’t hardcode credentials or OAuth tokens into your Cloudformation templates, but instead rely on parameters.
How to Deploy Multiple Git Branches?
The CI/CD tools you use need to adapt to your team workflow. Amplify Console allows for branch pattern deployments, giving you the ability to directly deploy branches that go with a particular pattern without the need of any additional configuration. Such pattern matchings are according to regular expressions.
Whenever you’d like to test new features, you get to creating a new branch in Git. The Amplify Console as well as the Amplify CLI can start detecting this and provisioning another backend and hosting infrastructure for the serverless application that you have.
- For the sake of enabling branch detection, go to the Amplify Console using the following link https://aws.amazon.com/amplify/console/.
- Then from the left menu, choose General.
- Then, click on Edit and turn Branch Autodetection to enabled:
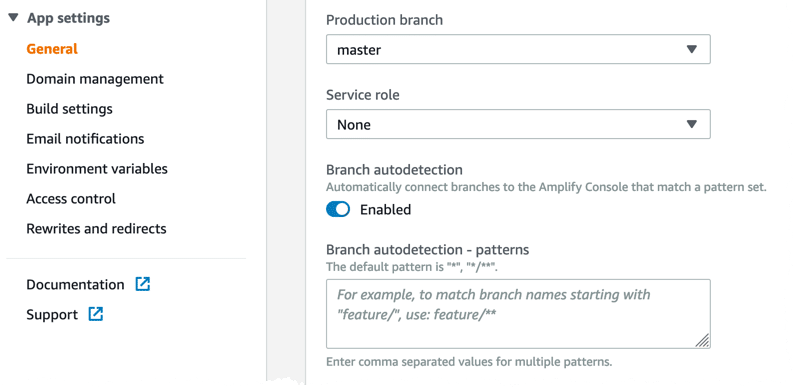
Deploy Without Git Provider – Branch Autodetection
How to Send Custom HTTP Headers?
It is possible to customize Amplify Console for the sake of sending some customized HTTP response headers. Those Response headers may be utilized for the following purposes: security, informational or debugging. For the sake of adding custom headers, follow the below steps:
Login to the Amplify Console using the following link https://aws.amazon.com/amplify/console/.
Choose App Settings from the left navigation pane.
Click on Build Settings, then edit the buildspec.
For instance, if you’d like to start enforcing TLS transport and preventing XSS attacks, add the below headers:
customHeaders:

- pattern: '**/*'

headers:

- key: 'Strict-Transport-Security'

value: 'max-age=31536000; includeSubDomains'

- key: 'X-Frame-Options'

value: 'X-Frame-Options: SAMEORIGIN'

- key: 'X-XSS-Protection'

value: 'X-XSS-Protection: 1; mode=block'

- key: 'X-Content-Type-Options'

value: 'X-Content-Type-Options: nosniff'

- key: 'Content-Security-Policy'

value: "default-src 'self'"
It is based on YAML.
How to Use Custom Containers for Build?
Amplify Console utilized AWS CodeBuild. The build container image which is set as default is based on Linux 2 and includes Serverless Application Model CLI that is installed before. (To learn about AWS Serverless Projects, check the AWS Serverless Project article). In case you’d ever want to utilize your very own unique container for the build, follow the below steps:
Configure the Amplify Console to do so, by first choosing App Settings from the left navigation pane.
After that, click on Build Settings:

Deploy Without Git Provider – Build Image Settings
Then start editing the build image settings section as needed.
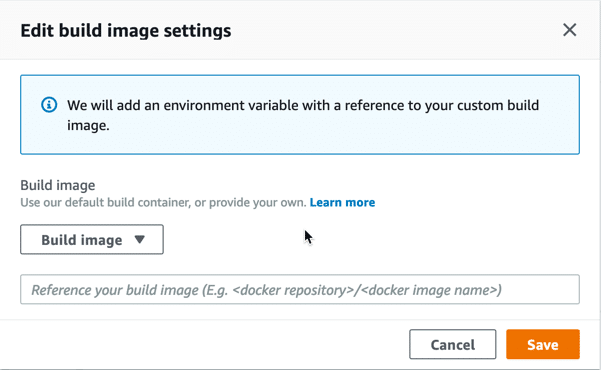
Deploy Without Git Provider – Edit Build Image Settings
Keep in mind that there will be a couple of requirements on the container image, such as:
– It must have OpenSSH, git, and cURL.
– In case of building NodeJS projects, it must have npm and node.
This is how easy it is for you to navigate your way around the AWS Amplify Console, where you can rapidly deploy applications without the need of any Git provider.
Create and Organization on AWS