Innovations in technology have changed the way enterprises used to deal with their daily operations. During the early days, enterprises were relying on a single physical platform. Gradually, they shifted to web platforms and now, most enterprises manage their data over the cloud platforms. Amazon Web Services offer a range of cloud-based services for enterprises and web users working in different fields. AWS Storage Gateway Configuration explained in this article.
What is AWS Storage Gateway?
AWS Storage Gateway bridges the gap between the on-premises storage and cloud-storage service offered by AWS. AWS Cloud Services use AWS S3 and Amazon EBS for storing data of different sizes. The AWS Storage Gateway works with both types of data to simplify the process. All the data-related tasks can be done with this single service at the user’s end.
The AWS Storage Gateway stores data and files as native files of S3. It also stores EBS Snapshots with the help of the AWS EBS service. The S3 objects saved with Amazon Glacier within the same environment.
Before we jump on to the main configuration part, let’s get the details about the different types of Gateways offered by this service.
Three Types of AWS Storage Gateways
Type 1: File Gateway
This gateway behaves as a separate server for storing the data in S3 Objects. The file transfer process is done through SMB and NFS protocol access.
Type 2: Volume Gateway
This gateway can be deployed in two different ways, through cached volume and through dataset that resides locally. This type of gateway releases frequent snapshots. The snapshots store automatically in S3 objects for further use.
Type 3: Tape Gateway
This type of gateway uses local data that can be transmitted to Amazon S3 backups through S3 Objects, S3 Glaciers, and S3 Deep Archive.
How to Configure AWS Storage Gateway?
Make sure that you have an active AWS account registered with your username and password. If not, kindly create a new AWS account. Once the account is created, go to the AWS Management Console page and then go to the Storage services from which you need to select the Storage Gateway option.
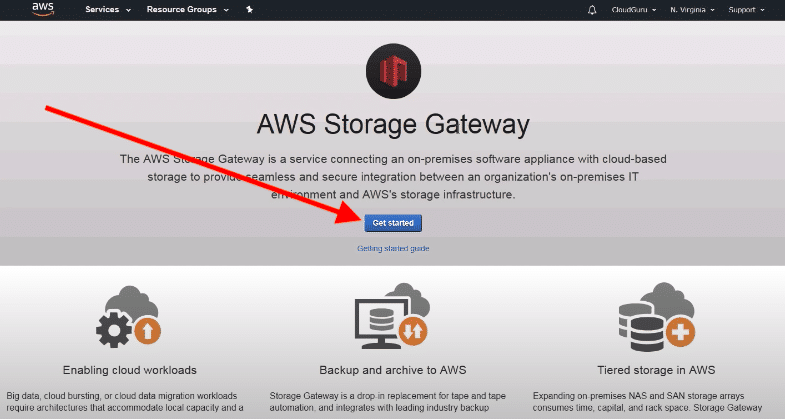
The AWS Storage Gateway’s front-page will be presented in front of you. You can read out all the information given about this service from here. Once done, click the blue-colored Get started button.

How to Configure AWS Storage Gateway
On the next page, the service will ask you to select the type of gateway for your next on-premises data storage. You will be presented with File Gateway, Volume Gateway and Tape Gateway options. Select the first option i.e. File Gateway from here.
Now, to host the selected Gateway, you will be presented with a list of available hosts. Depending on your current platform and requirements, you can select any of these hosts to get an image of the host. The downloaded file will be in ova file type. Eg. Here, we have selected the Amazon EC2 host platform.
The next page will be of adding storage. The Add Storage step will ask you how you would like to add new data. Click the Add New Volume button. After adding the file, click on to the Review and Launch button.
In the next step, you need to configure the final security group for the storage gateway. This must be enabled to keep the data of your storage safe and secured. You can configure the security group as per your requirements. Once done, click the Review and Launch button to launch the selected Instance of Amazon.
You will be taken to the main page of the Gateway where you would be asked to select the Amazon Instances option back. Since you have configured this gateway type, you don’t need to download the image file again. Select the Amazon EC2 option and then click the Next button.
In the next step, you need to set up the gateway to communicate with the AWS Services. Go back to the main page of the Amazon Storage Gateway service and select the “Select service endpoint” option from the left sidebar. Select the Public endpoint type and then click the Next button.
After this, you need to manually connect and activate this gateway with the help of the local host through the existing web browser app. Fetch the IP address of your system and enter the same on the main page of the Gateway service and click the Connect to Gateway button to establish a connection between the Gateway and the AWS Services.
You can configure and set up the other fields as per your knowledge and requirements from the same Gateway page. Select the appropriate option from the left sidebar and configure it by adding the Gateway number, IP address and other required details.
Conclusion:
The Amazon Storage Gateway is a very important service for web developers and designers to test out the live applications. Since users can use hybrid storage options, the implementation process of new data for the websites will become easier. The same service can be integrated easily with the existing storage services. Set up a new file gateway, establish a connection and start accessing the AWS Services!