AWS RDS Instance Pricing - AWS RDS Instances

AWS RDS Instance Pricing

AWS RDS Instance Pricing

Previous Generation DB AWS RDS Instance Pricing Details and AWS RDS AWS RDS Instance Pricing:

AWS RDS Instance Pricing - AWS RDS Instance Pricing Details

AWS RDS Instance Pricing – AWS RDS Instance Pricing Details

The previous generation DB AWS RDS Instance pricing paves the way to a whole world of services and features just like MySQL, PostgreSQL database engine, and Oracle while being free of commitment. Which will give you the freedom to explore those services without worrying about complex management, purchase and maintenance of your hardware. Changing expensive costs into less expensive ones, and freeing you from the strenuous job of managing relational databases. In turn, you will get the ability to give your applications and your customers all the attention that they need. To learn more about the types of RDS Instances, you check out the AWS RDS Instance Types guidlines.

Type vCPU Memory PIOPS-Optimized Network Performance
Standard Pricing
db.m1.small 1 1.7 No Low
db.m1.medium 1 3.75 No Average
db.m1.large 2 7.5 Yes Average
db.m1.xlarge 4 15 Yes High
db.m3.medium 1 3.75 No Average
db.m3.large 2 7.5 No Average
db.m3.xlarge 4 15 Yes High
db.m3.2xlarge 8 30 Yes High
Memory optimized Pricing
db.m2.xlarge 2 17.1 No Average
db.m2.2xlarge 4 34.2 Yes Average
db.m2.4xlarge 8 68.4 Yes High
db.r3.large 2 15.25 No Average
db.r3.xlarge 4 30.5 500 Average
db.r3.2xlarge 8 61 1,000 High
db.r3.4xlarge 16 122 2,000 High
db.r3.8xlarge 32 244 No 10 Gbps

Previous Generation AWS RDS Instance Pricing
AWS RDS Instance Pricing - AWS RDS MySQL

AWS RDS Instance Pricing – AWS RDS MySQL

  • MySQL

Single-AZ Deployment

The following is a DB AWS RDS Instance Pricing of an instance being in a Single Availability Zone Deployment.

Region: US East (Ohio)

Standard AWS RDS Instance Pricing Hourly Fee
db.t2.micro $0.017
db.t2.small $0.034
db.t2.medium $0.068
db.t2.large $0.136
db.t2.xlarge $0.272
db.t2.2xlarge $0.544
db.m4.large $0.175
db.m4.xlarge $0.35
db.m4.2xlarge $0.70
db.m4.4xlarge $1.401
db.m4.10xlarge $3.502
db.m4.16xlarge $5.60
Memory Optimized AWS RDS Instance Pricing Hourly Fee
db.r4.large $0.24
db.r4.xlarge $0.48
db.r4.2xlarge $0.96
db.r4.4xlarge $1.92
db.r4.8xlarge $3.84
db.r4.16xlarge $7.68
db.r3.large $0.24
db.r3.xlarge $0.475
db.r3.2xlarge $0.945
db.r3.4xlarge $1.89
db.r3.8xlarge $3.78


Multi-AZ Deployment

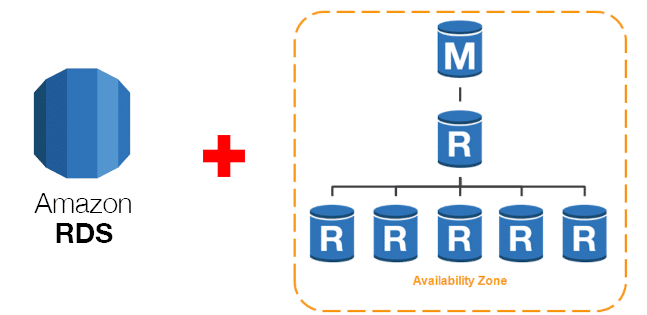
DB AWS RDS Instance Pricing for Multi-AZ deployment gives you better performance in terms of available data and its durability.

RDS sets and maintains what is a standby located another AZ to grant you direct failover whenever a scheduled or an unexpected outage occurs.

Region: US East (Ohio)

Standard AWS RDS Instance Pricing Hourly Fee
db.t2.micro $0.034
db.t2.small $0.068
db.t2.medium $0.136
db.t2.large $0.27
db.t2.xlarge $0.544
db.t2.2xlarge $1.088
db.m4.large $0.35
db.m4.xlarge $0.70
db.m4.2xlarge $1.40
db.m4.4xlarge $2.802
db.m4.10xlarge $7.004
db.m4.16xlarge $11.20
Memory Optimized AWS RDS Instance Pricing Hourly Fee
db.r4.large $0.48
db.r4.xlarge $0.96
db.r4.2xlarge $1.92
db.r4.4xlarge $3.84
db.r4.8xlarge $7.68
db.r4.16xlarge $15.36
db.r3.large $0.48
db.r3.xlarge $0.95
db.r3.2xlarge $1.89
db.r3.4xlarge $3.78
db.r3.8xlarge $7.56

Single-AZ as well as Multi-AZ deployments offer pricing per consumed DB AWS RDS Instance-hour. This pricing charges you from the moment an RDS Instance begins launching all the way till it gets terminated. Every partial DB AWS RDS Instance-hour being consumed gets charged for like if it were a full hour.


Reserved DB AWS RDS Instance Pricing
AWS RDS Instance Pricing - AWS RDS Reserved Instances Pricing

AWS RDS Instance Pricing – AWS RDS Reserved Instances Pricing

Amazon RDS Reserved AWS RDS Instance Pricing provide you with the ability to reserve capacity in a datacenter.

By doing so, you will get an enormous discount that will be added to your hourly charge of Instances which are set on reservation.

There are three RI payment options:

No Upfront

Partial Upfront

All Upfront

The three options allow you to balance the upfront paid amount with your effective hourly price and get a great discount over your On-Demand prices. Go to the RDS console to buy some reserved instances right now!

Single-AZ Deployment

Region: US East (Ohio)

db.t2.micro

ONE YEAR STANDARD TERM
Payment Option Upfront Monthly Effective Hourly Savings over On-Demand On-Demand Hourly
No Upfront $0.00 $10.22 $0.014 18% $0.017
Partial Upfront $51.00 $4.38 $0.012 30%
All Upfront $102.00 $0.00 $0.012 32%


THREE YEAR STANDARD TERM
Payment Option Upfront Monthly Effective Hourly Savings over On-Demand On-Demand Hourly
Partial Upfront $109.00 $2.92 $0.008 52% $0.017
All Upfront $202.00 $0.00 $0.008 55%

db.t2.small

ONE YEAR STANDARD TERM
Payment Option Upfront Monthly Effective Hourly Savings over On-Demand On-Demand Hourly
No Upfront $0.00 $19.71 $0.027 21% $0.034
Partial Upfront $102.00 $8.03 $0.023 33%
All Upfront $195.00 $0.00 $0.022 35%


THREE YEAR STANDARD TERM
Payment Option Upfront Monthly Effective Hourly Savings over On-Demand On-Demand Hourly
Partial Upfront $218.00 $5.84 $0.016 52% $0.034
All Upfront $403.00 $0.00 $0.015 55%

db.t2.medium

ONE YEAR STANDARD TERM
Payment Option Upfront Monthly Effective Hourly Savings over On-Demand On-Demand Hourly
No Upfront $0.00 $39.42 $0.054 21% $0.068
Partial Upfront $204.00 $16.79 $0.046 32%
All Upfront $398.00 $0.00 $0.045 33%


THREE YEAR STANDARD TERM
Payment Option Upfront Monthly Effective Hourly Savings over On-Demand On-Demand Hourly
Partial Upfront $436.00 $10.95 $0.032 54% $0.068
All Upfront $781.00 $0.00 $0.030 56%

db.t2.large

ONE YEAR STANDARD TERM
Payment Option Upfront Monthly Effective Hourly Savings over On-Demand On-Demand Hourly
No Upfront $0.00 $78.84 $0.108 21% $0.136
Partial Upfront $408.00 $33.58 $0.093 32%
All Upfront $794.00 $0.00 $0.091 33%


THREE YEAR STANDARD TERM
Payment Option Upfront Monthly Effective Hourly Savings over On-Demand On-Demand Hourly
Partial Upfront $872.00 $22.63 $0.064 53% $0.136
All Upfront $1,592.00 $0.00 $0.061 55%

db.t2.xlarge

ONE YEAR STANDARD TERM
Payment Option Upfront Monthly Effective Hourly Savings over On-Demand On-Demand Hourly
No Upfront $0.00 $141.766 $0.194 29% $0.272
Partial Upfront $810.00 $67.525 $0.185 32%
All Upfront $1,588.00 $0.00 $0.181 33%


THREE YEAR STANDARD TERM
Payment Option Upfront Monthly Effective Hourly Savings over On-Demand On-Demand Hourly
Partial Upfront $1,680.00 $46.647 $0.128 53% $0.272
All Upfront $3,292.00 $0.00 $0.125 54%

db.t2.2xlarge

ONE YEAR STANDARD TERM
Payment Option Upfront Monthly Effective Hourly Savings over On-Demand On-Demand Hourly
No Upfront $0.00 $283.532 $0.388 29% $0.544
Partial Upfront $1,620.00 $135.05 $0.370 32%
All Upfront $3,176.00 $0.00 $0.363 33%


THREE YEAR STANDARD TERM
Payment Option Upfront Monthly Effective Hourly Savings over On-Demand On-Demand Hourly
Partial Upfront $3,360.00 $93.294 $0.256 53% $0.544
All Upfront $6,585.00 $0.00 $0.251 54%


Multi-AZ Deployment

AWS RDS Instance Pricing - AWS RDS Instances Multi-AZ Deployment

AWS RDS Instance Pricing – AWS RDS Instances Multi-AZ Deployment

Region: US East (Ohio)

db.t2.micro

ONE YEAR STANDARD TERM
Payment Option Upfront Monthly Effective Hourly Savings over On-Demand On-Demand Hourly
No Upfront $0.00 $19.71 $0.027 21% $0.034
Partial Upfront $102.00 $8.76 $0.024 30%
All Upfront $203.00 $0.00 $0.023 32%


THREE YEAR STANDARD TERM
Payment Option Upfront Monthly Effective Hourly Savings over On-Demand On-Demand Hourly
Partial Upfront $218.00 $5.84 $0.016 52% $0.034
All Upfront $403.00 $0.00 $0.015 55%

db.t2.small

ONE YEAR STANDARD TERM
Payment Option Upfront Monthly Effective Hourly Savings over On-Demand On-Demand Hourly
No Upfront $0.00 $38.69 $0.053 22% $0.068
Partial Upfront $204.00 $16.06 $0.045 33%
All Upfront $389.00 $0.00 $0.044 35%


THREE YEAR STANDARD TERM
Payment Option Upfront Monthly Effective Hourly Savings over On-Demand On-Demand Hourly
Partial Upfront $436.00 $11.68 $0.033 52% $0.068
All Upfront $806.00 $0.00 $0.031 55%

db.t2.medium

ONE YEAR STANDARD TERM
Payment Option Upfront Monthly Effective Hourly Savings over On-Demand On-Demand Hourly
No Upfront $0.00 $79.57 $0.109 20% $0.136
Partial Upfront $408.00 $33.58 $0.093 32%
All Upfront $795.00 $0.00 $0.091 33%


THREE YEAR STANDARD TERM
Payment Option Upfront Monthly Effective Hourly Savings over On-Demand On-Demand Hourly
Partial Upfront $872.00 $21.90 $0.063 54% $0.136
All Upfront $1,561.00 $0.00 $0.059 56%

db.t2.large

ONE YEAR STANDARD TERM
Payment Option Upfront Monthly Effective Hourly Savings over On-Demand On-Demand Hourly
No Upfront $0.00 $157.68 $0.216 20% $0.27
Partial Upfront $816.00 $67.16 $0.185 31%
All Upfront $1,587.00 $0.00 $0.181 33%


THREE YEAR STANDARD TERM
Payment Option Upfront Monthly Effective Hourly Savings over On-Demand On-Demand Hourly
Partial Upfront $1,744.00 $45.26 $0.128 52% $0.27
All Upfront $3,183.00 $0.00 $0.121 55%


RDS snapshot pricing

AWS Neptune Subnet Group - Create DB Subnet Group

AWS Neptune Subnet Group

AWS Neptune Subnet Group


How to create an AWS Neptune Subnet Group?

  1. Login to the Management Console, then head to the Neptune console using the following link https://console.aws.amazon.com/neptune/home.
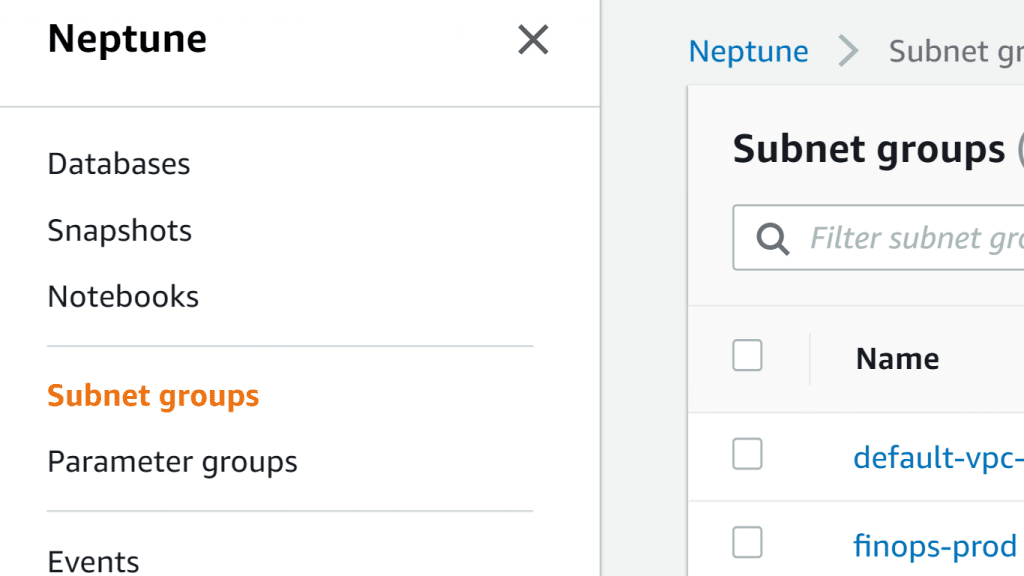
  2. Select Subnet groups from the navigation pane.
    AWS Neptune Subnet Group - Create DB Subnet Group

    AWS Neptune Subnet Group – Create DB Subnet Group


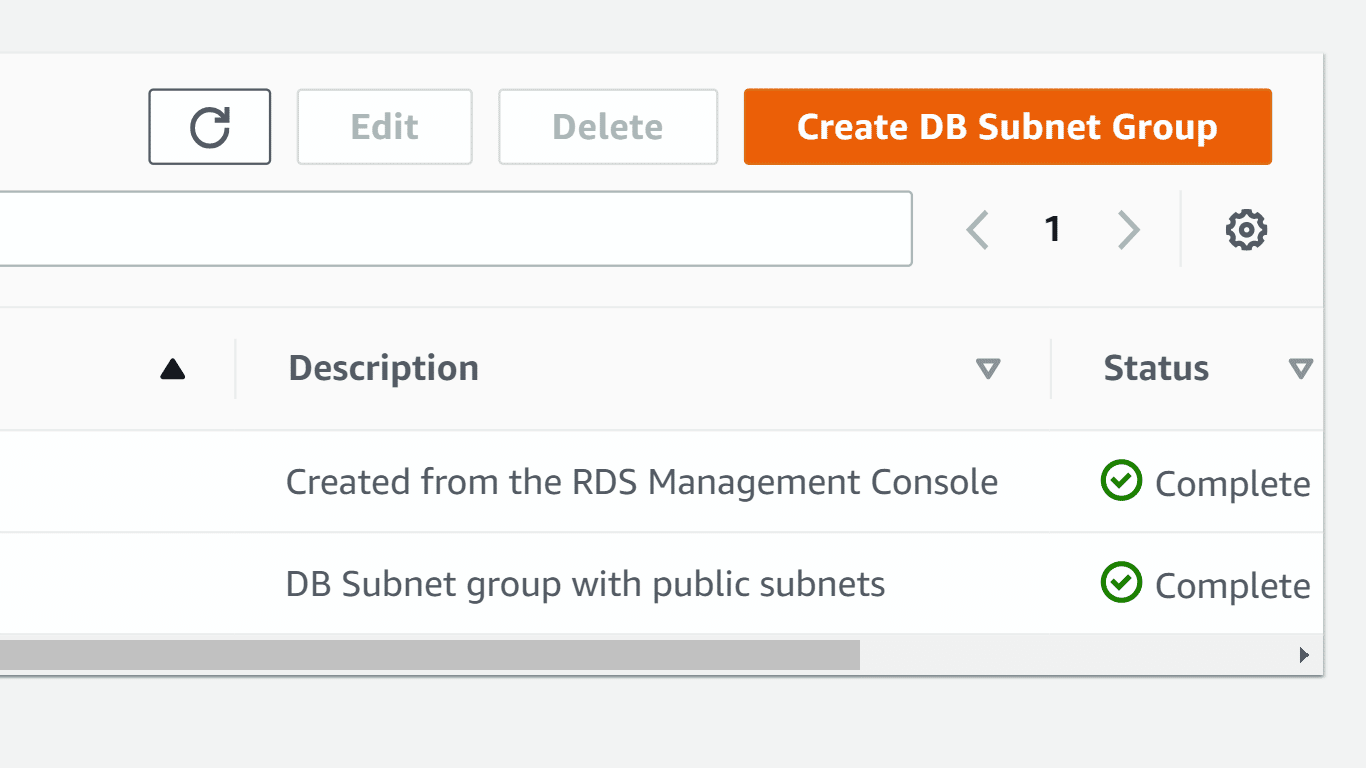
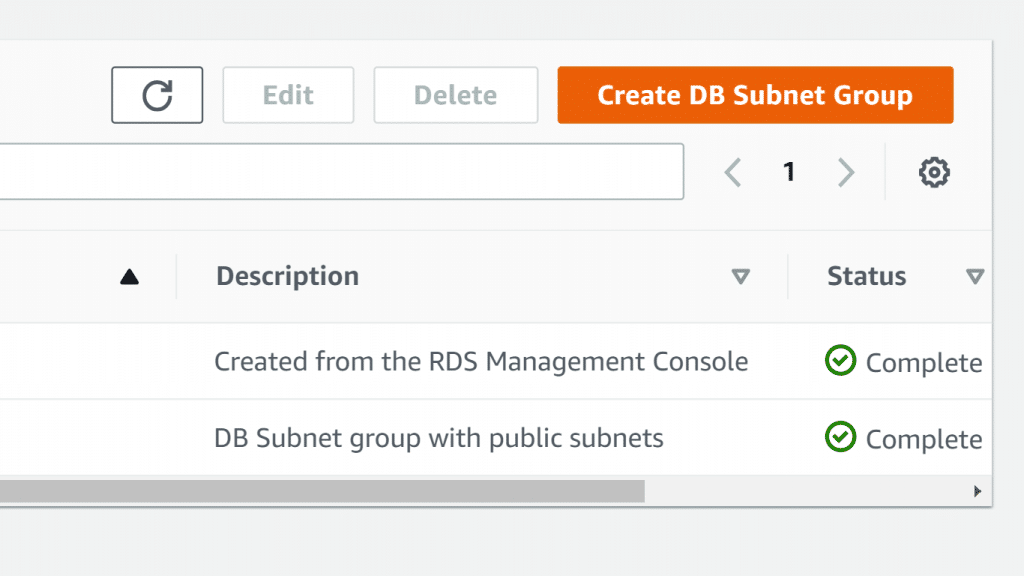
  3. Click on Create DB Subnet group.

You will find that the page for creating an AWS Neptune Subnet Group will now open, Create DB Subnet group.

AWS Neptune Subnet Group - Subnet Group Details

AWS Neptune Subnet Group – Subnet Group Details

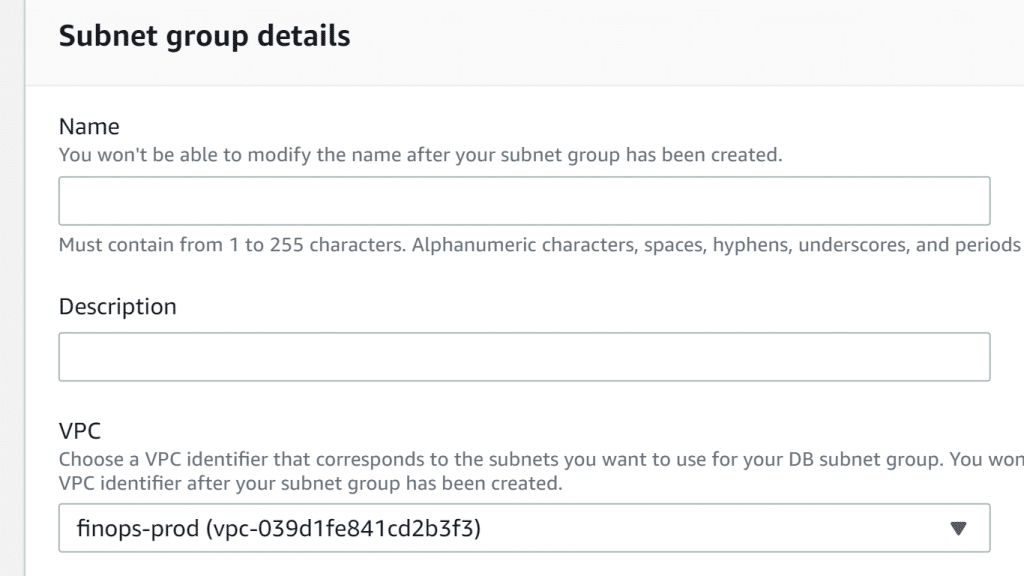
4. For Name box, fill in the new DB subnet group’s name.

5. For Description box, describe your new DB Subnet group.

6. From the VPC list, select a VPC identifier for the subnets of the new DB Subnet group.

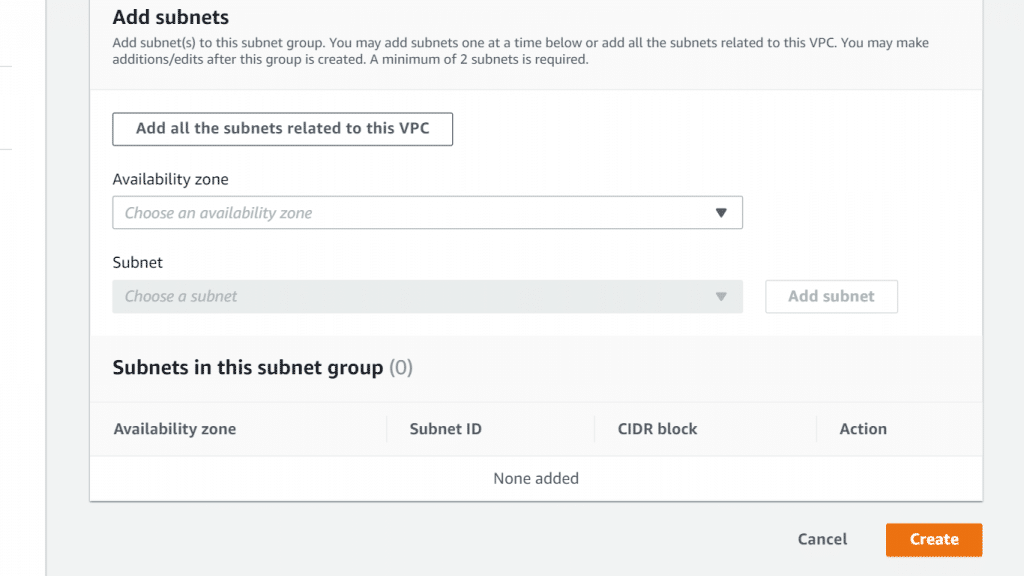
7. For the Add Subnets section, you can either choose to add all the available subnets related to the previously chosen VPC, or select the required subnets one by one according to their availability zones.

AWS Neptune Subnet Group - Add Subnets

AWS Neptune Subnet Group – Add Subnets


At the bottom of the page, you will see a table showing the list of chosen subnets for your group. You need to have added at least 2 subnets. You will be able to make changes as required even after the group gets created.

8. Click on Create.


How to edit an AWS Neptune Subnet Group?

  1. Login to the Management Console, then head to the Neptune console using the following link https://console.aws.amazon.com/neptune/home.
    AWS Neptune Subnet Group - Neptune Console Subnet Group Section

    AWS Neptune Subnet Group – Neptune Console Subnet Group Section


    2. Click on the section for Subnet groups from the Neptune navigation pane on the left.

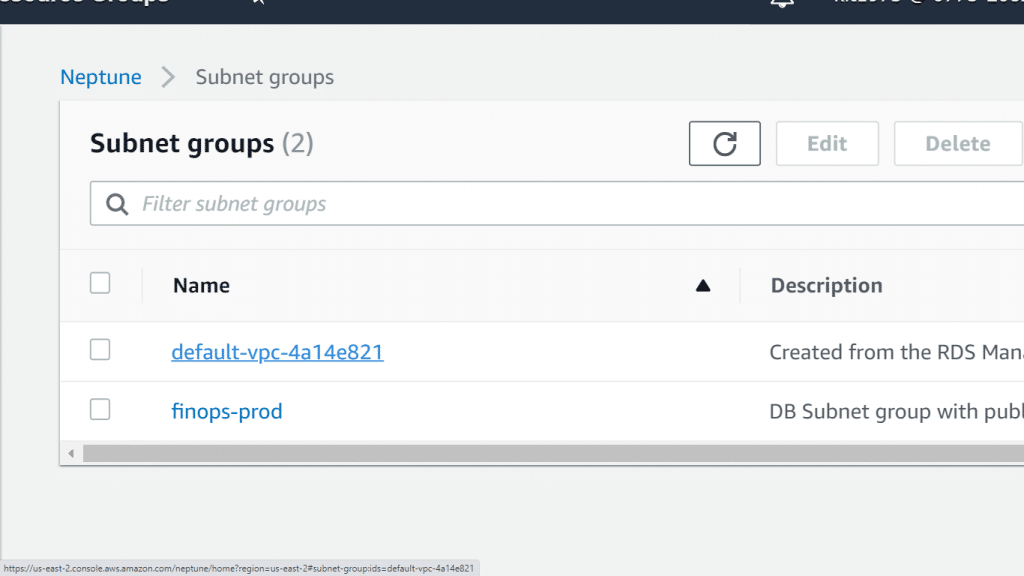
3. Select the Name link for the DB Subnet group that you want to edit.

AWS Neptune Subnet Group - Subnet Group Name Link

AWS Neptune Subnet Group – Subnet Group Name Link

You can optionally select Create Subnet group for creating a cluster Subnet group. After that, you click on the new subnet group’s Name.

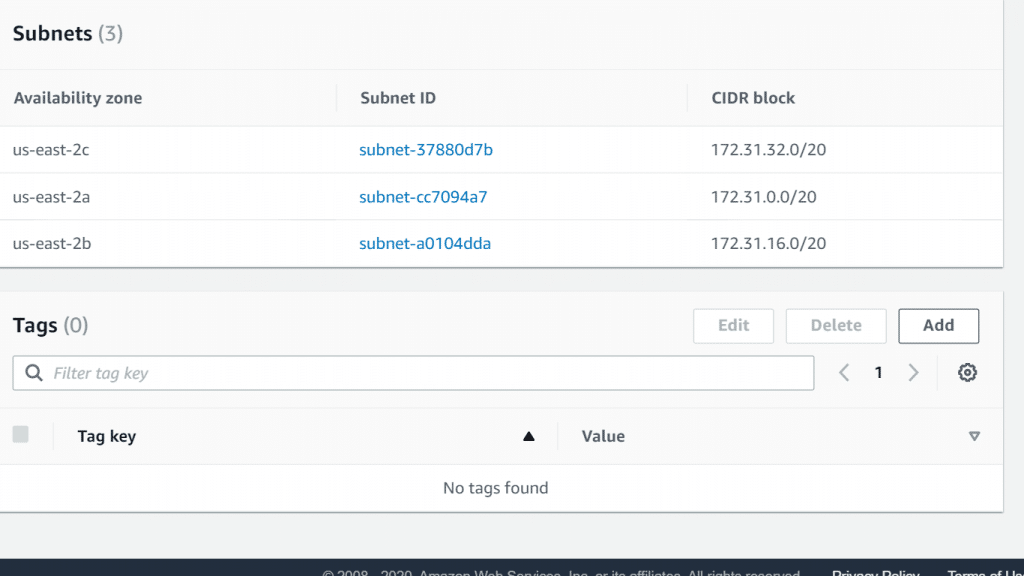
  1. When you click on the name link, you can choose to add tags to your subnet group.
AWS Neptune Subnet Group - Subnet Group Name Tags

AWS Neptune Subnet Group – Subnet Group Name Tags

  1. Click on the Add button located at the top right of the Tags

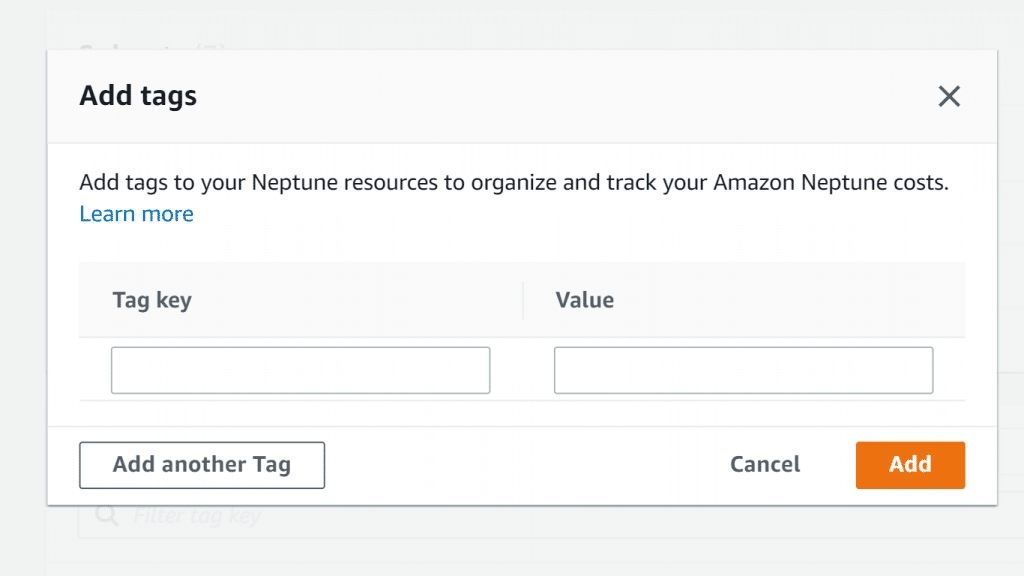
You will get a popup screen asking you to fill in the necessary info for your new tag.

AWS Neptune Subnet Group - Subnet Group Name Add Tags

AWS Neptune Subnet Group – Subnet Group Name Add Tags

  1. In the tag Key dialog box, enter a name for you tag.
  2. In the Value dialog box, enter a value for your tag.
  3. Click on Add.

You can add multiple tags by clicking on the Add another Tag button and filling the required fields. To learn more about tags, check the AWS Tagging guidelines.


What is the AWS::Neptune::DBSubnetGroup?

This specific type allows you to create an AWS Neptune Subnet group.

Every AWS Neptune Subnet group should have:

– Minimum of 2 subnets

– 2 Different Availability Zones

– 1 same AWS Region


How is its Syntax?


The JSON type:


{

"Type" : "AWS::Neptune::DBSubnetGroup",

"Properties" : {

"DBSubnetGroupDescription" : String,

"DBSubnetGroupName" : String,

"SubnetIds" : [ String, ... ],

"Tags" : [ Tag, ... ]

}

}

The YAML type:

Type: AWS::Neptune::DBSubnetGroup

Properties:

DBSubnetGroupDescription: String

DBSubnetGroupName: String

SubnetIds:

    – String

Tags:

    – Tag


What are its Properties?

DBSubnetGroupDescription

Describes DB subnet group.

It is required.

It is of type String.

Its Update needs No interruption.


DBSubnetGroupName

Name of DB subnet group.

It is not required.

It is of type String.

Its Update needs Replacement.


SubnetIds

EC2 subnet IDs.

It is required.

It is of type List of String.

Its Update needs No interruption.


Tags

Attached to DB subnet group.

Not required.

It is of type List of Tag.

Its Update needs No interruption.


What are its Return values?

Ref

Upon passing logical ID of the required resource to the Ref function, the Ref will return the name of this resource.

Ref function will return the needed resource or parameter’s value.

  • Parameter’s logical name: Parameter’s value will be returned.
  • Resource’s logical name: Resource’s reference value will be returned (physical ID, etc..).

Keep a Hint

Ref may also be used for the sake of adding some values to your Output messages.


How is Ref’s Declaration?

The JSON type:

{ “Ref” : “logicalName” }

The YAML type:

Full function name:

Ref: logicalName

Short form:

!Ref logicalName


What are Ref’s Parameters?

logicalName

Dereferenced parameter or resource’s logical name.


What is Ref’s Return value?

For resource: physical ID.

For parameter: the value.

Simple Example:

Elastic IP address’s resource declaration requires: Instance ID of an EC2 instance

It refers to the Ref function for the sake of setting MyEC2Instance resource’s Instance ID.

The JSON Type:


"MyEIP" : {

"Type" : "AWS::EC2::EIP",

"Properties" : {

"InstanceId" : { "Ref" : "MyEC2Instance" }

}

}

The YAML Type:

MyEIP:

Type: "AWS::EC2::EIP"

Properties:

InstanceId: !Ref MyEC2Instance


What are Ref's Supported functions?

A string needs to be written as a resource logical ID.

The Ref function cannot take any functions.

AWS Neptune Parameter Group

AWS DeepRacer - AWS DeepRacer Car

What is AWS DeepRacer? Get a Test Drive!

AWS DeepRacer


What is AWS DeepRacer?

AWS DeepRacer is a race car built for testing RL models through performing races on physical tracks. Utilizing cameras to see the track and a reinforcement model to control throttling and steering, the vehicle displays the way a model which gets training in an environment of simulation, is capable of being brought to life in reality.


AWS DeepRacer Features:

  • Completely Autonomous
  • 1/18th scale
  • Uses RL for learning driving habits


AWS DeepRacer Types of Machine learning:

  • Supervised
  • Reinforcement
  • Unsupervised


How to get started using AWS DeepRacer?

  1. Start off by building an RL model

You can begin creating, training and tuning your model through using the AWS DeepRacer 3D racing simulator. Start now for free »


  1. Become a pro in basic time-trial racing

    AWS DeepRacer - RL Model

    AWS DeepRacer – RL Model

Get your RL model created in simple and swift steps using the AWS DeepRacer console, with the help of getting started tutorials as well. Discover new features and improve your skills through retraining and tuning models. This way you can efficiently navigate around the track and earn the title of speediest lap time.


  1. Boost your skills with head-to-head racing

    AWS DeepRacer - Head-to-head racing

    AWS DeepRacer – Head-to-head racing

Work with and discover extra sensors and algorithms for training. Create an RL model to use your skills and avoid any racing obstacles. Find and predict beforehand the racing behavior of cars competing in dual-car head-to-head races.


  1. Enter the AWS DeepRacer League competitions

    AWS DeepRacer - DeepRacer League

    AWS DeepRacer – DeepRacer League

When the model is finally built, start your engines for racing! The AWS DeepRacer League is a global autonomous league for racing. Anyone anywhere can join. Competitions are made between developers all around the globe, and the winners can get glory, prizes and the possibility for advancing to the DeepRacer Championship Cup Finals at re:Invent 2020!


  1. Enter the Summit Circuit

    AWS DeepRacer - Summit Circuit

    AWS DeepRacer – Summit Circuit

Racing in real life

AWS Summits allows you to join racing on the AWS DeepRacer League Summit Circuit. You can enter competition in time-trial or perform head-to-head racing.

Find a Race »


  1. Enter the Virtual Circuit

    AWS DeepRacer - Virtual Circuit

    AWS DeepRacer – Virtual Circuit

Racing online

User around the globe can enter the AWS DeepRacer League. You can enter time trial races and face outstanding challenges like head-to-head racing using the AWS DeepRacer console.

Start Racing for Free »


  1. Start with Virtual Community Races

    AWS DeepRacer - Virtual Community Races

    AWS DeepRacer – Virtual Community Races

Race in your league

The new community races give you the pleasure of competing with ML enthusiasts from all over the world. You get to create your very own unique online race using the the AWS DeepRacer console.

Create your race »


Performing AWS DeepRacer Test drive:


  1. First start by connecting the Power bank

With the Power bank connector cable start connecting your power bank to the left USB-C port.

-Turn on power bank

You will know that the battery is completely charges as soon each of the 4 LEDs are lit on.

-Turn on the computer of your car

You will see that the left blue LED becomes solid blue.

Search for the following icon at the top of the button.

AWS DeepRacer - LED Icon

AWS DeepRacer – LED Icon


-Wait for your car to connect to your Wi-Fi network

The car is now on and getting connected to a Wi-Fi network. You will know that your car has finally connected to a Wi-Fi network as soon as the 2nd LED becomes a solid blue.


  1. Start aligning the wheels

Keep the wheels in the center faced forward.


  1. Turn your car on

You can find the switch behind the front tire, underneath the car chassis. Turn it on by switching it to the right. You will soon hear 2 short beeps, and a single long on. When the long beep sound happens, this means that your car is on.


  1. Utilize a computer or phone

For test driving your car, utilize whichever device capable of accessing a web browser. This device needs to be in connection with the exact Wi-Fi of the wifi.txt

– Go to the browser

– Fill in the IP found on URL bar and start


  1. Now, the Sign in

The car can be driven either manually and autonomously. You can start managing the required settings and adjusting the calibration when you sign in. You can gain access to your car through typing the printed password underneath your car.


  1. Begin test driving your car manually

It’s time to start driving the car. You will get an image on the screen coming from the camera of the car.

– Set the driving mode as manual

– Drive your car by moving your fingers on the touch pad


  1. Start your autonomous driving

Time to begin uploading your trained models to your vehicle. Now, take a look at your vehicle as it magically drives autonomously.

Head to the following link https://aws.amazon.com/deepracer .


Autonomous Model Management of AWS DeepRacer:


  1. Start off by creating a model

Head to the AWS DeepRacer console link at https://aws.amazon.com/deepracer for creating, training and evaluating your personal model.

– Login with your account

– Choose the Create model to start


  1. Begin downloading your Model

Upon finishing your model’s training, download this model to the chosen computer.


  1. Get a new folder created on USB flash drive

Get the computer connected to the USB flash drive, then get a new folder created with the name models.

– Get the computer connected to the USB flash drive

– Enter the USB flash drive

– Get a models folder created


  1. Start saving the downloaded model to the models folder

The file you download will get your model’s name and the extension of “.tar.gz”, such as “myfastmodel.tar.gz”. Search for this file from the downloads, then put it in models folder on USB flash drive.


  1. Get your car connected to the USB flash drive

Get the USB flash drive ejected from the laptop. Get the USB flash drive connected to the car.


  1. Work from a computer or phone

Go to the browser, then type in your car’s IP address on the URL bar for the sake of accessing the car.

– Go to browser

– Type in IP on URL bar then start


  1. Begin Sign in

You can start using your car through typing in the password underneath the car.


  1. Select a Driving mode

Select the option Autonomous under Driving mode menu. After that, pick your model under the Select model menu. You will need to wait for a couple of seconds for the model to load.


  1. Start Driving autonomously

For autonomous driving, click Start and Stop using the Autonomous Controls.

AWS Cost Optimization

AWS SDK and Redshift

AWS SDK and Redshift


The AWS SDK and Redshift may be used together for building clients. The SDK for Java offers a class with the name AmazonRedshiftClientBuilder for interacting with Redshift.

Keep in Mind

Using the SDK for Java you can get thread-safe clients in order to access Redshift. The best thing to do is to create only 1 client with your application, then keep reusing this same client between multiple threads.

Both the AwsClientBuilder and the AmazonRedshiftClientBuilder classes for the sake of configuring an endpoint or creating an AmazonRedshift client.

AWS SDK and Redshift - Java Client Class

AWS SDK and Redshift – Java Client Class

After that, the client object could be utilized in order to get a Cluster object instance created. This cluster object includes methods capable of mapping to underlying actions of Redshift Query API.

A request object needs to be created in correspondence to calling a method. The request object contains data which is needed to get passed with the request.

The Cluster object offers data that returns from Redshift as a response to the actual request.

In the below example you will see how the AmazonRedshiftClientBuilder class can be utilized for the sake of configuring an endpoint, then get a 2-node ds2.xlarge cluster created.


String endpoint = "https://redshift.us-east-1.amazonaws.com/";

String region = "us-east-1";

AwsClientBuilder.EndpointConfiguration config = new AwsClientBuilder.EndpointConfiguration(endpoint, region);

AmazonRedshiftClientBuilder clientBuilder = AmazonRedshiftClientBuilder.standard();

clientBuilder.setEndpointConfiguration(config);

AmazonRedshift client = clientBuilder.build();


CreateClusterRequest request = new CreateClusterRequest()

.withClusterIdentifier("exampleclusterusingjava")

.withMasterUsername("masteruser")

.withMasterUserPassword("12345678Aa")

.withNodeType("ds2.xlarge")

.withNumberOfNodes(2);


Cluster createResponse = client.createCluster(request);

System.out.println("Created cluster " + createResponse.getClusterIdentifier());


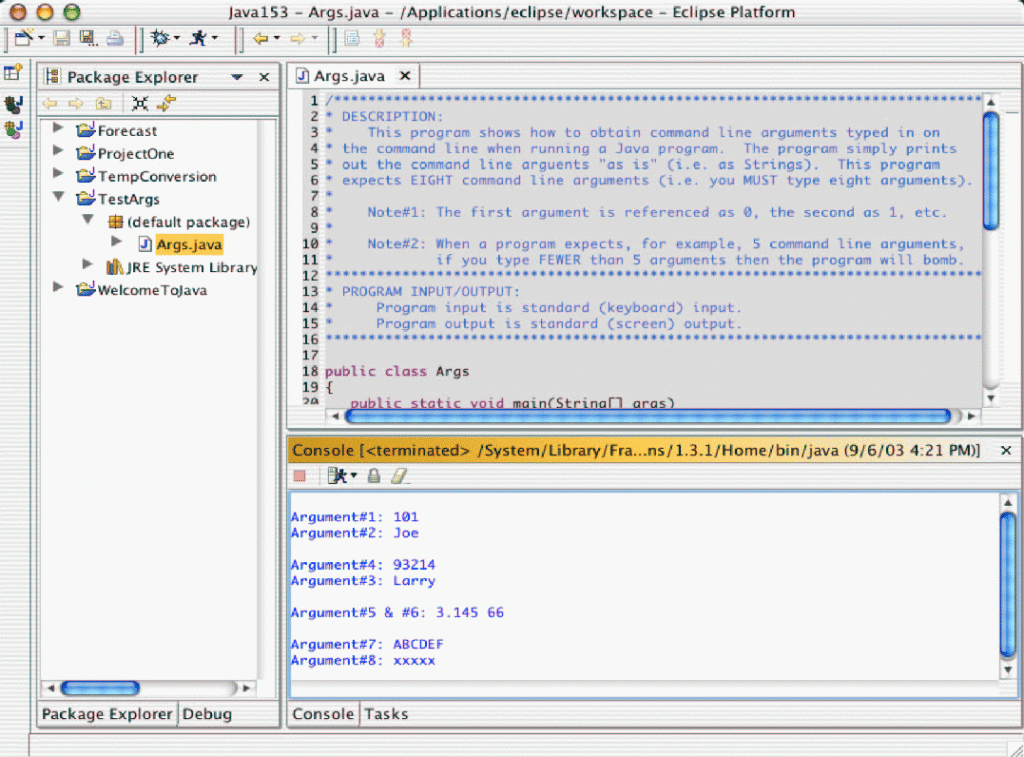
Run Java examples for AWS SDK and Redshift with Eclipse:

General process of running Java code examples using Eclipse

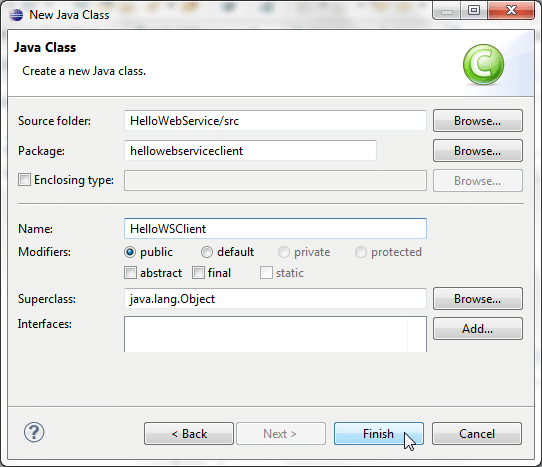
  1. First you need to get a new AWS Java Project created in Eclipse.

    AWS SDK and Redshift - New AWS Java Project

    AWS SDK and Redshift – New AWS Java Project

Go over the procedure in AWS Eclipse Toolkit Setup for downloading and setting up your AWS Toolkit for Eclipse.

  1. Get the sample code copied from this document’s section which you are reading. Then, go ahead and paste it to your project as a new Java class file.
  2. Stat running the code.

Run Java examples from command line for AWS SDK and Redshift:

How to run Java code examples using command line for AWS SDK and Redshift?

AWS SDK and Redshift - Running Java Code Examples

AWS SDK and Redshift – Running Java Code Examples

  1. First follow the below steps for setting up and testing your environment:
    1. After creating a directory for working, create src in it. Also create sdk subfolders and bin.
    2. Begin downloading the SDK for Java then start unzipping it to your created sdk subfolder. When the SDK is unzipped, you will find 4 subdirectories in your sdk folder. Included with them is a third-party folder and a lib.
    3. Enter your credentials to the SDK.
    4. Make sure of being able to run javac and java using the working directory you have. They can be tested when you run the below 2 commands:

javac -help

java -help

  1. Copy your code to a .java file, then save it inside the src folder. For going over the necessary steps, you will have to utilize the code shown in Manage Cluster Security Groups in order to ensure that the src directory file is: CreateAndModifyClusterSecurityGroup.java.
  2. Start compiling your code.

javac -cp sdk/lib/aws-java-sdk-1.3.18.jar -d bin src\CreateAndModifyClusterSecurityGroup.java

In case of utilizing another SDK version for Java, you will need to change the classpath (-cp) to suit that version.

  1. Start running your code. The below commands include line breaks that are used for improving readability.

java -cp "bin;

sdk/lib/*;

sdk/third-party/commons-logging-1.1.1/*;

sdk/third-party/httpcomponents-client-4.1.1/*;

sdk/third-party/jackson-core-1.8/*"

CreateAndModifyClusterSecurityGroup

Make alterations to the used class path separator based on what is required for the operating system you’re working with. Such as using the “;” separator for a Windows OS like the one in the example, or the “:” separator for a Unix OS. Different coding could need additional libraries than the ones found in the above shown example. Also, the SDK version you are utilizing could include other 3rd party names for your folder than the used above. When this occurs, you will need to change the classpath (-cp) owever required.

For the sake of running some samples in the following document, you will need to utilize an SDK version supporting Redshift. For receiving the newest version of SDK for Java, check out the downloadable AWS SDK for Java.


How to set the client endpoint for AWS SDK and Redshift?

AWS SDK and Redshift - Setting Client Endpoints

AWS SDK and Redshift – Setting Client Endpoints

The endpoint https://redshift.us-east-1.amazonaws.com/ is utilized by the SDK for Java. It can be set with the client.setEndpoint method. Below you can see an example:


client = new AmazonRedshiftClient(credentials);

client.setEndpoint("https://redshift.us-east-1.amazonaws.com/");

how to manage redshift cluster subnet groups

Manage Cluster Security Groups - Cluster Security Groups

Manage Cluster Security Groups

Manage Cluster Security Groups


In this article we will supply you with an example of how to manage cluster security groups. This article is complementary with the AWS SDK and Redshift article. You need to login with an EC2-Classic AWS account to be able to access the Amazon Redshift console for creating a cluster security group.

It shows the operations that are made to manage cluster security groups, such as:

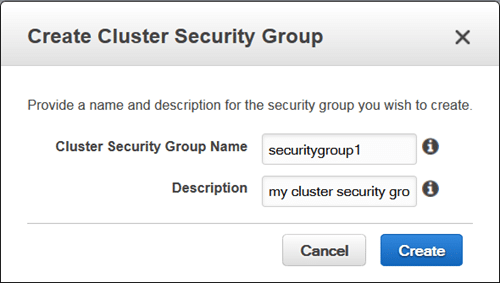
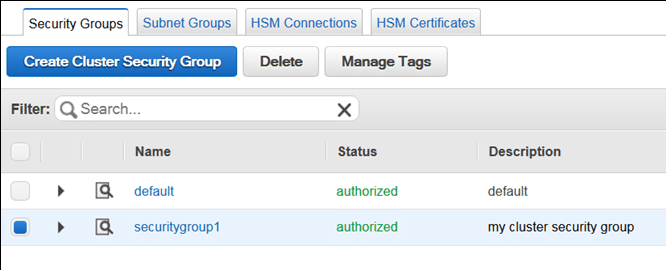
  • Getting a new cluster security group created.
    Manage Cluster Security Groups - Create Cluster Security Group

    Manage Cluster Security Groups – Create Cluster Security Group


  • Getting ingress rules added to a cluster security group.
    Manage Cluster Security Groups - Add Ingress Rules

    Manage Cluster Security Groups – Add Ingress Rules


  • Getting a cluster security group associated with a cluster through the modification of cluster configuration.
    Manage Cluster Security Groups - Modifying Cluster Configuration

    Manage Cluster Security Groups – Modifying Cluster Configuration


Before learning how to manage cluster security groups, you must learn what they are:

A cluster security group is made up of a set of rules. Those rules are capable of controlling the access to a cluster. Individual rules specify a range of IP addresses or an EC2 security group which is granted access to the cluster. As soon as a cluster gets associated with a cluster security group, the set of rules specified in this cluster security group will be able to take control over the access to the cluster.

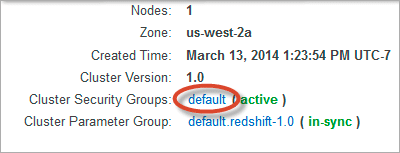
Redshift offers a “default” named cluster security group, created upon launching your very 1st cluster. It represents an empty cluster security group, which can get some inbound access rules added to it. Then, it is possible for you to associate this default cluster security group with your specified Redshift cluster.

Manage Cluster Security Groups - Default Cluster Security Group

Manage Cluster Security Groups – Default Cluster Security Group

How to Manage Cluster Security Groups?

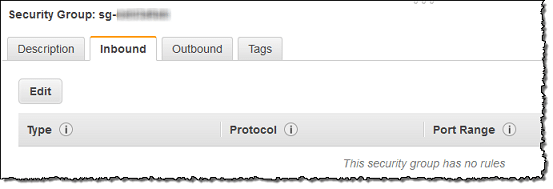
Upon creating a new cluster security group, by default it will not include any ingress rules. The following shown example will help you modify a new cluster security group through the addition of 2 ingress rules. 1 of the ingress rules gets added through the specification of a CIDR/IP range, while the 2nd ingress rule gets added through the specification of ID an EC2 security group combination and an owner ID.

To learn how you can start running the below example, see how to Run Java examples for Redshift with Eclipse. You must first update the code and supply a specific cluster identifier, as well as an account number.


/**

 *

 * The following file needs the Apache License; Version 2.0 called the "License".

 * This file is not capable of being used without having the needed license. You can find a copy of

 * this required License at the below link

 *

 * http://aws.amazon.com/apache2.0/

 * 

*/


// snippet-sourcedescription:[CreateAndModifyClusterSecurityGroup shows the way to get a Redshift security group created and modified.]

// snippet-service:[redshift]

// snippet-keyword:[Java]

// snippet-keyword:[Amazon Redshift]

// snippet-keyword:[Code Sample]

// snippet-keyword:[CreateClusterSecurityGroup]

// snippet-keyword:[DescribeClusterSecurityGroups]

// snippet-sourcetype:[full-example]

// snippet-sourcedate:[2019-02-01]

// snippet-sourceauthor:[AWS]

// snippet-start:[redshift.java.CreateAndModifyClusterSecurityGroup.complete]


package com.amazonaws.services.redshift;


import java.io.IOException;

import java.util.ArrayList;

import java.util.List;


import com.amazonaws.services.redshift.model.*;


public class CreateAndModifyClusterSecurityGroup {


public static AmazonRedshift client;

public static String clusterSecurityGroupName = "securitygroup1";

public static String clusterIdentifier = "***enter a specific cluster identifier***";

public static String ownerID = "***enter a 12-digit account number***";


public static void main(String[] args) throws IOException {


// A default client will be utilizing the {@link com.amazonaws.auth.DefaultAWSCredentialsProviderChain}

client = AmazonRedshiftClientBuilder.defaultClient();


try {

createClusterSecurityGroup();

describeClusterSecurityGroups();

addIngressRules();

associateSecurityGroupWithCluster();

} catch (Exception e) {

System.err.println("Operation failed: " + e.getMessage());

}

}


private static void createClusterSecurityGroup() {

CreateClusterSecurityGroupRequest request = new CreateClusterSecurityGroupRequest()

.withDescription("my cluster security group")

.withClusterSecurityGroupName(clusterSecurityGroupName);


client.createClusterSecurityGroup(request);

System.out.format("Created cluster security group: '%s'\n", clusterSecurityGroupName);

}


private static void addIngressRules() {


AuthorizeClusterSecurityGroupIngressRequest request = new AuthorizeClusterSecurityGroupIngressRequest()

.withClusterSecurityGroupName(clusterSecurityGroupName)

.withCIDRIP("192.168.40.5/32");


ClusterSecurityGroup result = client.authorizeClusterSecurityGroupIngress(request);


request = new AuthorizeClusterSecurityGroupIngressRequest()

.withClusterSecurityGroupName(clusterSecurityGroupName)

.withEC2SecurityGroupName("default")

.withEC2SecurityGroupOwnerId(ownerID);

result = client.authorizeClusterSecurityGroupIngress(request);

System.out.format("\nAdded ingress rules to security group '%s'\n", clusterSecurityGroupName);

printResultSecurityGroup(result);

}


private static void associateSecurityGroupWithCluster() {


// Here you will be getting existing security groups that are utilized by the cluster.

DescribeClustersRequest request = new DescribeClustersRequest()

.withClusterIdentifier(clusterIdentifier);


DescribeClustersResult result = client.describeClusters(request);

List<ClusterSecurityGroupMembership> membershipList =

result.getClusters().get(0).getClusterSecurityGroups();


List<String> secGroupNames = new ArrayList<String>();

for (ClusterSecurityGroupMembership mem : membershipList) {

secGroupNames.add(mem.getClusterSecurityGroupName());

}

// Here you will be adding new security group to the list.

secGroupNames.add(clusterSecurityGroupName);


// Here you will be applying the change to the cluster.

ModifyClusterRequest request2 = new ModifyClusterRequest()

.withClusterIdentifier(clusterIdentifier)

.withClusterSecurityGroups(secGroupNames);


Cluster result2 = client.modifyCluster(request2);

System.out.format("\nAssociated security group '%s' to cluster '%s'.", clusterSecurityGroupName, clusterIdentifier);

}


private static void describeClusterSecurityGroups() {

DescribeClusterSecurityGroupsRequest request = new DescribeClusterSecurityGroupsRequest();


DescribeClusterSecurityGroupsResult result = client.describeClusterSecurityGroups(request);

printResultSecurityGroups(result.getClusterSecurityGroups());

}


private static void printResultSecurityGroups(List<ClusterSecurityGroup> groups)

{

if (groups == null)

{

System.out.println("\nDescribe cluster security groups result is null.");

return;

}


System.out.println("\nPrinting security group results:");

for (ClusterSecurityGroup group : groups)

{

printResultSecurityGroup(group);

}

}

private static void printResultSecurityGroup(ClusterSecurityGroup group) {

System.out.format("\nName: '%s', Description: '%s'\n", group.getClusterSecurityGroupName(), group.getDescription());

for (EC2SecurityGroup g : group.getEC2SecurityGroups()) {

System.out.format("EC2group: '%s', '%s', '%s'\n", g.getEC2SecurityGroupName(), g.getEC2SecurityGroupOwnerId(), g.getStatus());

}

for (IPRange range : group.getIPRanges()) {

System.out.format("IPRanges: '%s', '%s'\n", range.getCIDRIP(), range.getStatus());


}

}

}

// snippet-end:[redshift.java.CreateAndModifyClusterSecurityGroup.complete]

The code example above is a necessary step for the AWS SDK and Redshift src directory file for your project. It is in order to make sure that the src directory file is: CreateAndModifyClusterSecurityGroup.java

AWS sdk and redshift

SDK for Java Calls - Log4J

SDK for Java Calls

SDK for Java Calls

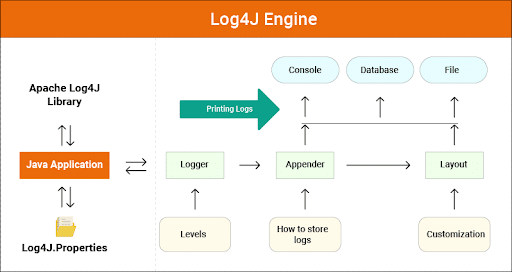
The SDK for Java Calls comes with Apache Commons Logging, which is a layer of abstraction, that enables the user to use as many logging systems as he sees fit. It is utilized for logging SDK for Java Calls.

SDK for Java - Log4j and Java

SDK for Java – Log4j and Java

The allowed logging systems include the Java Logging Framework and Apache Log4j and other logging systems. The remainder of this post shows you how to use Log4j. While using the SDK’s logging functionality you do not need to change your software’s code.

Keep  in Mind

This post talks about Log4j 1.x., since, Log4j2 doesn’t support Apache Commons Logging. However, it provides an adapter that automatically directs the call logging function to Log4j2 using the Apache Commons Logging interface.


Download the Log4J JAR to work with SDK for Java Calls:

In order to use Log4j with the SDK,  a download of log4j JAR needs to be made. The download can be found at the official Apache website. The SDK does not include the JAR file by default. After downloading the jar file you need to manually place it to a location in your classpath.

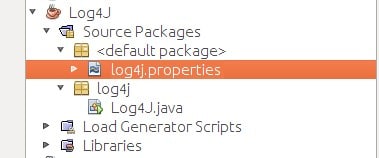
log4j.properties is the configuration file for log4j.

SDK for Java Calls - log4j.properties

SDK for Java Calls – log4j.properties

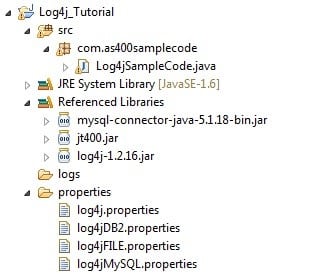
Example configuration files are shown below. Place the below examples of a configuration file in a directory on your classpath. The Log4j JAR and the log4j.properties file do not need to be in the same directory to work.

SDK for Java Calls - Properties and JAR Files Directories

SDK for Java Calls – Properties and JAR Files Directories

The “log4j.properties” configuration file consists of properties. One property example is logging level, where logging output is sent either to a file or to the console, and the format of the output is to be specified. The logging level is the level of detail of the output that the logger generates. The concept of Multiple logging hierarchy can be used by Log4j. The logging level is set for each hierarchy separately without affecting other hierarchies.

The 2 logging hierarchies below are supported by the AWS SDK for Java:

  • log4j.logger.com.amazonaws
  • log4j.logger.org.apache.http.wire


Setting the Classpath to use when working with SDK for Java Calls:

the Log4j JAR and the log4j.properties file need to be located in your classpath together. If you decide to use Apache Ant, you have to set the classpath in the path element inside your Ant file. The example below portrays a path element from the Ant file for the Amazon S3 example included with the SDK.

<path id=”aws.java.sdk.classpath”>

<fileset dir=”../../third-party” includes=”**/*.jar”/>

<fileset dir=”../../lib” includes=”**/*.jar”/>

<pathelement location=”.”/>

</path>

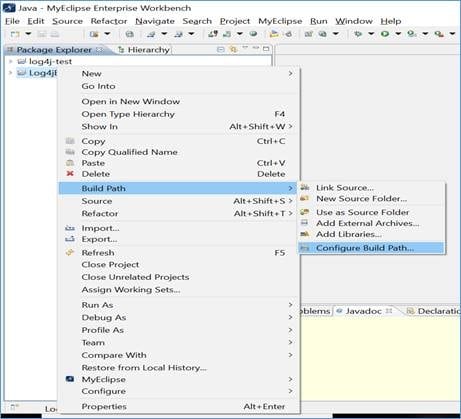
If you prefer using Eclipse IDE, you could set the classpath by opening the menu and going to Project | Properties | Java Build Path.

SDK for Java Calls - Java Build Path

SDK for Java Calls – Java Build Path

Mistakes and Warnings that are Service-Specific with SDK for Java Calls:

We recommend that you keep the “com.amazonaws” logger hierarchy set as “WARN” in order to catch any important messages from the client libraries. For example, if the Amazon S3 client detects that the InputStream inside your application hasn’t properly closed and could cause the leaking of resources, the S3 client reports it through a warning message which would appear in the logs. This makes sure that the messages are logged if the client is experiencing issues while attempting to handle requests or responses

The log4j.properties file portrayed below sets the rootLogger to WARN, which allows warning and error message from all loggers in “com.amazonaws” hierarchy to be included. Alternatively, you can always explicitly set the com.amazonaws logger to WARN.

log4j.rootLogger=WARN, A1

log4j.appender.A1=org.apache.log4j.ConsoleAppender

log4j.appender.A1.layout=org.apache.log4j.PatternLayout

log4j.appender.A1.layout.ConversionPattern=%d [%t] %-5p %c –  %m%n

# Or you can explicitly enable WARN and ERROR messages for the AWS Java clients

log4j.logger.com.amazonaws=WARN


Logging the Summary for Request/Response:

All requests to a service create a unique request ID which can be handy if you run into a problem generated from how a service is handling a request. Request IDs are accessible through Exception objects in the SDK after any failed service call, they can also be reported through the DEBUG log level in the “com.amazonaws.request” logger.

The below log4j.properties file allows for a summary of requests and responses, which includes request IDs.

In some cases, it can be handy to monitor the exact requests and responses that the AWS SDK for Java is sending and receiving. Since large requests, like a file being uploaded to S3, or responses can throttle an application this logging should not be enabled in production systems. If you for whatever reason need this information you can use it temporarily by enabling it through the “Apache HttpClient 4 logger” and then disabling it when you are done. Enabling the DEBUG level on the apache.http.wire logger allows logging for all request and response data.

The following log4j.properties file toggles on full wire logging in Apache HttpClient 4 and should only be turned on temporarily because it can significantly impact the performance of your application.

log4j.rootLogger=WARN, A1

log4j.appender.A1=org.apache.log4j.ConsoleAppender

log4j.appender.A1.layout=org.apache.log4j.PatternLayout

log4j.appender.A1.layout.ConversionPattern=%d [%t] %-5p %c –  %m%n

# Log every HTTP content  for

# each request and response. Be careful when working with this because it may

# be quite costing for logging that much verbose data!

log4j.logger.org.apache.http.wire=DEBUG


Logging for Latency Metrics when working with SDK for Java Calls:

If you want to see metrics while troubleshooting, an example of a metric would be which process is taking the longest time or whether the server or the client side has the greater latency. The latency logger in this case will come in handy. Set the com.amazonaws.latency logger to DEBUG to turn this logger on. To learn more about metrcis you check the AWS SDK Metrics guidlines.

Keep in Mind

Such a logger may be available when SDK metrics gets enabled.

log4j.rootLogger=WARN, A1

log4j.appender.A1=org.apache.log4j.ConsoleAppender

log4j.appender.A1.layout=org.apache.log4j.PatternLayout

log4j.appender.A1.layout.ConversionPattern=%d [%t] %-5p %c –  %m%n

log4j.logger.com.amazonaws.latency=DEBUG

Here you can see a log output example.

com.amazonaws.latency – ServiceName=[Amazon S3], StatusCode=[200],

ServiceEndpoint=[https://list-objects-integ-test-test.s3.amazonaws.com],

RequestType=[ListObjectsV2Request], AWSRequestID=[REQUESTID], HttpClientPoolPendingCount=0,

RetryCapacityConsumed=0, HttpClientPoolAvailableCount=0, RequestCount=1,

HttpClientPoolLeasedCount=0, ResponseProcessingTime=[52.154], ClientExecuteTime=[487.041],

HttpClientSendRequestTime=[192.931], HttpRequestTime=[431.652], RequestSigningTime=[0.357],

CredentialsRequestTime=[0.011, 0.001], HttpClientReceiveResponseTime=[146.272]

AWS sdk metrics