AWS EC2 Dashboard - Dashboard

AWS EC2 Dashboard

AWS EC2 Dashboard


What are the available Instance Categories to launch from AWS EC2 Dashboard?


General-Purpose Category

AWS EC2 Dashboard - General Purpose Category

AWS EC2 Dashboard – General Purpose Category

Best for medium and small-sized databases, business critical apps and web tier apps.


Compute Optimized Category

AWS EC2 Dashboard - Compute Optimized Category

AWS EC2 Dashboard – Compute Optimized Category

Best used for processing batches, encoding videos, and excessive overall performance computing.


Memory Optimized Category

AWS EC2 Dashboard - Memory Optimized Category

AWS EC2 Dashboard – Memory Optimized Category

Best for real time big data analytics, in-memory caches and high-performance databases.


Accelerated Computing Category

AWS EC2 Dashboard - Accelerated Computing Category

AWS EC2 Dashboard – Accelerated Computing Category

Best used for gaming, machine learning, and image intensive apps.


Storage Optimized Category
AWS EC2 Dashboard - Storage Optimized Category

AWS EC2 Dashboard – Storage Optimized Category

Best used for file systems that are distributed, statistics warehousing and NoSQL databases.


Launching The AWS EC2 Dashboard

  1. Enter “EC2” into the search bar of the Management Console search bar.
  2. Select the option EC2 in order to access the EC2 Dashboard.

The EC2 can also be used as a means of launching instances directly, rather than normally doing so using scripts.

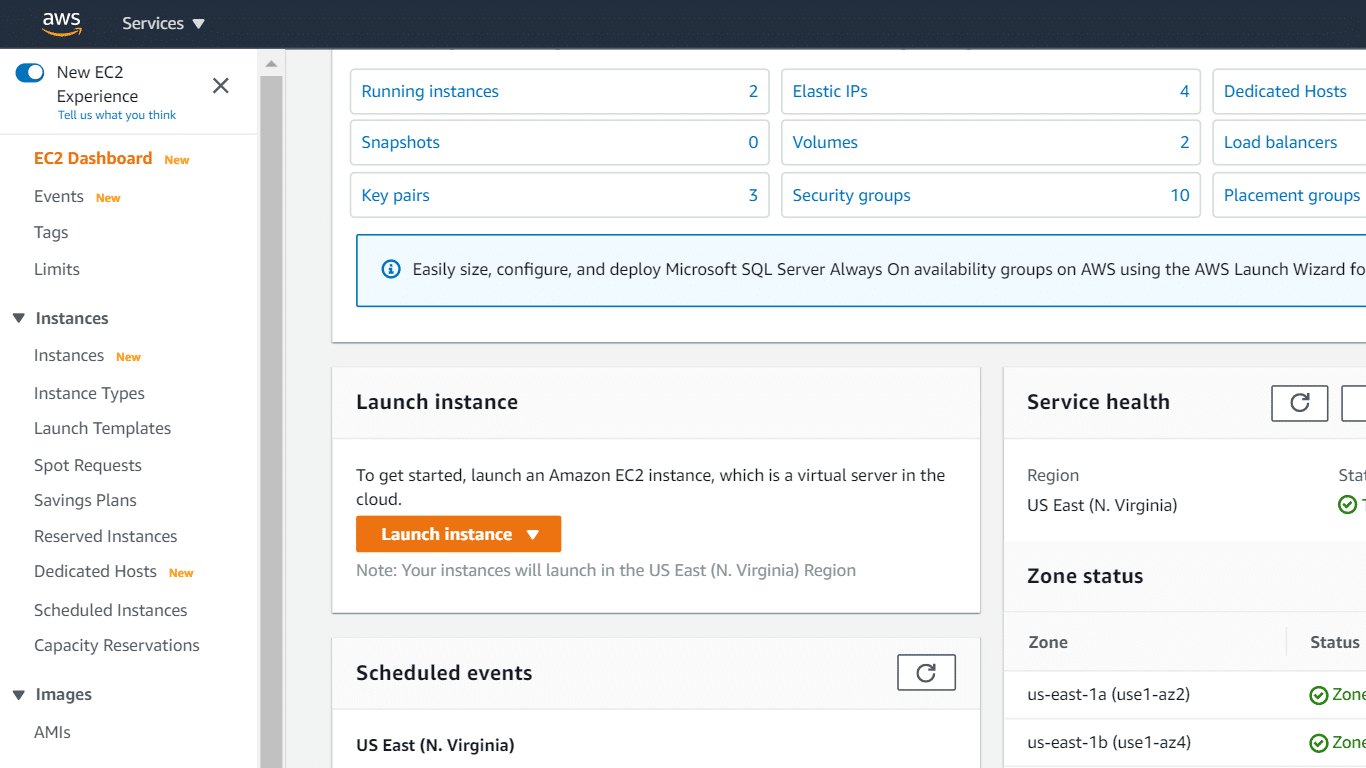
Check out what the layout of the EC2 dashboard will include:

  • In the Left pane: You will find some features and tools, like saved AMIs, Key Pairs and storage volumes.
  • In the Center: You will find lists of resources and the option of launching an instance.
  • In the Right pane: You will find general information, like pricings and  documentations. To estimate your pricing, try out our EC2 Cost Calculator.
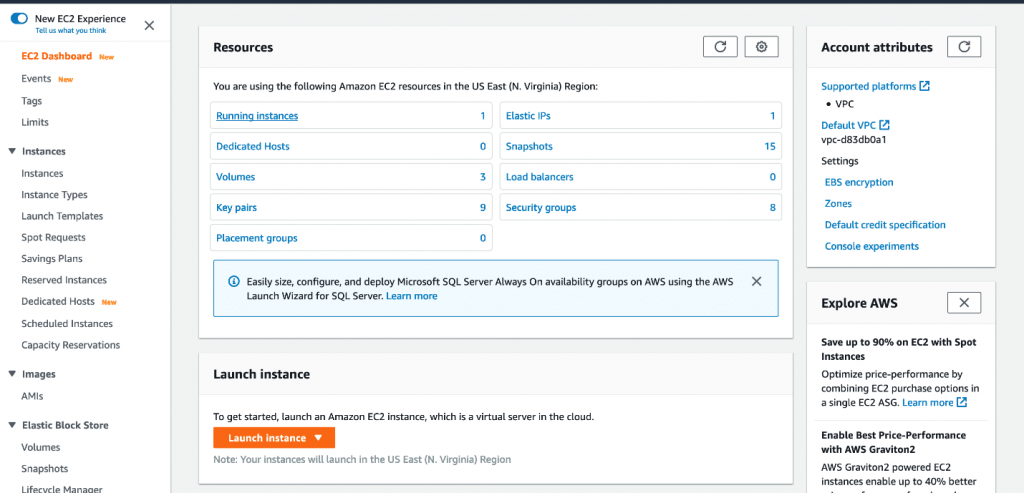
AWS EC2 Dashboard - The EC2 Dashboard

AWS EC2 Dashboard – The EC2 Dashboard

Launching an instance through AWS EC2 Dashboard

Below you will discover how to launch a Linux instance with the Management Console. This procedure is the simplest and easiest way for launching the very first instance rapidly. This means that not every single option is going to be covered in this tutorial.

How to launch an instance?

  1. Head to the EC2 console using the following link https://console.aws.amazon.com/ec2/.
  2. Click on the option Launch Instance from the dashboard.

    AWS EC2 Dashboard - Launch Instance Button

    AWS EC2 Dashboard – Launch Instance Button

  3. From the page of Choose an Amazon Machine Image (AMI)you can find a list of basic configurations that are named Amazon Machine Images (AMIs). They are used as templates for instances. Choose a specific HVM version of Linux 2. You can see that the available AMIs are Free tier eligible.
  4. From the page of Choose an Instance Type, choose the hardware configuration that you want for your instance. Choose the default t2.micro type of instance. This specific type of instance is free tier eligible. t3.micro instance type can be utilized for free tier for whichever Regions where t2.micro is unavailable.
  5. Select the option Review and Launch for allowing the wizard to finish the remaining of the configuration settings in your place.
  6. From the page of Review Instance Launch, in the section of Security Groups, you can notice that a security group has already been created and chosen by the wizard. It is possible for you to keep this security group or choose the one you got created upon setting up with the below steps:
    1. Click on the option Edit security groups.
    2. From the page of Configure Security Group, make sure that the option Select an existing security group is chosen.
    3. Pick your created security group out of the listed existing security groups, then click on Review and Launch.
  7. From the page of Review Instance Launch, select the option of Launch.
  8. In case of being asked for a key pair, click on Choose an existing key pair, and pick the key pair which you got created while setting up.

Do Not Ignore!

Never choose Proceed without a key pair. In case an instance gets launched with no key pair, you will not be able to get connected to it.

Upon finishing, click on the acknowledgement check box, then click on the option Launch Instances.

  1. You will reach a confirmation page which tells you that your instance has started launching. Click on View Instances to leave this confirmation page and go back to the EC2 console.
  2. From the screen of Instances, you will be able to check the status of the launch. It won’t take a lot of time for launching your instance. A launched instance’s initial state would be pending. When it starts, the state will become running and it will get a public DNS name. (In case the Public DNS (IPv4) column was hidden, click on the option Show/Hide Columns which is a gear-shaped icon located in the upper right corner then click on Public DNS (IPv4).)
  3. It might need a couple of minutes to get the instance ready for you to connect to it. Make sure that the status checks of your instance have been passed; this info can be checked from the column named Status Checks.
Elastic Beanstalk vs EC2

AWS CloudTrail Role - CloudTrail Role Work

AWS CloudTrail Role

AWS CloudTrail Role

In this article, we will explain how an AWS CloudTrail Role works by looking at an example that includes:

– 3 Accounts: D, E, and R having no rights until granted.

– Account Admin, which has full read access to every log file found in our bucket.

Upon the aggregation of log files from various accounts into just 1 bucket, only the account with total control over the bucket is capable of accessing it. To be able to share log files between accounts, cross-account access is required. It can be enabled through the creation of IAM roles along with their access policies.

What is an AWS CloudTrail Role?

IAM roles need to be created for every single account you would like to grant access to.

For this example, we’re going to take 3 roles, where every 1 of the accounts D, E, and R has a role.

Every IAM role specifies a particular permissions or access policy which will allow those accounts to access the log files of the owning account named “Admin.”

Type of Policies:

AWS CloudTrail Role - Type of Policy

AWS CloudTrail Role – Type of Policy

There are 2 policies for each IAM role you create.

Trust policy: sets either a trusted entity or a principle.

For the example at hand, we will consider that accounts D, E, and R refer to trusted entities, with an IAM user having the required permissions from those accounts.

Trust policy:

– Directly created upon utilizing console for the creation of the role.

In case you choose to go for the CLI when creating the role, you will need to provide the trust policy for CLI command of create-role.

Utilizing the SDK for the creation of the role means that you need to add the trust policy as a parameter to API CreateRole.

Role access policy:

– Needs to be created by the owner of Account Admin.

– Specifies resources and actions that are permitted access to by the trusted entity or principal.

How to Create an AWS CloudTrail Role

To create an AWS CloudTrail Role through the Console:

  1. Login to the Management Console as an administrator of Account “Admin”.
  2. Go straight to the IAM console.
AWS CloudTrail Role - Dashboard

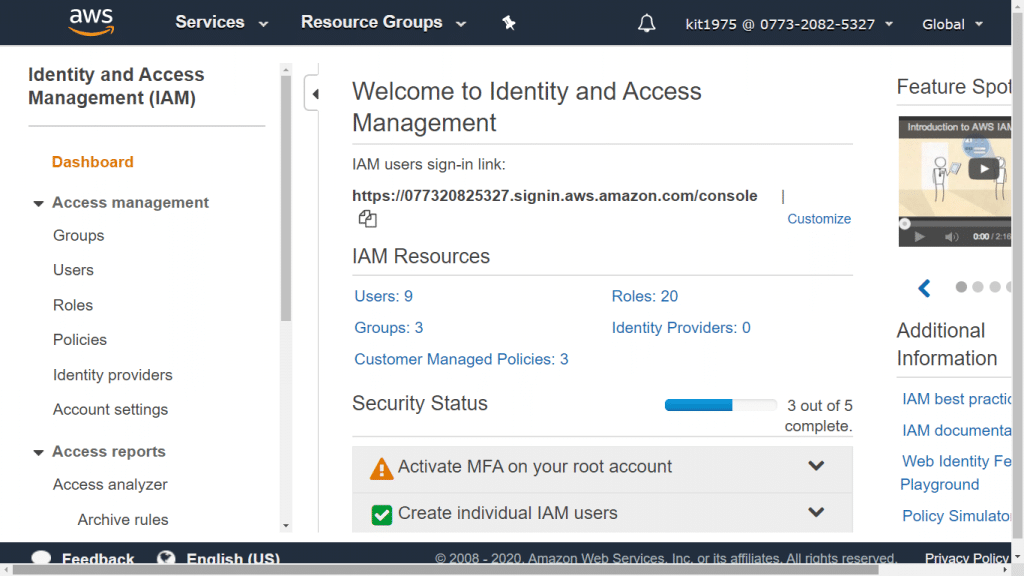
AWS CloudTrail Role – Dashboard

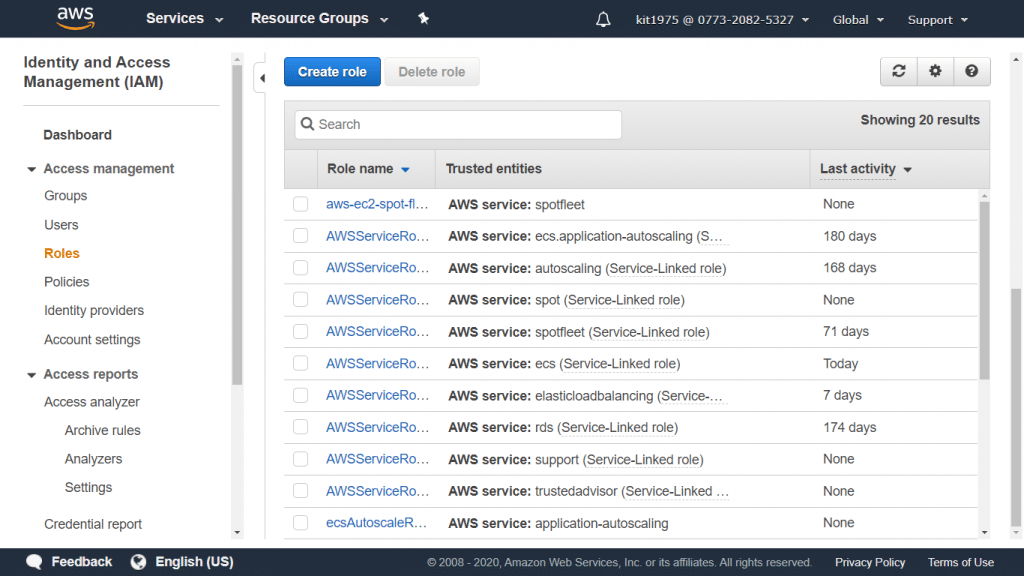
  1. From under navigation pane, click on Roles.
AWS CloudTrail Role - Roles Page

AWS CloudTrail Role – Roles Page

  1. Select Create New Role.
  2. Type a name for the new role, and click on Next Step.
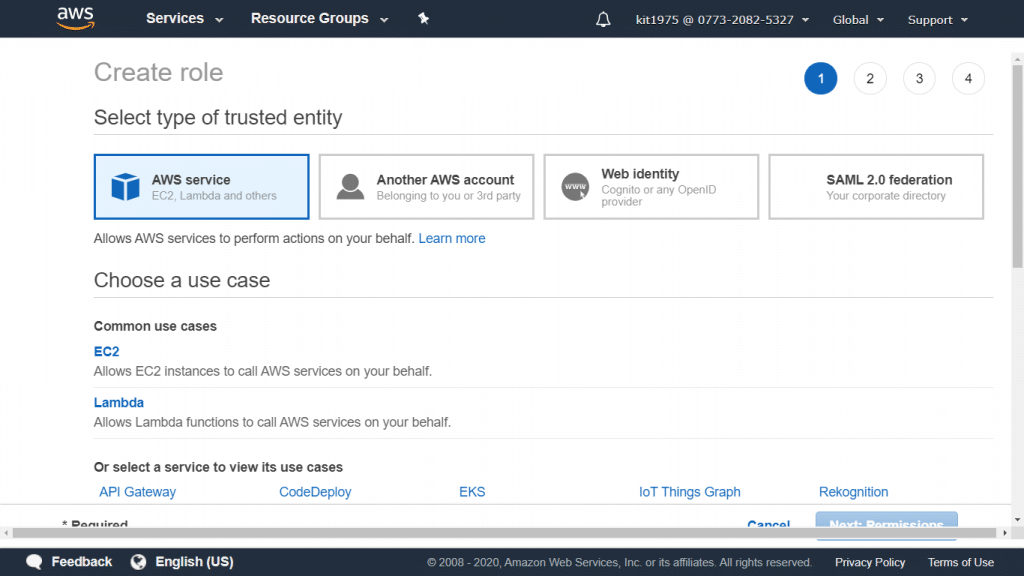
AWS CloudTrail Role - Type of Trusted Entity

AWS CloudTrail Role – Type of Trusted Entity

  1. Select the option: “Role for Cross-Account Access”.

    AWS CloudTrail Role - Type Permissions Policy Name

    AWS CloudTrail Role – Type Permissions Policy Name

  2. If you choose to go with Scenario 1, you will need to perform the below steps in order to grant access between your owned accounts:
    1. Select the option: “Provide access between AWS accounts you own”.
    2. Fill in the 12-digit account ID of the chosen account (D, E, or R) which will be given access.
    3. Leave a check mark for Require MFA in case you’d like multi-factor authentication to be provided by a user prior to his assuming of this role.

If you wish to follow Scenario 2, you must perform the below listed steps in order to grant a 3rd-party account access.

In this chosen example, the following steps are to be made for Account R (3rd-party log analyzer):

  1. Select the option: “Allows IAM users from a 3rd party AWS account to access this account”.
  2. Fill in 12-digit ID of the account you choose to give access to your role.
  3. Fill in an external ID for adding more control over the accounts that may be able to assume your role.
  4. Click on Next Step in order to start attaching a specific policy for granting permissions to your role.
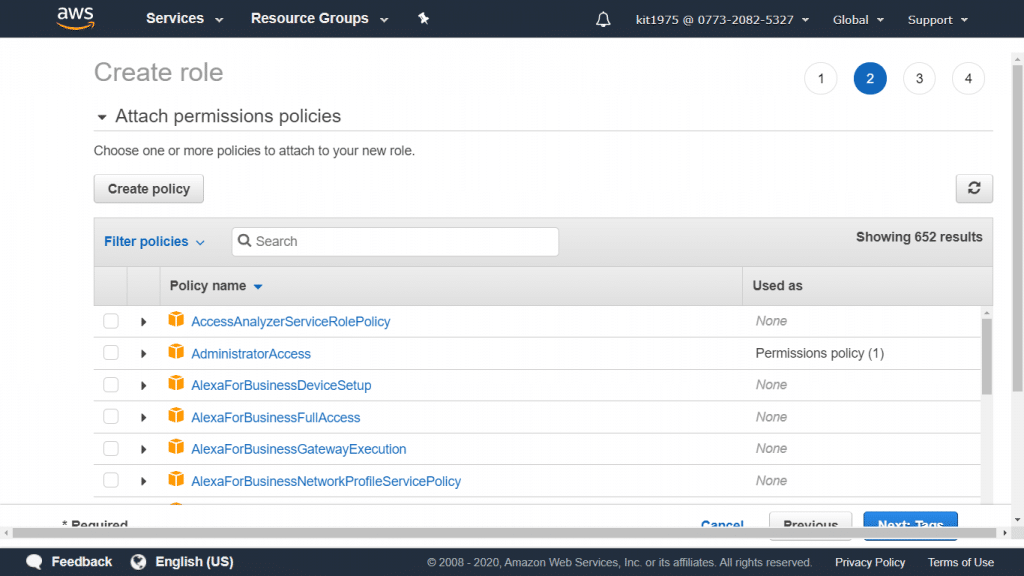
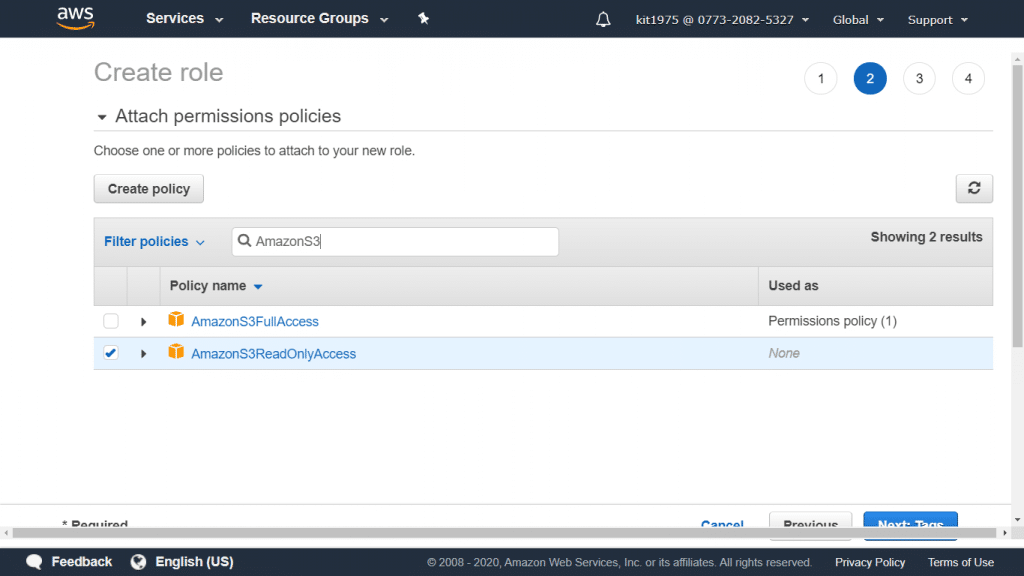
AWS CloudTrail Role - Attach Permissions Policies

AWS CloudTrail Role – Attach Permissions Policies

  1. For the Attach Policy, select the policy named AmazonS3ReadOnlyAccess.

Keep in mind the following:

AmazonS3ReadOnlyAccess policy: This policy will grant list and retrieval rights to every single S3 bucket found in the user’s account.

– You can grant access only to a specific account’s log files.

– You can grant access to every single log file found in your S3 bucket.

  1. Click on Next Step
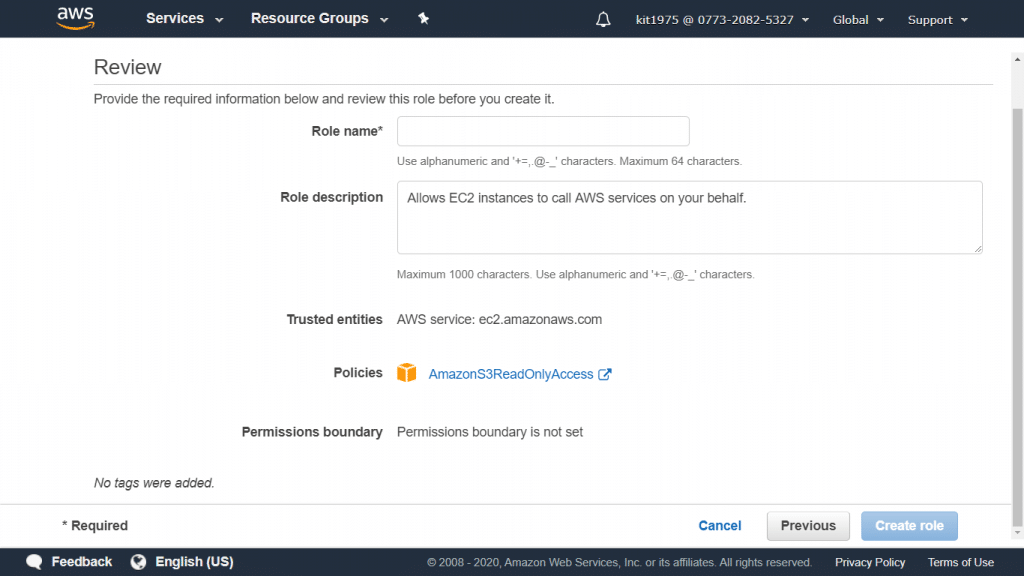
AWS CloudTrail Role - Review Page

AWS CloudTrail Role – Review Page

  1. Go over your role information.

Notice that:

Now, it’s possible to alter the role name. However, this will let you return to page Step 2: Select Role Type and you will have to go over it again and enter the required info once more.

  1. Select Create Role. As soon as your role creation finishes, the new role will be displayed in your role list.


Common Scenarios for an AWS CloudTrail Role:

There are 2 ways for role utilization:

– Interactively – IAM console

– Programmatically – API, Tools for Windows PowerShell, or CLI

  • Your account’s IAM users who work through the IAM console are capable of switching to a role for the sake of temporarily utilizing its permissions. They do this through letting go of their primary permissions and taking on those permissions which are assigned to the chosen role. Upon exiting this role, the users’ primary permissions will get restored again.
  • A specific service (EC2, S3…) or an application is capable of assuming a role through requesting temporary security credentials for a chosen role for performing programmatic requests. A role may be utilized as such in order to prevent sharing or keeping track of any long-term security credentials for every single entity in need of being granted access to a particular resource. To learn how to create a Service Roles, check out the article about AWS CloudTrail: Creating a Service Role.

See Also:

How to view events in AWS cloud trail console 

AWS Glue Tag - AWS Glue

AWS Glue Tags

This article provides a detailed overview of using Glue Tags & how to get started with Glue Tags in AWS.


What is an AWS Glue Tag?

A tag is a label that you assign to an AWS resource. Each tag consists of a key and an optional value, both of which you define. You’re capable of optionally assigning your very own tags on specific Glue resources, so that you can effectively manage your resources.

AWS Glue Tag - AWS Tag

AWS Glue Tag – AWS Tag


AWS Glue Tags Benifits:
  • Organizing + identifying resources.
  • Creating cost accounting reports.
  • Restricting access to specific resources.

Identity and Access Management: It allows you to control the users you wish to grant permission for performing the following actions on tags: creating, editing, or deleting.

The below listed resources can be tagged:

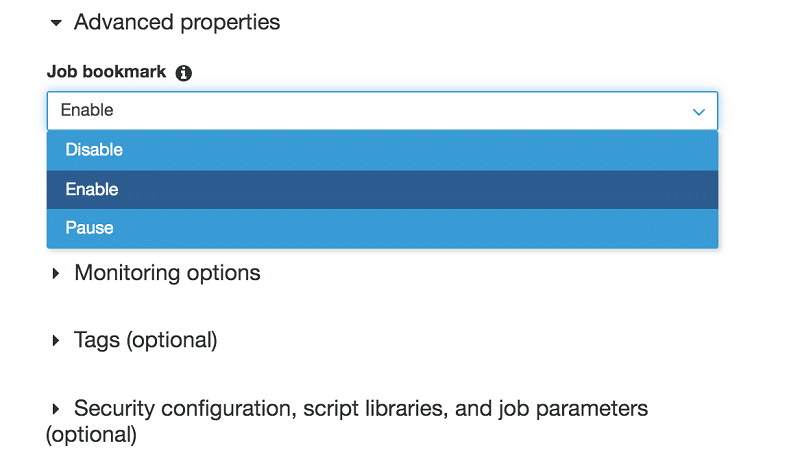
AWS Glue Tag - Advanced Properties

AWS Glue Tag – Advanced Properties

  • Machine learning transforms
  • Development endpoints
  • Crawlers
  • Jobs
  • Triggers

Additional Details:

Never forget to add the glue:TagResource action when creating your policy for enabling to get your Glue resources tagged.

Considee the following aspects while tagging.

  • Maximum of Fifty tags allowed for each entity.
  • Tags will reflect key-value pairs listed in the following format {“string”: “string” …}
  • You need the tag key when creating a tag on a specific object, but it’s optional to add the tag value.
  • Case sensitive: Tag key + Tag value.
  • The prefix “aws” is not allowed to be included in tag keys and tag values.
  • Max length for tag key= 128 UTF-8. No null or empty tag keys.
  • Max length for tag value= 256 UTF-8. No null or empty tag values.

How AWS Glue Tags looks like-

Creating a specific job while having tags assigned to it.

  • CLI based Approach
aws glue create-job --name job-test-tags--role MyJobRole--command Name=glueetl,ScriptLocation=S3://aws-glue-scripts//prod-job1 --tags '{"key1" : "value1", "key2 : "value2"}'
  • CloudFormation JSON
{
  "Description": "AWS Glue Job Test Tags",
  "Resources": {
    "MyJobRole": {
      "Type": "AWS::IAM::Role",
      "Properties": {
        "AssumeRolePolicyDocument": {
          "Version": "2012-10-17",
          "Statement": [
            {
              "Effect": "Allow",
              "Principal": {
                "Service": [
                  "glue.amazonaws.com"
                ]
              },
              "Action": [
                "sts:AssumeRole"
              ]
            }
          ]
        },
        "Path": "/",
        "Policies": [
          {
            "PolicyName": "root",
            "PolicyDocument": {
              "Version": "2012-10-17",
              "Statement": [
                {
                  "Effect": "Allow",
                  "Action": "*",
                  "Resource": "*"
                }
              ]
            }
          }
        ]
      }
    },
    "MyJob": {
      "Type": "AWS::Glue::Job",
      "Properties": {
        "Command": {
          "Name": "glueetl",
          "ScriptLocation": "s3://aws-glue-scripts//prod-job1"
        },
        "DefaultArguments": {
          "--job-bookmark-option": "job-bookmark-enable"
        },
        "ExecutionProperty": {
          "MaxConcurrentRuns": 2
        },
        "MaxRetries": 0,
        "Name": "cf-job1",
        "Role": {
          "Ref": "MyJobRole",
          "Tags": {
            "key1": "value1",
            "key2": "value2"
          }
        }
      }
    }
  }
}

AWS Glue Tag on IAM Policies
AWS Glue Tag - Tags on IAM

AWS Glue Tag – Tags on IAM

You can also control access to certain types of AWS Glue resources using AWS tags. These are used for giving or denying access according to the keys that you place on development endpoints, jobs, triggers and crawlers.

  • Condition element.
  • glue:resourceTag context key
Example:
{
  "Version": "2012-10-17",
  "Statement": [{
    "Effect": "Allow",
    "Action": "glue:*",
    "Resource": "*",
    "Condition": {
      "StringEquals": {
        "glue:resourceTag/Name": "CloudySave"
      }
    }
  }]
}
Additional Details:

Only jobs, development endpoints, crawlers and triggers can have condition context keys.


Resource-Level Permissions for Specific Objects

  • Always better to choose least privilege based access.
  • Enter client’s IAM policy not to confuse with the API operations that support ARNs for the “Resource” statement, while others don’t support it.
  • The below example details an IAM policy that supports API operations for both actions of “GetClassifier” and “GetJobRun”.
  • “Resource” will get defined as “*”, since ARNs are not supported by Glue for both jobs and classifier runs.
  • Few operations, including “GetDatabase” and GetTable”, support ARNs. You may add your ARNs in the 2nd part of your policy.
{
  "Version": "2012-10-17",
  "Statement": [{
      "Effect": "Allow",
      "Action": [
        "glue:GetClassifier*",
        "glue:GetJobRun*"
      ],
      "Resource": "*"
    },
    {
      "Effect": "Allow",
      "Action": [
        "glue:Get*"
      ],
      "Resource": [
        "arn:aws:glue:us-east-1:123456789012:catalog",
        "arn:aws:glue:us-east-1:123456789012:database/default",
        "arn:aws:glue:us-east-1:123456789012:table/default/e*1*",
        "arn:aws:glue:us-east-1:123456789012:connection/connection2"
      ]
    }
  ]
}

AWS Glue Console Permissions
AWS Glue Tag - Glue Console Permissions

AWS Glue Tag – Glue Console Permissions

A user needs necessary permissions for their account in order to be able to operate with the Glue console. Also, permissions from the below services are required:

  • Displaying Logs: CloudWatch Logs permissions.
  • Listing and passing roles: IAM permissions.
  • Working with stacks: CloudFormation permissions.
  • Listing instances, VPCs, other objects, security groups and subnets: EC2 permissions.
  • Listing objects and buckets + saving and retrieving scripts: S3 permissions.
  • Working with clusters: Redshift permissions.
  • Listing instances: RDS permissions

Here are few awesome resources on AWS Services:
AWS S3 Bucket Details
AWS Glue Tags
AWS S3 File Explorer
AWS Cost Optimization

  • CloudySave is an all-round one stop-shop for your organization & teams to reduce your AWS Cloud Costs by more than 55%.
  • Cloudysave’s goal is to provide clear visibility about the spending and usage patterns to your Engineers and Ops teams.
  • Have a quick look at CloudySave’s Cost Caluculator to estimate real-time AWS costs.
  • Sign up Now and uncover instant savings opportunities.


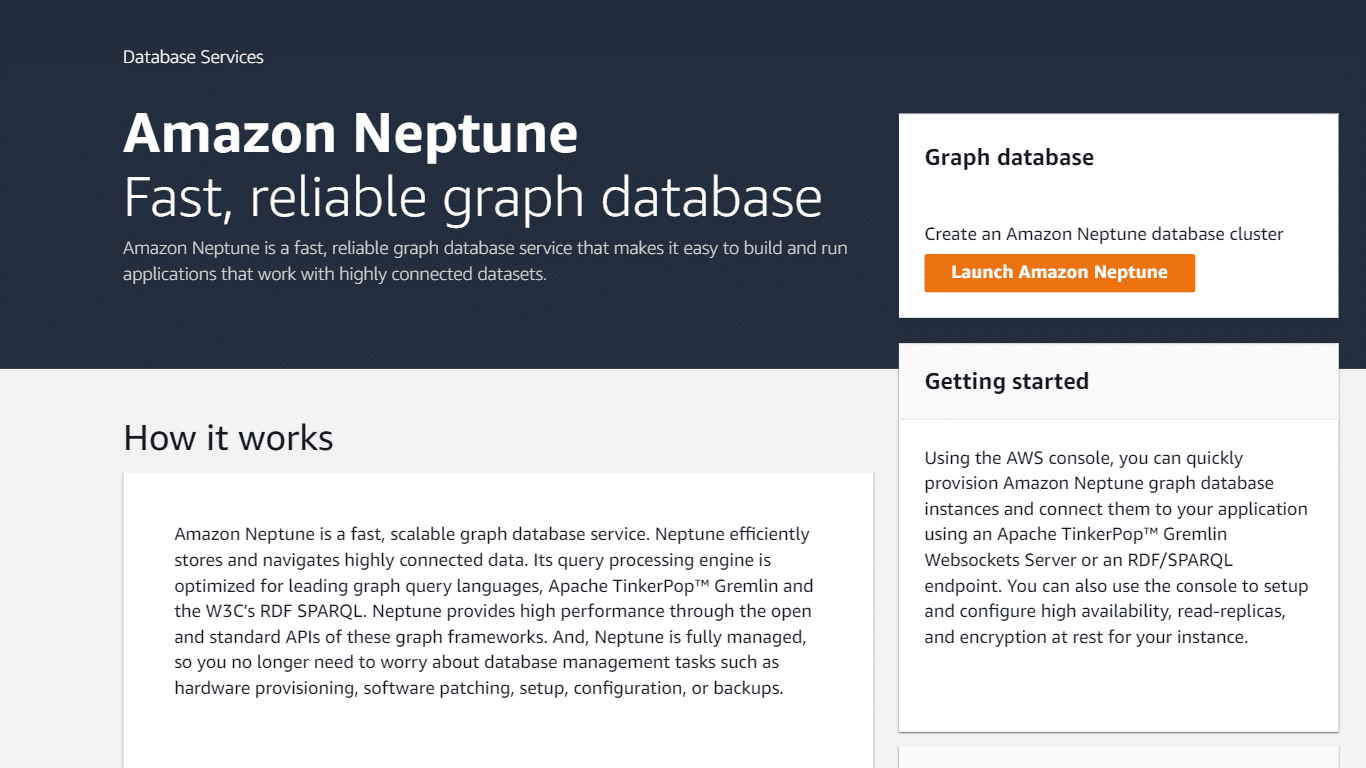
Neptune DB Cluster - Amazon Neptune Page

Neptune DB Cluster

Neptune DB Cluster

How to Launch a Neptune DB Cluster?

You need to obtain an IAM user having NeptuneFullAccess permissions in order to use the Neptune console, then go ahead with the creation of a cluster.

“NeptuneFullAccess”: not supporting S3, VPC endpoints and VPC. They need to be added.

Permission must be given to Neptune for the sake of creating a service-linked role upon the first ever creation of a resource.

Those iam:CreateServiceLinkedRole permissions  need to be given to the user which has NeptuneFullAccess. To learn more about IAM permissions, check the article for Amazon Neptune Create A Database.

{

"Action": "iam:CreateServiceLinkedRole",

"Effect": "Allow",

"Resource": "arn:aws:iam::*:role/aws-service-role/rds.amazonaws.com/AWSServiceRoleForRDS",

"Condition": {

"StringLike": {

"iam:AWSServiceName":"rds.amazonaws.com"

}

}

}

Launching a Neptune DB Cluster through the console:

  1. First you will need to start by signing into your Management Console, then opening Neptune console through the following link https://console.aws.amazon.com/neptune/home.
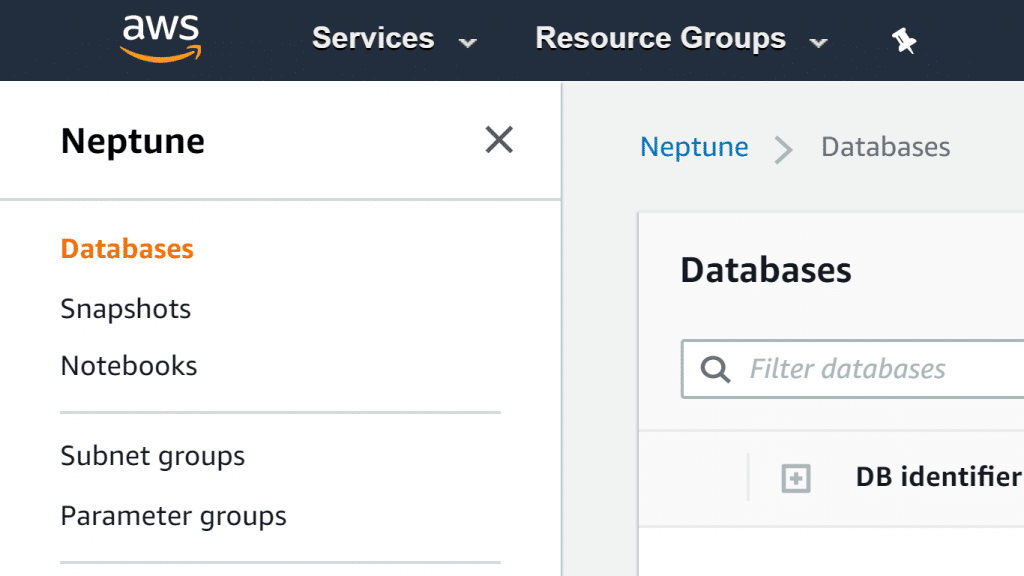
  2. Go straight to Databases
Neptune DB Cluster - Databases Page

Neptune DB Cluster – Databases Page

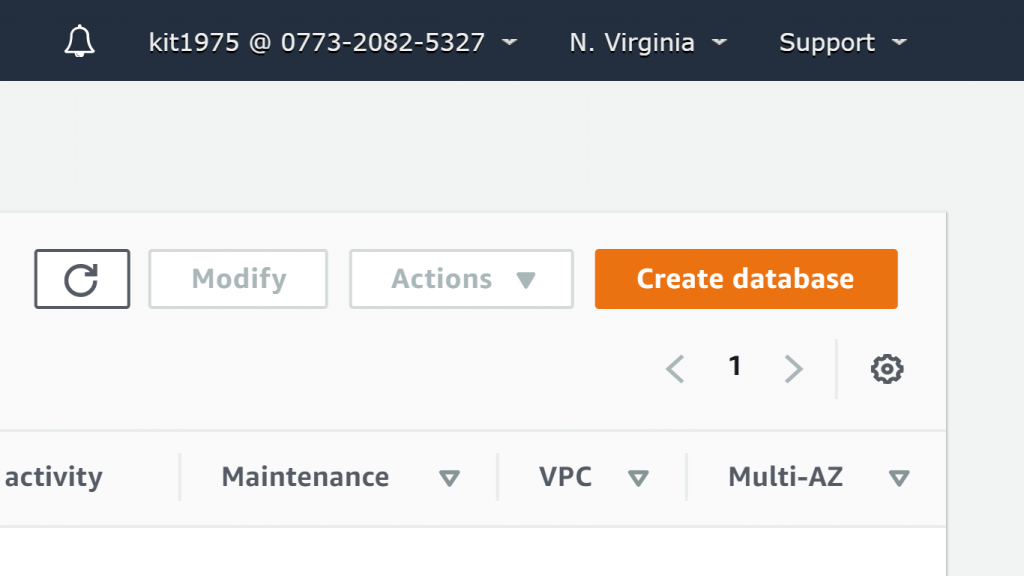
  1. Select the option: Create database.

    Neptune DB Cluster - Create Database

    Neptune DB Cluster – Create Database

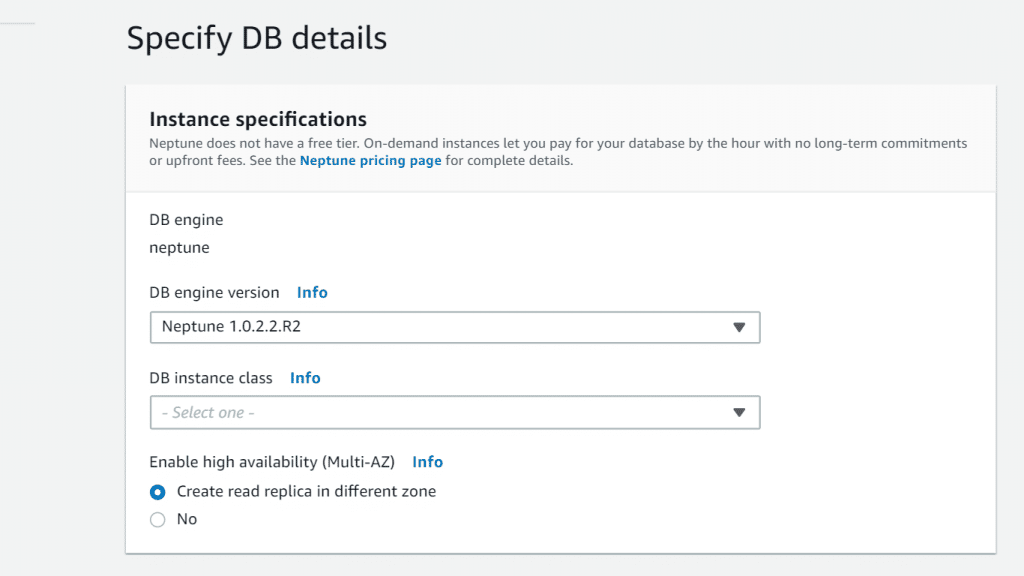
  2. From Specify DB details, below the Instance specifications choose a specific version to give to your newly created cluster. Except in the case that you obtain a particular idea in mind for utilizing older engine versions for the new cluster, keep your recent version at default value.
Neptune DB Cluster - DB Details

Neptune DB Cluster – DB Details

  1. From below Purpose, select Production otherwise Development and Testing.
  2. In case you choose Production, select one of the existing fixed-performance classes. Which class you select sets your memory and processing capacity of the new cluster.

Some of which include the following instances:

db.r5.large

db.r5.xlarge

db.r5.2xlarge

db.r5.4xlarge

db.r5.8xlarge

db.r5.12xlarge

db.r4.large

db.r4.xlarge

db.r4.2xlarge

db.r4.4xlarge

db.r4.8xlarge


In case you choose the Development and Testing, choose a T3 burstable instance class which is the most efficient in terms of cost when it comes to development effectiveness that does not require great capacity.

  1. Read-replica instances, created for a DB cluster in AZs that are not the same, are going to be located for the sake of improving their availability. In case you wouldn’t want this to occur, you will have to leave the Enable high availability (Multi-AZ)setting as enabled.
  2. For Settings, type in a name for the first write instance located in the cluster. The following identifier gets utilized in the endpoint address of this specific instance, and needs to be having the below obligations:

– Numerical Characters / Hyphens: 1 to 63

– 1st Character type: Letter

– Ending: No hyphen + No 2 consecutive Hyphens

– Not used in any of the other DB instances found in your account in a particular Region

  1. Click on Next. From Configure advanced settings page, it’s possible for you to change more settings for your cluster. The below shown table identifies the advanced settings for DB clusters.
Option NameWhat to do?
VPCSelect which VPC that to host your cluster. Click on Create a new VPC for getting a new one created. Later, create an EC2 instance within that exact VPC for accessing the Neptune instance.
Subnet groupSelect a subnet group for using for your cluster. In case the VPC lacks subnet groups, then a subnet group will be created by Neptune.
AZSelect a specific AZ, otherwise, select No preference so that Neptune does the choosing in your place.
VPC security groupsSelect 1 or more security groups for keeping a safe network access. Click on Create a new VPC security group so that Neptune goes ahead with creating one for you.
DB cluster identifierIn case you choose not to set this value, one will be created by Neptune according to the DB instance identifier.
PortEvery single HTTP + WebSockets connection. 8182 is the default value for port.
DB parameter groupThere is a default one which you could utilize, otherwise get a new one created.
IAM DB authenticationSelect Enable IAM DB authentication for managing your access and security information through IAM.
EncryptionClick on Enable encryption for the sake of enabling encryption-at-rest.
Failover priorityIn case of any contention, the replica having similar size like that of primary instance will get chosen.
Backup retention periodLength of time for having database backups: 1 to 35 days.
Log exportsSelect your favored log types for getting them published to your CloudWatch logs.
Auto minor version upgradeYou can select the Enable auto minor version upgrade for letting the DB cluster get little Neptune DB Engine version upgrades as soon as they are found.
Maintenance windowIt’s possible to select a particular weekly time range for allowing system maintenance occurrences.
Deletion protectionThis will not allow your DB cluster to get deleted. If you remove the check from Enable deletion protection, it becomes enabled.
  1. Click on Create database for the sake of launching your instance. Click on Close for closing the wizard.

    Neptune DB Cluster - Create or Close

    Neptune DB Cluster – Create or Close

On the console, the newly created DB cluster will show up under the listed Databases. It will maintain a Creating status till the time it gets created and becomes available to be utilized. As soon as the state becomes Available, go ahead and connect to the primary instance for DB cluster. It may possibly take several minutes for the instance to become available, this is based on what DB instance class was chosen and which store was allocated.

For the sake of viewing your new cluster, click on the Databases view from your Neptune console.

AWS DeepRacer Build New Vehicle - DeepRacer League

AWS DeepRacer Build New Vehicle

AWS DeepRacer Build New Vehicle


How to use AWS DeepRacer Build New Vehicle?

Before going through those steps, if you’d like to learn the basics about AWS DeepRacer, check the AWS DeepRacer starting guide.

The default Car may be utilized, “The Original DeepRacer”, or AWS DeepRacer build new vehicle through going over the below procedure:

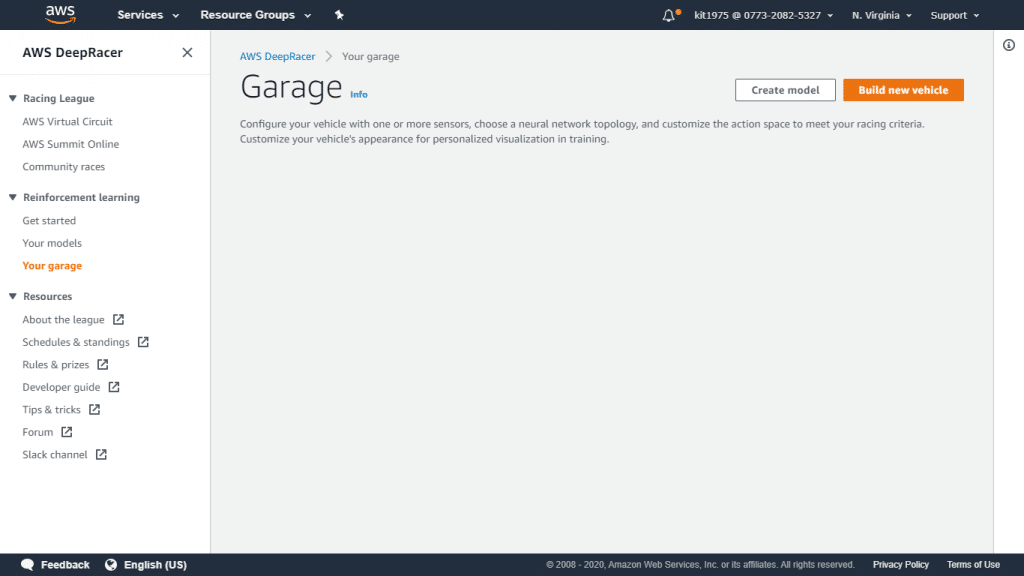
  1. Head to the AWS DeepRacer Console, then click on Reinforcement Learning. Go to your garage, then click on Build New Vehicle.
    AWS DeepRacer Build New Vehicle - Build a New Vehicle

    AWS DeepRacer Build New Vehicle – Build a New Vehicle


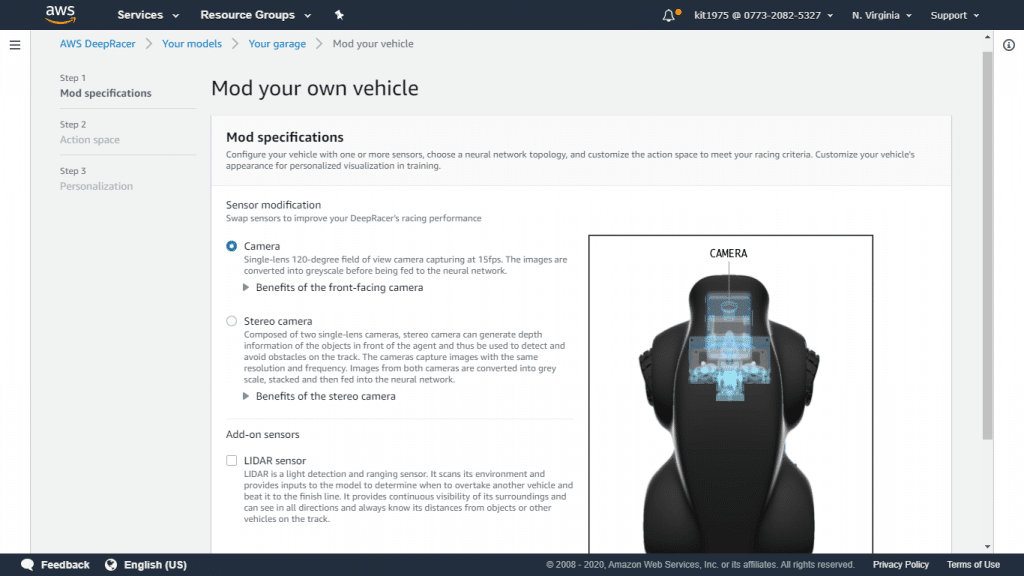
  2. The setting for Sensor and Camera should be left the same. Click on Next.
    AWS DeepRacer Build New Vehicle - Camera and Sensor specifications

    AWS DeepRacer Build New Vehicle – Camera and Sensor specifications


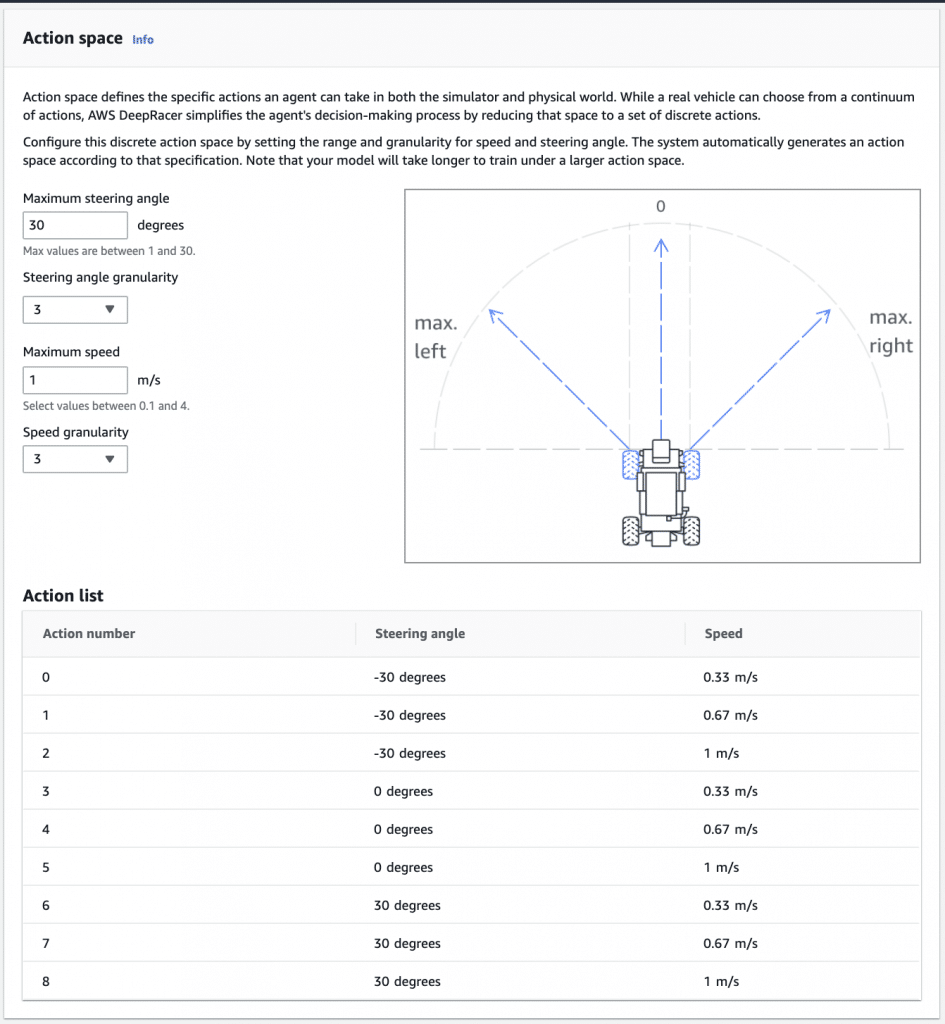
  3. Leave the action space settings like the values set in the following screenshot. Click on Next.
    AWS DeepRacer Build New Vehicle - Action Spaces

    AWS DeepRacer Build New Vehicle – Action Spaces


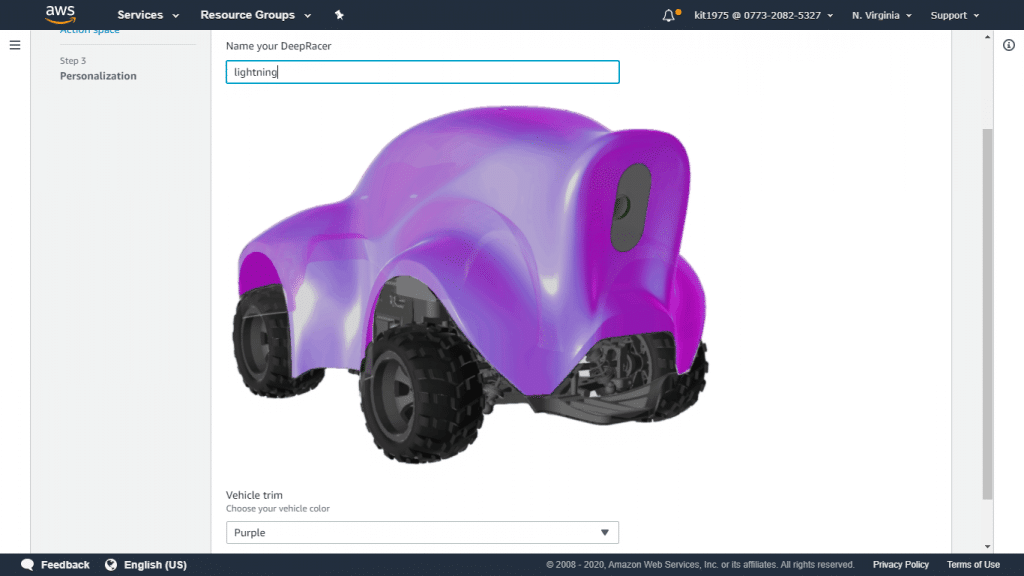
  4. Fill in the name of your car then select a specific color. Click on Done.

    AWS DeepRacer Build New Vehicle - Name and Color

    AWS DeepRacer Build New Vehicle – Name and Color


What is Action Space when working with AWS DeepRacer Build New Vehicle?

You can make your car steer right or left, and drive forward at multiple speeds. Those choices reflect the action spaces of your Car, and they are dependent upon the below parameters:

– Maximum Steering Angle: 1 to 30

– Maximum speed: 0.1m/s to 4m/s

– Steering angle granularity: 3, 5 or 7

– Speed granularity: 1, 2 or 3

Beginners are recommended to utilize the following values:

  • Three steering angles as well as Three speeds, which means 3*3 = 9 action spaces
  • maximum speed: 1m/s for training your car at a faster pace

You will need to concentrate on how reliable and accurate your model is, rather than focusing merely on speed and lap time. After learning more about the whole process, you will be able to start training your car through adding more action spaces and more max speed.

How to Create a Model?

AWS DeepRacer offers 5 out of the box models:

Model Name Model Description Model Status Model Sensors
Sample-Head-to-Head Its training has a reward function for head to head racing Ready Stereo camera and Lidar
Sample-Object-Avoidance Its training has a reward function for avoiding objects Ready Stereo camera
Sample-Time-Trial-PreventZigZag Its training has a reward function for penalizing the agent in case of over steering Ready Camera
Sample-Time-Trial-StayOnTrack Its training has a reward function for keeping the agent inside the borders of the track Ready Stereo camera
Sample-Time-Trial-FollowCenterLine Its training has a reward function for keeping the agent following the center line Ready Camera

It is advised that you start clicking on every model one by one, and head to their Training Configuration. Check the Reward Function and Action Space that are going to provide you with the basis of designing your very own unique model.

Go through the below steps to get your own model created:

  1. Open the AWS DeepRacer Console using the following link https://console.aws.amazon.com/deepracer/home?region=us-east-1#welcome. Click on Reinforcement Learning, and then Your models. After that, select the option Create Model.

    AWS DeepRacer Build New Vehicle - Create a Model

    AWS DeepRacer Build New Vehicle – Create a Model

  2. Fill in a Model name and give it a specific description.
  3. Select a Racing Track. For example you can pick ⦿ re:Invent 2018 and click on Next.
  4. Select a Race Type. For example, pick ⦿ Time trial.
  5. Select an Agent, which refers to a Car. For example select a recently created car. Otherwise, you can simply select the default car, which is “The Original DeepRacer”.
  6. Start clearing the Reward Function Code Editor. After that, go ahead with Copying and Pasting the below reward function into the code editor. Select the option Validate in order to ensure that the code is valid.

def reward_function(params):
 
'''
 
An example that rewards the Agent (Car) whenever it follows the center line
 
'''
 
# Go over the input parameters
 
track_width = params['track_width']
 
distance_from_center = params['distance_from_center']
 
all_wheels_on_track = params['all_wheels_on_track']
 
speed = params['speed']
 
SPEED_THRESHOLD = 1.0
 
# Calculation of three markers located at changing distances that are not at the center line
 
marker_1 = 0.1 * track_width
 
marker_2 = 0.25 * track_width
 
marker_3 = 0.5 * track_width
 
# Offer a greater reward in case the car goes closer to the center line and a less reward if it is far from the center line
 
if distance_from_center <= marker_1:
 
reward = 1.0
 
elif distance_from_center <= marker_2:
 
reward = 0.5
 
elif distance_from_center <= marker_3:
 
reward = 0.1
 
else:
 
reward = 1e-3 # probably got crashed or closed to going off track
 
if not all_wheels_on_track:
 
reward = 1e-3 # Penalizes when car is off track
 
elif speed < SPEED_THRESHOLD:
 
reward *= 0.5 # Penalizes when car is extremely slow
 
return float(reward)
 

  1. Leave the the setting of Training Algorithm as default ⦿ PPO and hyperparameters.
  2. Fill in the Stop Condition and set the Maximum time to 60 minutes.

What happens now?

You have finally gotten your special model configured. The upcoming step will be for creating, training and evaluating your model. Please note that you have not charged anything till this point. Subsequent steps will charge you money based on AWS resource utilization.

  1. After selecting Create Model, AWS resources shall get provisioned for getting your model trained for a period of sixty minutes.

what is AWS DeepRacer

Personal Health Dashboard - AWS Personal Health Dashboard

Personal Health Dashboard

Personal Health Dashboard

The Personal Health Dashboard teaches its users about health events which can effect the user’s account or services.

This data is displayed in two different ways:

– Dashboard displaying the latest and the upcoming events according to categories

–  Full event log displaying every single event that happened in the last 90 days

How can the Personal Health Dashboard be viewed?

  1. Logging into the Management Console, then heading to the Personal Health Dashboard using the following link https://phd.aws.amazon.com/phd/home.
  2. Choose Dashboard for the sake of checking the latest and the upcoming events. Otherwise, click on Event log to see every single event which occurred in the last 90 days.

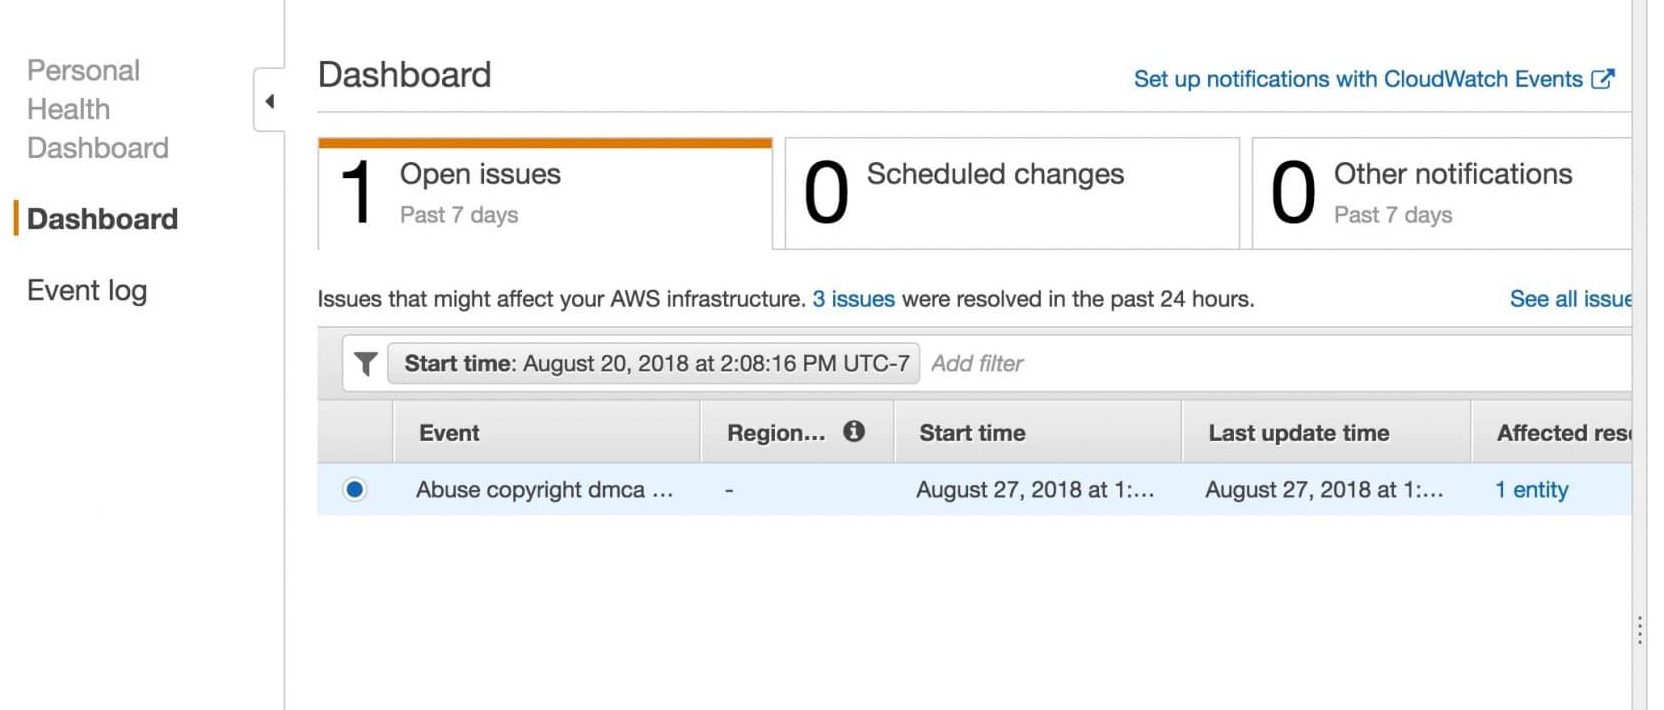
Personal Health Dashboard: The Dashboard

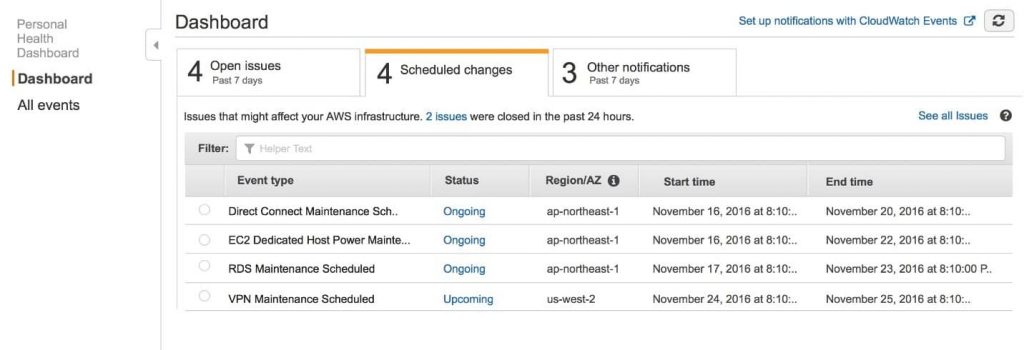
There are 3 groups of issues when using the Personal Health Dashboard:

Personal Health Dashboard - Issues Groups

Personal Health Dashboard – Issues Groups

  1. Open Issues
  2. Scheduled Changes
  3. Other Notifications

Open issues and other notifications: By default, these are restricted to issues having a start time occurring within the past 7 days.

Scheduled Changes: Includes ongoing and upcoming items.

Upon choosing a particular event from dashboard list, you will see the Event Details pane carrying info regarding this event and its affected resources.

Items can be filtered through selecting options in the filter list.

This means that you will be able to search for results by Region, AZ, service, and event end or last update time.

For the sake of viewing every single event applied to your account, and not only the most recent events, click on See all issues which is located at the top of the list for showing the Event log.

Keep in Mind

No notifications can be deleted for events displayed in the Personal Health Dashboard. Whenever a service resolves a particular event, its notification will get removed from the dashboard.

Personal Health Dashboard: Event Log

You can find every single AWS Health event applied to your account from checking the Event log page of the Personal Health Dashboard.

The layout of the column and the way it works are both the same as that of the Dashboard. However, there are extra columns and filter options in the log page for the sections, Status and Event category.

Upon picking a particular event from the Event log list, you will see the Event details pane with information about the event and its affected resources.

Items may be filtered through the selecting options.

This means that you are capable of narrowing the results according to AZ, status, category, event end time or last update time, service, and region.

Personal Health Dashboard: Event types

Health events come in 2 types:

  • Public: service events not specified to a particular account.
  • Account-specific: specified to either the user’s account or an organization’s account.

You can use the following options for the sake of checking whether an event is account-specific or public:

  • In Personal Health Dashboard, click on the Affected resources tab from the page of Event log.
  • With the Health API let the eventScopeCode parameter be returned.

Personal Health Dashboard: Event details pane

There are 2 tabs in the Event details pane.

Details tab showing a description of the event and its related data such as: event status, name, region and AZ, category, start and end time.

Affected resources tab showing data about whichever resources affected by this selected event:

Resource ID or an available or relevant ARN.

Items can be filtered by selecting options in filter list. Also, results may be narrowed by ARN or resource ID.

Personal Health Dashboard: Integrations

From the navigation page, you can choose the Integrations section for listing services which may get enabled with AWS Health. The below services can get integrated with AWS Health.

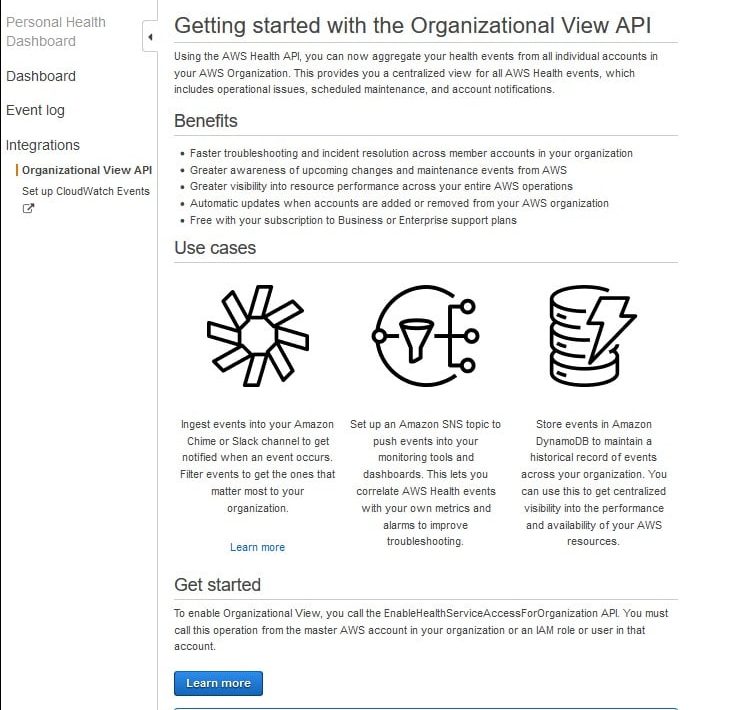
AWS Organizations:

Personal Health Dashboard - Organizational View API

Personal Health Dashboard – Organizational View API

Health events can be checked for every single account in your organization.

Such a feature will offer you complete view for your organization’s events.

The events may be utilized for the sake of keeping track of changes in applications, services and resources.

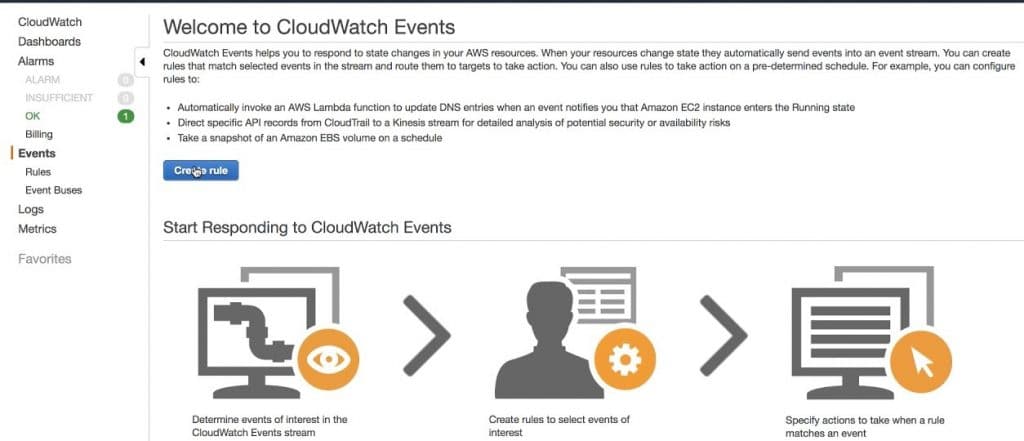
CloudWatch Events:

Personal Health Dashboard - CloudWatch Events

Personal Health Dashboard – CloudWatch Events

CloudWatch Events may be utilized for spotting and reacting to alterations for Health events.

Certain Health events occurring in your account may be monitored. With this, you can formulate rules which will notify you or allow you to perform an action upon event changes.

It is possible to select Set up CloudWatch Events for heading to CloudWatch Events console.

To learn about CloudWatch status check alarms, check out the EC2 Instances: Status Check Alarms guide.

How do AWS Health events’ Alerts Work?

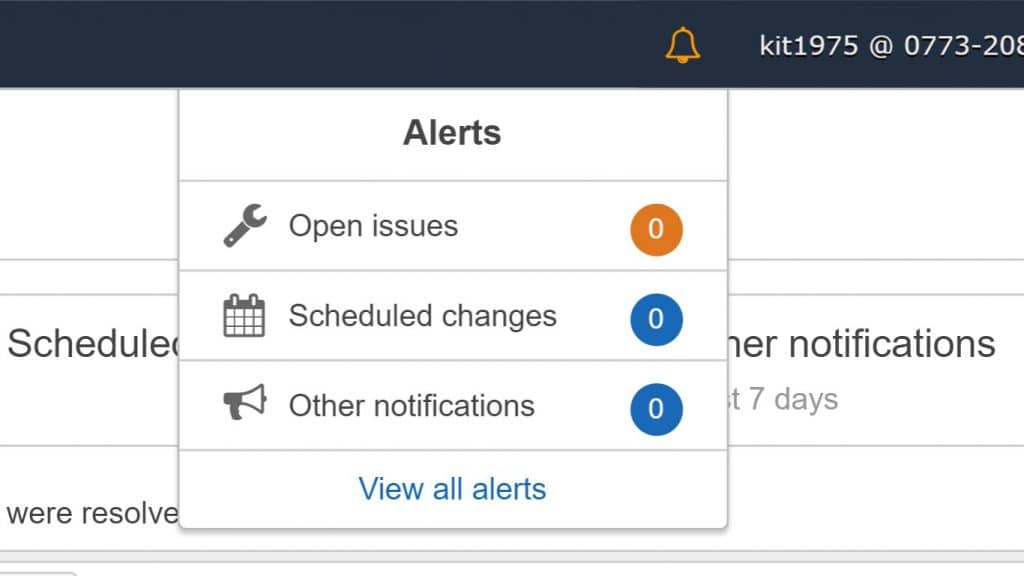
You can find a bell icon on the Personal Health Dashboard’s console navigation bar which has a menu for Alerts.

Personal Health Dashboard - Health Events Alerts

Personal Health Dashboard – Health Events Alerts

Such a feature will show you the number of latest Health events found on the dashboard in every single category.

You can locate this bell icon on multiple AWS consoles, like the IAM, RDS, Trusted Advisor and EC2.

Select the bell icon for the sake of viewing if your account got affected by some latest events.

After that, you are capable of selecting a specific event for the sake of heading to the Personal Health Dashboard to check additional information.

average cost of cloud computing