Amazon S3: Create A Job

Amazon S3: Create A Job

The way an S3 Batch Operations job tends to work:

  1. What is an S3 Job?

It’s the basic unit of work that is used for S3 Batch Operations in AWS.

  1. What does an S3 Job contain?

It includes every single information needed for the execution of a selected operation on a chosen list of objects.

  1. How is an S3 Job created?

You will need to supply S3 Batch Operations with a list of objects as well as setting which action is going to be performed over the selected objects.

  1. Which operations does S3 Batch Operations support?

The below set of operations:

– PUT object tagging

– PUT object ACL

– PUT copy object

– Invoke an AWS Lambda function

– Initiate S3 Glacier restore

How to Create an S3 Batch Operations job?

Learn the way to get an S3 Batch Operations job created.

For the sake of creating a batch job, do the following:

  1. Login to the Management Console and head straight to the S3 console using the following link https://console.aws.amazon.com/s3/.
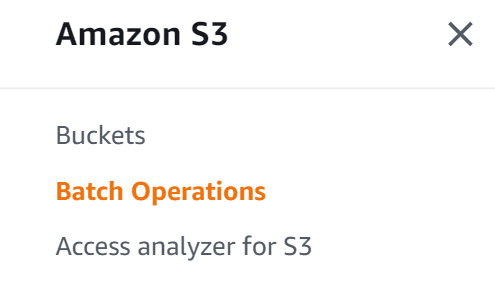
  2. Select the option Batch Operations from the navigation pane of S3 console.
 

3. Click on Create job.
 

4. Select which Region you’d like to get a job created in.


5. For the section of Manifest format, select which type of manifest object you’d like to use.
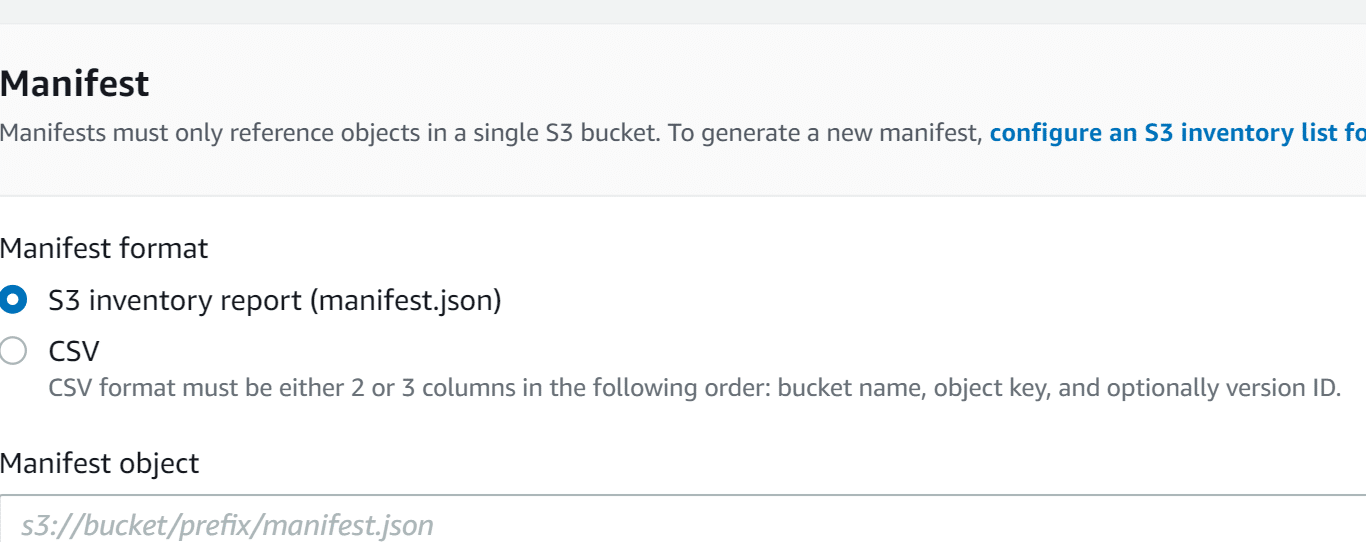
 

    • In case you select the S3 inventory report, fill in the path to the manifest.json object which was generated by Amazon S3 in CSV-formatted Inventory report, and you can optionally enter the version ID for the manifest object in case you choose to use a version different than that of recent one.
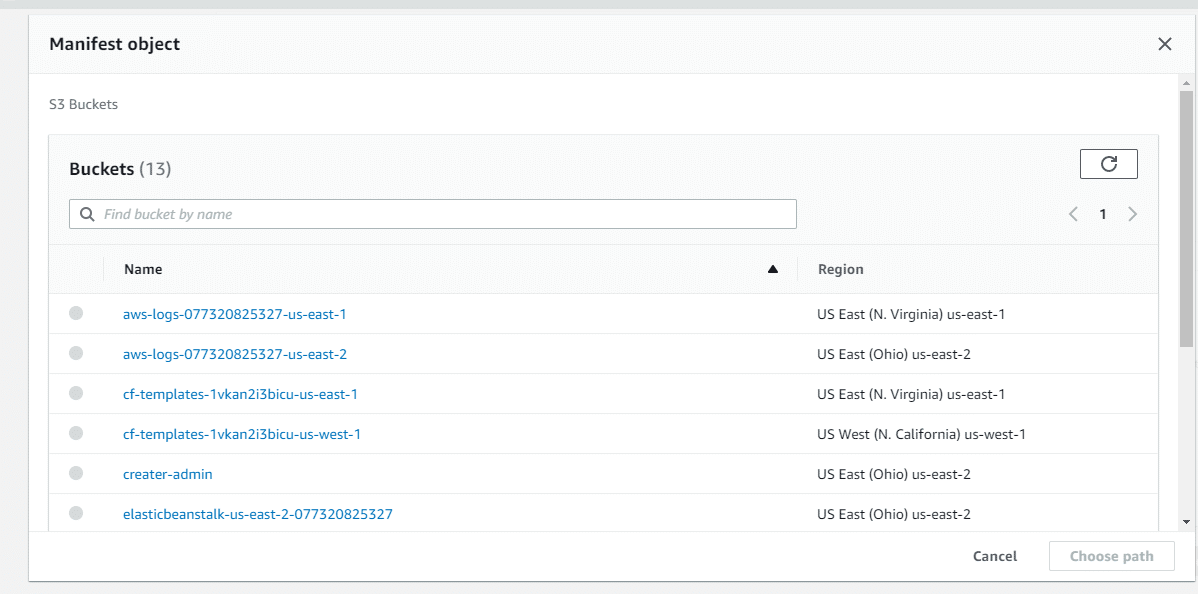
 

In case you select the CSV, fill in the path to a CSV-formatted manifest object. The manifest object needs to be exactly as the format which was shown in the console. You are capable of optionally adding the version ID for the manifest object in case you’d like to utilize a version different than that of the recent one.

6. Click on Next.

7. For the section of Operation, select the operation which you’d like to do on every object which is shown in the manifest. Enter the necessary data for the operation which you selected then click on Next.

8. Enter the necessary data for Configure additional options then click on Next.

9. When you get to the section Review, confirm the settings. In case you’d like to do any changes, click on Previous to go back and do your alterations. If not, then click on Create Job.


How to Specify a Manifest?

You are capable of specifying a manifest in a create job request through 1 of the below listed 2 formats.

– S3 inventory report — Needs to be a CSV-formatted S3 inventory report, and you should identify the manifest.json file which comes along with your inventory report. In case the inventory report contains version IDs, then S3 Batch Operations is going to operate on the specified and chosen object versions.

– CSV file — Every single row included in the file needs to have the following fields: object key, bucket name and object version as an optional field. The object key needs to be URL-encoded, just like the ones in the below examples. The manifest should have either the version IDs for every single object or to omit version IDs for every single object.

Below you can find an example manifest in CSV format with no version IDs:

Examplebucket,objectkey1
Examplebucket,objectkey2
Examplebucket,objectkey3
Examplebucket, photos/jpgs/objectkey4Examplebucket, photos/jpgs/newjersey/objectkey5Examplebucket,object%20key%20with%20spaces

Below you can find an example manifest in CSV format with version IDs:

Examplebucket, objectkey1, PZ9ibn9D5lP6p298B7S9_ceqx1n5EJ0pExamplebucket, objectkey2,YY_ouuAJByNW1LRBfFMfxMge7XQWxMBF
Examplebucket, objectkey3,jbo9_jhdPEyB4RrmOxWS0kU0EoNrU_oIExamplebucket,photos/jpgs/objectkey4,
6EqlikJJxLTsHsnbZbSRffn24_eh5Ny4Examplebucket, photos/jpgs/newjersey/objectkey5,imHf3FAiRsvBW_EHB8GOu.NHunHO1gVsExamplebucket, object%20key%20with%20spaces,9HkPvDaZY5MVbMhn6TMn1YTb5ArQAo3w


Permissions policies format:

– PUT copy object


{    
"Version": "2012-10-17",  
  "Statement": [ 
           {  "Action":
         		   [  "s3:PutObject","s3:PutObjectAcl", "s3:PutObjectTagging" ],            
				       "Effect": "Allow",            
					   "Resource": "arn:aws:s3:::{{DestinationBucket}}
					   /*"        
					   },{ "Action": 
					   [  "s3:GetObject",                
					       "s3:GetObjectAcl",               
						   "s3:GetObjectTagging"          
						     ],           
						   "Effect": "Allow",           
						   "Resource": "arn:aws:s3:::{{SourceBucket}}
						   /*"        },   
						   { 
						   "Effect": "Allow",  
						    "Action": 
						   [ 
						   "s3:GetObject", 
						   "s3:GetObjectVersion",  
						    "s3:GetBucketLocation"           
						   ],            
						   "Resource": 
						   [                
						   "arn:aws:s3:::{{ManifestBucket}}/*"            
						   ]        },       
						   { 
						   "Effect": "Allow", 
						   "Action":
						   [                
						   "s3:PutObject",               
						   "s3:GetBucketLocation"           
						   ],            
						   "Resource": 
						   [                
						   "arn:aws:s3:::{{ReportBucket}}/*"           
						   ]        
					}    
		]}


– PUT object tagging


{

"Version":"2012-10-17",  "Statement":

[    {      "Effect":"Allow",

"Action":

[        "s3:PutObjectTagging",        "s3:PutObjectVersionTagging"      ],      

"Resource": "arn:aws:s3:::{{TargetResource}}/*"    },    

{      "Effect": "Allow",

"Action":

[        "s3:GetObject",        "s3:GetObjectVersion",        "s3:GetBucketLocation"      ],

"Resource":

[        "arn:aws:s3:::{{ManifestBucket}}/*"      ]    },    {      "Effect":"Allow",

"Action":

[        "s3:PutObject",        "s3:GetBucketLocation"      ],      "Resource":

[        "arn:aws:s3:::{{ReportBucket}}/*"      ]

}

]}


– PUT object ACL

{  “Version”:”2012-10-17″,  “Statement”:[    {      “Effect”:”Allow”,      “Action”:[        “s3:PutObjectAcl”,        “s3:PutObjectVersionAcl”      ],      “Resource”: “arn:aws:s3:::{{TargetResource}}/*”    },    {      “Effect”: “Allow”,      “Action”: [        “s3:GetObject”,        “s3:GetObjectVersion”,        “s3:GetBucketLocation”      ],      “Resource”: [        “arn:aws:s3:::{{ManifestBucket}}/*”      ]    },    {      “Effect”:”Allow”,      “Action”:[        “s3:PutObject”,        “s3:GetBucketLocation”      ],      “Resource”:[        “arn:aws:s3:::{{ReportBucket}}/*”      ]    }  ]}


– Initiate S3 Glacier restore

{  “Version”:”2012-10-17″,  “Statement”:[    {      “Effect”:”Allow”,      “Action”:[          “s3:RestoreObject”      ],      “Resource”: “arn:aws:s3:::{{TargetResource}}/*”    },    {      “Effect”: “Allow”,      “Action”: [        “s3:GetObject”,        “s3:GetObjectVersion”,        “s3:GetBucketLocation”      ],      “Resource”: [        “arn:aws:s3:::{{ManifestBucket}}/*”      ]    },    {      “Effect”:”Allow”,      “Action”:[        “s3:PutObject”,        “s3:GetBucketLocation”      ],      “Resource”:[        “arn:aws:s3:::{{ReportBucket}}/*”      ]    }  ]}


– PUT S3 Object Lock retention

{    “Version”: “2012-10-17”,    “Statement”: [        {            “Effect”: “Allow”,            “Action”: “s3:GetBucketObjectLockConfiguration”,            “Resource”: [                “arn:aws:s3:::{{TargetResource}}”            ]        },        {            “Effect”: “Allow”,            “Action”: [                “s3:PutObjectRetention”,                “s3:BypassGovernanceRetention”            ],            “Resource”: [                “arn:aws:s3:::{{TargetResource}}/*”            ]        },        {            “Effect”: “Allow”,            “Action”: [                “s3:GetObject”,                “s3:GetObjectVersion”,                “s3:GetBucketLocation”            ],            “Resource”: [                “arn:aws:s3:::{{ManifestBucket}}/*”            ]        },        {            “Effect”: “Allow”,            “Action”: [                “s3:PutObject”,                “s3:GetBucketLocation”            ],            “Resource”: [                “arn:aws:s3:::{{ReportBucket}}/*”            ]        }    ]}


– PUT S3 Object Lock legal hold

{    “Version”: “2012-10-17”,    “Statement”: [        {            “Effect”: “Allow”,            “Action”: “s3:GetBucketObjectLockConfiguration”,            “Resource”: [                “arn:aws:s3:::{{TargetResource}}”            ]        },        {            “Effect”: “Allow”,            “Action”: “s3:PutObjectLegalHold”,            “Resource”: [                “arn:aws:s3:::{{TargetResource}}/*”            ]        },        {            “Effect”: “Allow”,            “Action”: [                “s3:GetObject”,                “s3:GetObjectVersion”,                “s3:GetBucketLocation”            ],            “Resource”: [                “arn:aws:s3:::{{ManifestBucket}}/*”            ]        },        {            “Effect”: “Allow”,            “Action”: [                “s3:PutObject”,                “s3:GetBucketLocation”            ],            “Resource”: [                “arn:aws:s3:::

{{ReportBucket}}/*”            ]        }    ]}
S3 glacier create a vault

Posted in S3
AWS Lambda Pricing Vs. EC2 - AWS Lambda Vs Amazon EC2

AWS Lambda Pricing Vs. EC2

AWS Lambda Pricing Vs. EC2


The pay-as-you-go principle is used by EC2 and Lambda services as well. Yet, there are a lot of differences between lambda and EC2 pricing model.

  • EC2 Pricing Model:

It charges for every running AWS EC2 instance even when the app or function is not under execution.

Pricing per hour is based on the memory amount, performance of the video card, performance of the CPU, and the capacity of the storage which is utilized by EC2 instances.

It would be better and cost-efficient for you to rely on AWS EC2 instances in case you’d like to keep your app or function available at all times because it having a great number of regular requests.


  • Lambda Pricing Model:


It charges for a number of executions for apps and for the time it takes to get each execution finished.

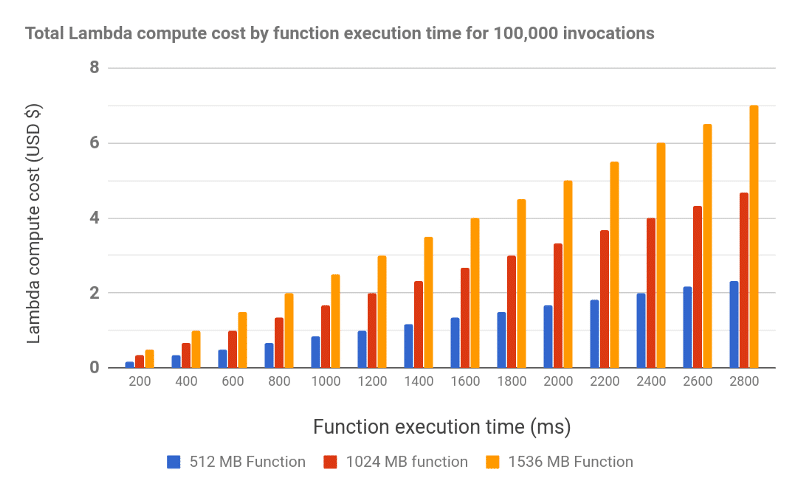
Pricing for every running second of a particular app is based on the amount of provided memory for a specific app which is amounted at $0.00001667 for every single Gigabyte-second.

The execution time for the app is counted from the app’s beginning to the result returning or to the after timeout stopping.

Time will get a round up to the closest multiple of 100ms.

At the time that you require to have on-demand availability, the price for using Lambda for running functions or apps might be considered as a best option.


EC2 is a service which reflects an IaaS and provides the user with the ability to do the following:

– Getting EC2 instances running as VMs

– Running custom applications
– Configuring environments

Lambda is the implementation of FaaS provided by Amazon which gives users the ability to start running their app with no need to think about the underlying infrastructure.

In case there will be a lot of idle time of your app on an EC2 instance which keeps on running, you should think of jumping to Lambda which does not charge you for idle time in the case that no requests are made for running the app. While, in the case that a great number of regular requests are made to run the app, it would be more suitable for you to deploy your app on a continuously running EC2 instance.

With the utilization of EC2 it will come as a best choice for running the following:

– Long-running apps

– High-performance apps

– Apps that can’t undergo a delay at their start time


EC2 vs Lambda in Performance and Availability

EC2:

Upon starting an EC2 instance, it will keep running up till you bring it to a stop manually or get a shutdown task scheduled for it. As soon as an EC2 instance runs, an application will get executed directly on it. Multiple apps can be run at once if the instance’s performance allows this to occur. EC2 instances are a great solution for apps that need to keep running regularly the whole day.


Lambda:

Lambda functions will be available at all times without being run all the time. A Lambda function will be inactive by default, and it will be started as soon as a trigger linked to an event gets activated. Maximum running time for a Lambda function is 900 seconds, which means that the execution of a long-running app in Lambda is not preferred in such cases.


For the sake of completely understanding the way EC2 and Lambda services differ in their pricing and cost, we will go through a few examples:  

  1. Example One:

An app having 5,000 hits every day and every execution taking 100 MS with 512MB.

Lambda Function Cost= $0.16.

Also, having similar requirements, we may choose the EC2 Instance of “t2.nano”.

EC2 Instance Cost= $4.25.

Hence, Lambda cost being $0.16 is merely 4% of the price of EC2 which is $4.25.

  1. Example Two:

An app with many hits, about 5,000,000 every month, and every execution taking 200 MS with 1GB of Memory.

Lambda Cost= $17.67.


Yet, with EC2, for the same requirements we will need the “t3.micros” EC2 Instance for handling such a load.

EC2 Instance Cost= $7.62.

Hence, it is obvious that in such a case, having an EC2 Instance is going to be a less expensive solution than that of using Lambda, because of to the greater requirements for number of requests, memory and execution time.

  1. Example Three:

Multiple EC2 instances are required for the sake of handling the available requests.

In such a case, EC2 is going to be more expensive for 2 major reasons.

– An Application Load Balancer is required for the sake of handling the load balancing between those instances which is going to cost additional expenses.

– EC2 is going to start eating up a bit of the memory that’s getting allocated and traffic won’t get evenly distributed at all times, which will require extra EC2 instances than what was expected.

On the other hand, Lambda is capable of handling the load balancing internally which will result in no additional cost whatsoever as scaling takes place.

Create an application

EC2 lightsail create a disk

AWS EC2 Pricing Calculator

AWS Lightsail – Create A Disk

AWS Lightsail: Create A Disk

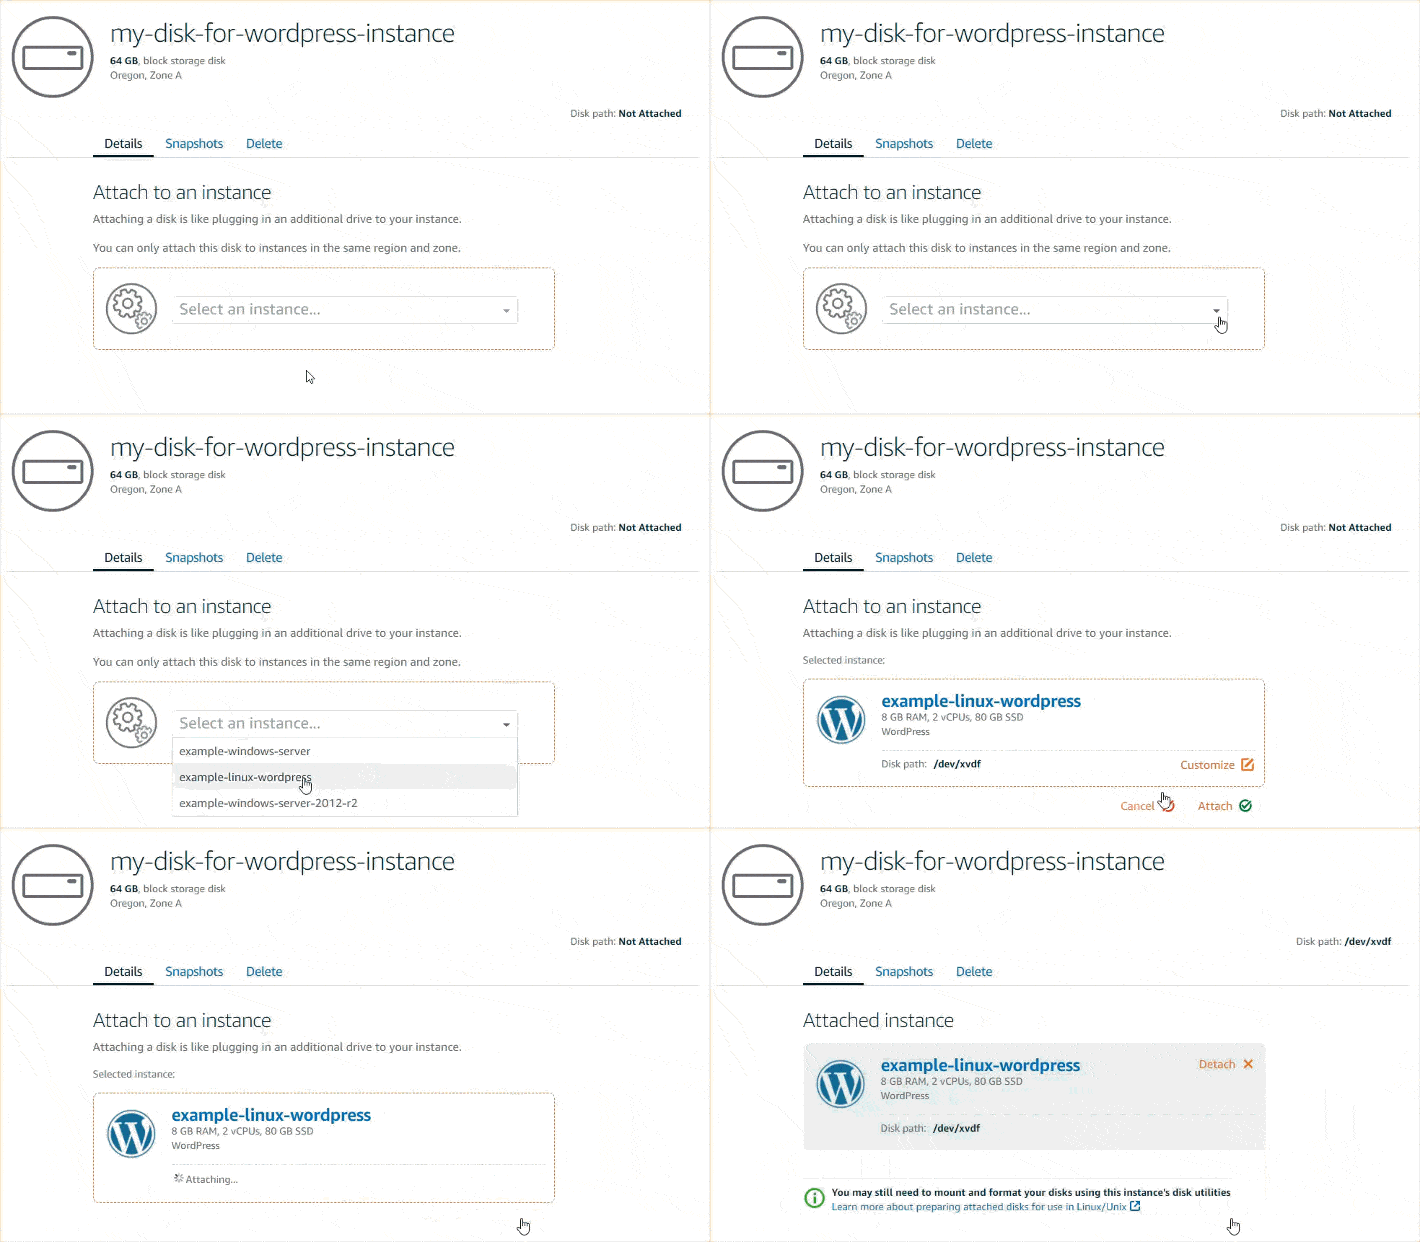
More block storage disks may be created and attached to chosen Lightsail instances.


More block storage disks may be created and attached to chosen Lightsail instances.

Creating a Disk and Attaching it to a Lightsail Instance:

  1. From the Lightsail home page, click on the Storage tab.
  2. Click on Create disk.
  3. Select the Region along with the Availability Zone for the location of your Lightsail instance.
  4. Select a specific size.
  5. Fill in a particularly unique name for this disk.

6. Select an action of the below options for adding some tags to the disk:

  • Add or Edit some key-only tags. Fill in a tag in the tag key text box, then click on Enter. Click on the button Save if you finish with filling in your tags to get them added, or select the option Cancel if you wish not to get them added.

AWS Lightsail


  • Get a key-value tag created, and fill in a key for the Key text box, along with an accompanying value for the Value text box. Click on the Save button as soon as you finish adding tags. Otherwise, click on Cancel if you don’t want to get them added.

Key-value tags may merely get added one by one and prior to saving. For the sake of adding multiple key-value tags to your disk, go over the steps mentioned before.


7. Click on Create disk.

When a couple of seconds pass, the disk will be created and you will be taken to a new page for disk management.

8. Select which Lightsail instance you’d like from this list, then click on the button “Attach” in order to get your new disk attached to this Lightsail instance.

AWS Lightsail

AWS Lightsail

Connecting to the Instance for Formatting & Mounting your Disk:

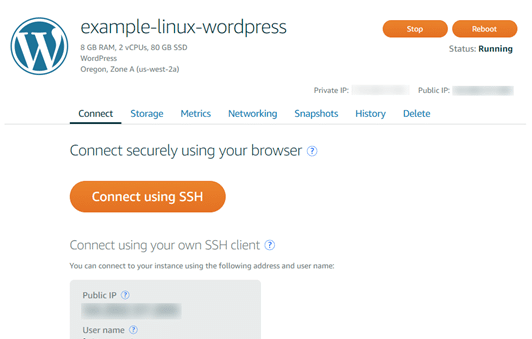
  1. Upon creating and attaching the disk, you will need to head back to “instance management” page located in Lightsail.

You will see that the Connect tab will be shown by default.


2. Click on the button Connect using SSH in order to connect to the Lightsail instance.

3. Enter the below:

lsblk

You will be able to spot an output similar to the below.

NAME MAJ:MIN RM SIZE RO TYPE MOUNTPOINT

xvda 202:0 0 80G 0 disk

└─xvda1 202:1 0 80G 0 part /

xvdf 202:80 0 64G 0 disk

This output that we get for lsblk takes out the /dev/ prefix out of your disk paths.

4. Make up your mind if you’d like to get a file system created on your disk because new disks will be something like raw block devices, which means you will need to preferably get a file system created on them prior to mounting and utilizing them. The disk which is restored from a snapshot will probably already contain a file system on it. In case you get a new file system created over an already found file system, this action will get your data overwritten. Enter the below command in order to get special information shown, including file system type.

sudo file -s /dev/xvdf

The below output should be displayed on a new disk.

/dev/xvdf: data

In case you get an output similar to the one below, this illustrates that this disk has an already existing file system.

/dev/xvda1: Linux rev 1.0 ext4 filesystem data, UUID=1701d228-e1bd-4094-a14c-12345EXAMPLE (needs journal recovery) (extents) (large files) (huge files)

5. Enter the below command if you wish to get an ext4 file system created on your disk. Change device name (like /dev/xvdf) into: device_name. It is possible for you to select from various file system types like ext3 or XFS, depending on what your app needs and what the limitations of your operating system are.

sudo mkfs -t ext4 device_name

A similar output to the one below should be shown.

mke2fs 1.42.9 (4-Feb-2014)

Filesystem label=

OS type: Linux

Block size=4096 (log=2)

Fragment size=4096 (log=2)

Stride=0 blocks, Stripe width=0 blocks

4194304 inodes, 16777216 blocks

838860 blocks (5.00%) reserved for the super user

First data block=0

Maximum filesystem blocks=4294967296

512 block groups

32768 blocks per group, 32768 fragments per group

8192 inodes per group

Superblock backups stored on blocks:

32768, 98304, 163840, 229376, 294912, 819200, 884736, 1605632, 2654208,

4096000, 7962624, 11239424


Allocating group tables: done

Writing inode tables: done

Creating journal (32768 blocks): done

Writing superblocks and filesystem accounting information: done


6. Rely on the below command in order to get a mount point directory created for your disk. A mount point refers to the location of the disk in the file system tree and the location from where you read and write files upon mounting your disk. Change the location of mount_point, to become something like /data.

sudo mkdir mount_point


7. You are capable of making sure of your disk having a file system on it through entering the below command.

sudo file -s /dev/xvdf

In the place of /dev/xvdf: data, an output that looks like the below will be displayed.

/dev/xvdf: Linux rev 1.0 ext4 filesystem data, UUID=0ee83fdf-e370-442e-ae38-12345EXAMPLE (extents) (large files) (huge files)


8. At last, get the disk mounted through entering the below command.

sudo mount device_name mount_point

Getting the Disk Mounted whenever you reboot your instance:

It’s possible that you might need to get this disk mounted whenever you try to reboot a Lightsail instance. In case you choose not to mount it, then this will be an optional step for you.

1. For mounting your disk on all system reboots, get an entry added for your device to the file /etc/fstab.

Get a backup created for your /etc/fstab file which is possible for you to use in case of getting your file deleted or destroyed by accident when you edit it.

sudo cp /etc/fstab /etc/fstab.orig

2. Get the /etc/fstab file opened through whatever text editor you’d like to use, for example “vim”.

The word sudo should be typed prior to getting the file opened in order to be allowed to get your changes saved.

3. Get a new line added at the end of your disk’s file having the below shown format.

device_name mount_point file_system_type fs_mntops fs_freq fs_passno

Finally, this is how your newly added line may look similar to.

/dev/xvdf /data ext4 defaults, nofail 0 2

4. Finish by saving your file then exiting the text editor.

See Also

Create a load balancer

AWS IAM Console – Create A Policy

AWS IAM Console: Create A Policy


How to Create IAM Policies Using the Console?


It’s possible to create a customer managed IAM policy using the Management Console through 1 of the below ways:

  • Import: Importing and customizing a managed IAM policy inside your account. You are capable of importing a customer managed IAM policy or a managed policy which was created before.
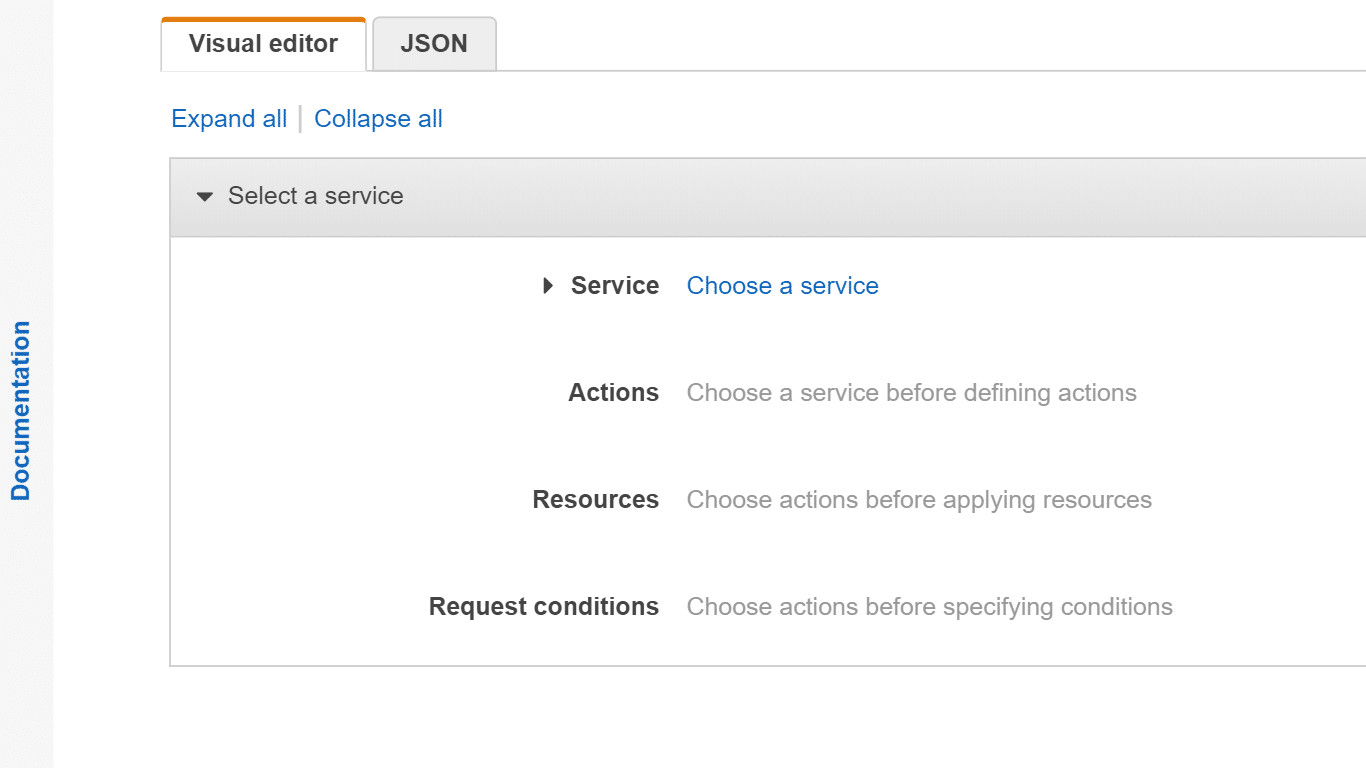
  • Visual editor: Using the visual editor to create a new IAM policy. In this case, there will be no need to learn the JSON syntax.
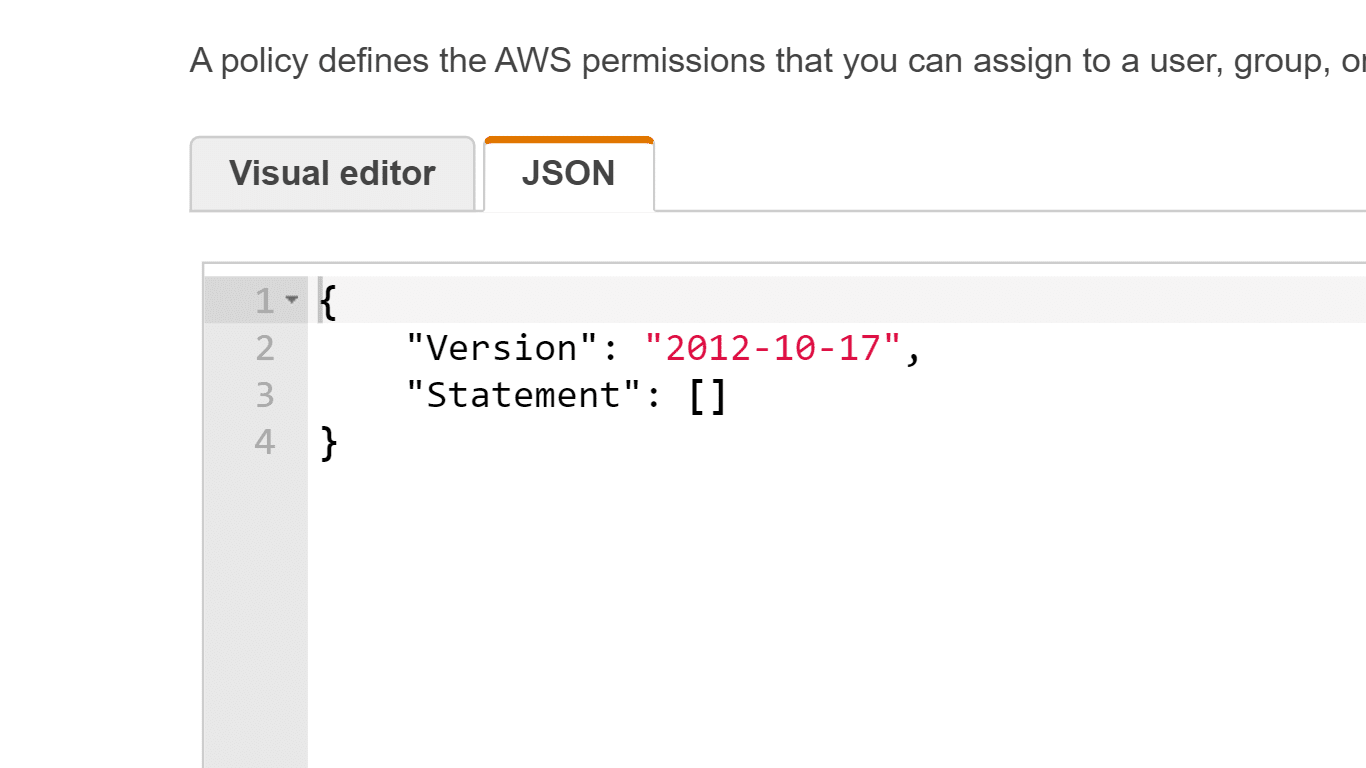
  • JSON: Pasting and customizing an identity-based example policy.

How to Create A Policy on JSON Tab?

Policies can be entered or pasted in JSON through selecting the JSON tab. Such a way is considered of good use for the sake of getting an example IAM policy copied so that it’s utilized in your account.

Your JSON policy document is going to be made up of multiple statements.

For the sake of using the JSON policy editor in order to get a policy created:

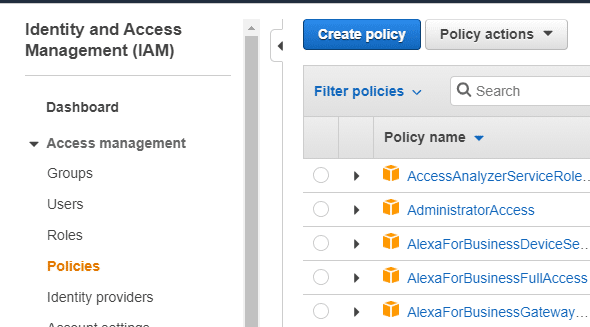
  1. Login to the Management Console then head straight to the IAM console through the following link https://console.aws.amazon.com/iam/.
  2. From left navigation pane, click on Policies.

  1. Select the option Create policy.


  1. Click on the JSON
  2. Enter or paste a chosen JSON policy document.


  1. After finishing, select Review policy, and the Policy Validator will report whatever syntax errors may occur.


Keep In Mind

Switching between Visual editor and JSON tabs can always be made whenever necessary. Yet, in case of performing any changes or selecting Review policy from the tab of Visual editor, your policy can get restructured by IAM for the sake of optimizing it for visual editor.

  1. From Review page, enter a unique Name and an optional Description for this policy. Those settings may not get edited afterwards. Go over the Summary of the policy in order to check the granted permissions by your policy. After that, click on Create policy for saving your work.

Upon finishing the creation of a new IAM policy, you will then be able to get it attached to specific roles, users or groups that you have.

How to Import Existing Managed Policies?

Remember that an inline policy is not capable of being imported.

For the sake of importing in the visual editor an existing managed policy:

  1. Login to the Management Console and head to the IAM console using the following link https://console.aws.amazon.com/iam/.
  2. From left navigation pane, click on Policies.
  3. Select Create policy.
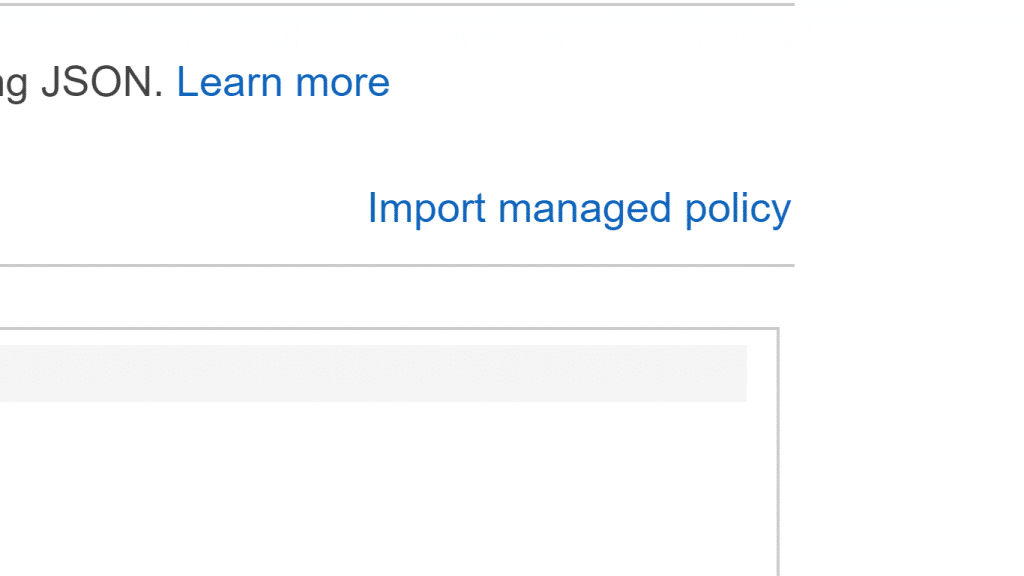
  4. Click on the Visual editor tab, then at the right, select the option Import managed policy.


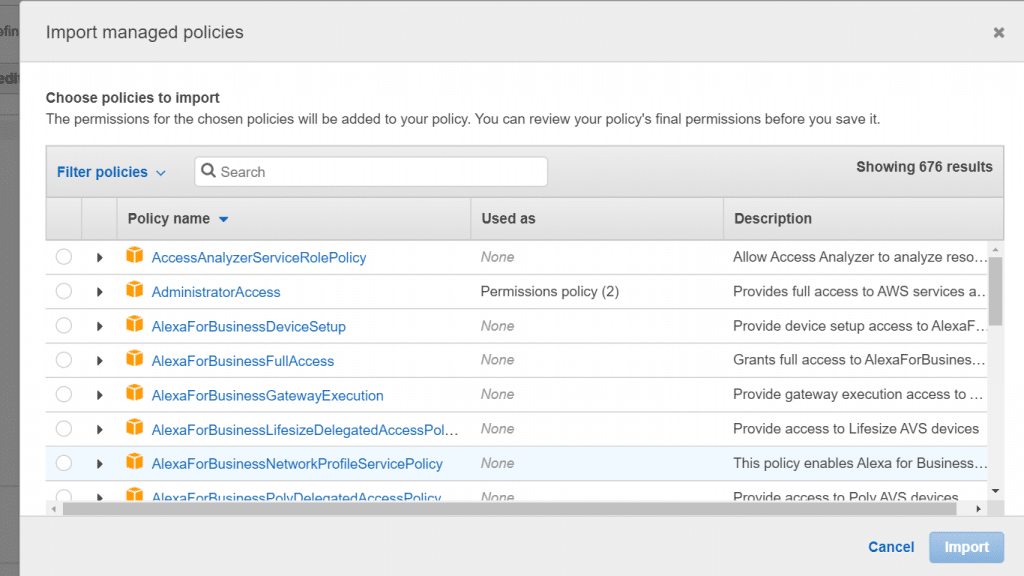
  1. From Import managed policies window, select the managed policies which are similar to the policy you’re going to add to the newly created policy. You are capable of utilizing the Filter menu, otherwise you can enter into the search box that is located above, in order to get specifically required results showing up in the IAM policy list.
  2. Click on Import.

Imported IAM policies will be included in new permission blocks located at the very end of the policy.

  1. Choose to utilize either the Visual editor or JSON for the sake of customizing the policy. After this, click on Review policy.
  2. From Review page, enter a unique Name and an optional Description for this policy. Those settings may not get edited afterwards. Go over the Summary of the policy then click on Create policy for the sake of getting your work saved.

For the sake of importing in the JSON tab an existing managed policy :

  1. Login to the Management Console then head straight to the IAM console using this link https://console.aws.amazon.com/iam/.
  2. From the left navigation pane, click on Policies.
  3. Select the option Create policy.
  4. Select JSON tab, then from the right side, click on Import managed policy.


  1. From Import managed policies window, select the required managed IAM policies which are similar to the policy you’re going to add to the new policy. You are capable of utilizing the Filter menu, otherwise you can enter into the search box that is located above, in order to get specifically required results showing up in the policy list.


  1. Click on Import.

The imported IAM policies’ statements will get added below at the end of your JSON policy.

  1. Get your IAM policy customized in JSON, otherwise select the Visual editor. After that, click on Review policy.
  2. From Review policy page, enter a specific Name and an optional Description for your IAM policy. They are not capable of being edited later on. Go over your policy’s Summary then click on the option Create policy for the sake of getting your work saved.

role modification using the console

AWS S3 Glacier: Create A Vault

AWS S3 Glacier: Create A Vault

You must be wondering first off, what an S3 Glacier vault is, right? Well it’s like a container that is used for the sake of storing your archives, which represent a specific object, like a video, photo or any other document stored in a vault.

An archive represents the base unit of storage in S3 Glacier.

In this tutorial we will be relying on the S3 Glacier management console instead of programmatically for the sake of creating a vault.

To get an archive uploaded and downloaded, you will be using the AWS Software Development Kits for both Java and .NET high-level API.

High-level API will offer you an easy and simple programming experience while you work and operate along with the S3 Glacier.

Keep in Mind

An S3 Glacier allows you to access a management console, which may be utilized for the sake of creating and deleting vaults. Yet, every different interaction made with S3 Glacier will ask you to utilize the CLI or refer to writing code. For instance, in order to get data uploaded, like videos, photos or different documents, you will need to utilize the CLI or otherwise write code for the sake of making requests, through the REST API or the SDKs.

Downloading the Right SDK

Make up your mid first to choose what programming language you prefer to rely on and then download the right SDK for the development platform that you are using.

How to Download SDK for Java?

For the sake of testing Java examples, the SDK for Java is required. The below show how you can download it:

  • In case you’re working with Eclipse, you are capable of downloading and installing the Toolkit for Eclipse through the update site by following this link http://aws.amazon.com/eclipse/.

How to Download SDK for .NET?

For the sake of testing C# examples found in this developer tutorial, you must use the SDK for .NET. You will get the below download options to choose from:

– Visual Studio: Download the SDK for .NET as well as the Toolkit for Visual Studio. This toolkit will give you the AWS Explorer for Visual Studio and the required project templates for you to utilize for your development purposes. For the sake of downloading the SDK for .NET head straight to this link http://aws.amazon.com/sdkfornet. the installation script will directly download the SDK along with the Toolkit for Visual Studio.

– Any different IDE for creating your app: Go to the exact link which was given to you in the previous step then just download the SDK for .NET.


How to Create a Vault in Amazon S3 Glacier?

What do we mean by a vault? Well, it is simply the container which we use to store our archives. As a first step in this tutorial, it will be to get a vault created in a supported AWS Region.

Now, we will be creating a vault in US West (Oregon) Region.

Vaults are capable of being created either through the S3 Glacier Console or programmatically. In the following tutorial we will be using the console for creating our vault.

For the sake of creating a vault:

  1. Login to your Management Console and head straight to the S3 Glacier console through the following link https://console.aws.amazon.com/glacier/.
  2. Choose a specific Region from the top Region selector tab.

For this tutorial, we are going to use US West (Oregon) Region.

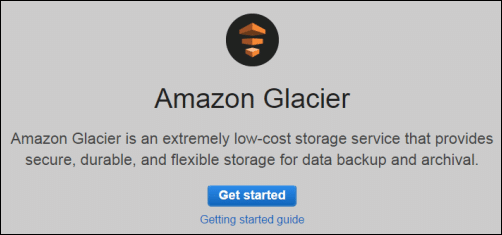
3. In case it’s your first experience with S3 Glacier, click on the button showing “Get started”. (If it’s not your first time, you will see a different button to click on having the words “Create Vault”.)

Amazon Glacier - Getting Started Page

Amazon Glacier – Getting Started Page


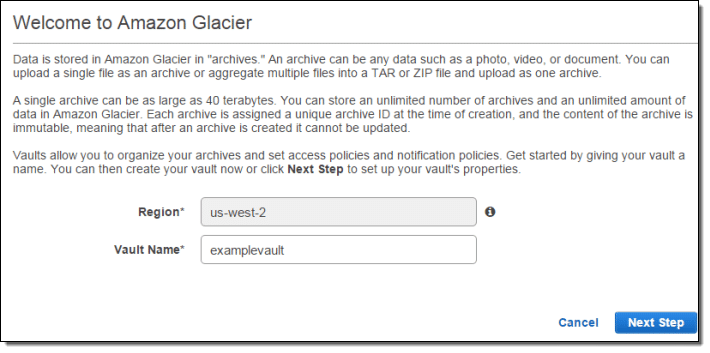
4. Type in “examplevault” for the vault name inside the Vault Name text box then choose the button Next Step.


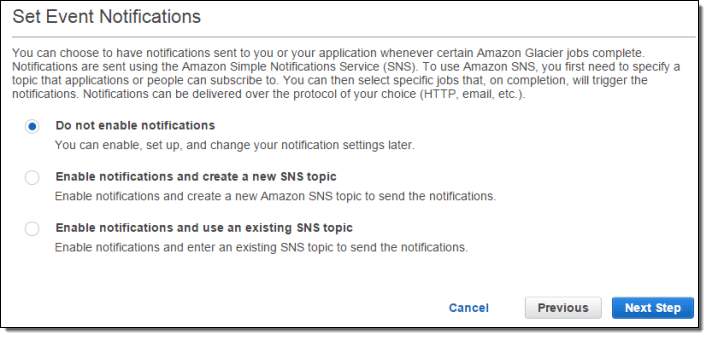
5. Choose the option of Do not enable notifications. In this tutorial, there is no need to configure notifications for the vault that you are creating.

In case you needed to get notifications sent to you or your app at the time that specific S3 Glacier jobs get finished, you should choose the option of Enable notifications and create a new SNS topic, or the option of Enable notifications and use an existing SNS topic for setting up Amazon SNS notifications. The coming steps will let you upload an archive then get it downloaded through high-level API of SDK. Working with high-level API will not need you to get vault notification configured for retrieving data.


6. In case the entered Vault name and Region turn out to be correct, later select the Submit button.


7. A newly created vault will be shown in the list located on the page of S3 Glacier Vaults.

S3 inventory pricing

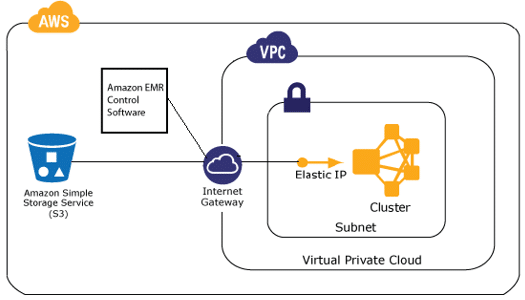
Amazon EMR – Create Cluster

Amazon EMR: Create Cluster


First: Sample Cluster Prerequisites

Prior to getting your EMR cluster set up, you need to ensure that you’ve completely finished the following prerequisites.


Signing Up for an AWS Account:

In case you still don’t have an AWS account, go over those steps and create one.

How to sign up for a new account

  1. Go to the following link https://portal.aws.amazon.com/billing/signup.
  2. Go over the instructions that are provided online.

Creating S3 Bucket:

You bucket and your folder names include the below limitations:

  • Contains nothing but letters, hyphens, numbers and periods.
  • Not ending in numbers.

Upon creating the bucket, select it then click on Create folder, change the name New folder to another name which identifies it, then click on Save.

Creating EC2 Key Pair:

An EC2 key pair is needed for connecting over a secure channel to the nodes in the cluster with SSH protocol. Go over 1 of the below procedures based on the operating system that you are using.

  • Create Key Pair through EC2 with Windows Instances.
  • Create Key Pair through EC2 with Linux Instances and Mac OS.


Second: Sample EMR Cluster Launching

Launching Sample Cluster:

How to launch sample EMR cluster?

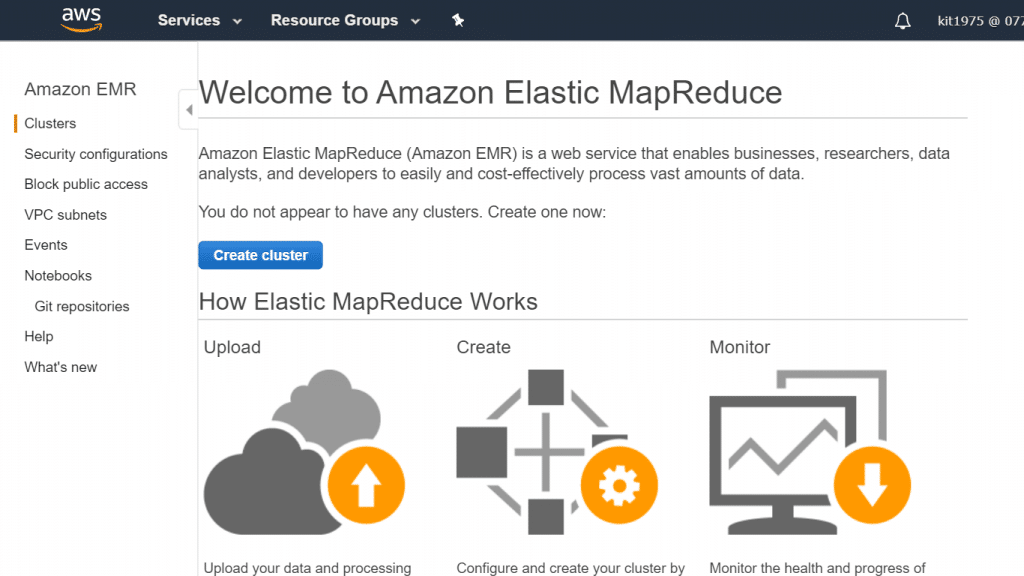
  1. Login to Management Console and head straight to the EMR console using this link https://console.aws.amazon.com/elasticmapreduce/.


  1. Click on Create cluster.

  1. From the page Create Cluster – Quick Options, confirm all default values excluding the below fields:
  • Type in a unique Cluster name for distinguishing and identifying your cluster, like First Sample EMR Cluster.


  • For the section of Security and access, select the EC2 key pair which you previously created as a prerequisite.
  1. Click on Create cluster.

This will then take you straight to the cluster status page which has the cluster Summary. This page may be utilized for the sake of monitoring how the cluster creation is progressing and viewing cluster status details. When the cluster creation tasks are completed, the items that are found on the status page will get updated directly. If they don’t automatically update, select the refresh icon which is located on the right side, otherwise get your browser refreshed for receiving the new updates.

For the section Network and hardware, locate the instance status of Master and Core. You will notice that the status will be changing from Provisioning then Bootstrapping then Waiting while the cluster creation process takes place.


Upon the appearance of links for Security groups for Master and Security Groups for Core & Task, you are capable of move on to the next step. However, you must be patient while waiting for the cluster to successfully start and being in the Waiting state.

Quick Options (Summary)

This table shows the fields and default values for launching your cluster in EMR console with the option Quick cluster configuration.

Console fieldsDefault valuesDescriptions
Cluster nameMy cluster(Optional)
An identifying name for the cluster with no need to make it unique.
LoggingEnableWith this being enabled, a detailed log data will be written to the S3 folder which was specified.
S3 folders3://aws-logs-account_number-region/elasticmapreduce/Gives the path to which folder of an S3 bucket for writing your log data.
Launch modeClusterThis option specifies whether to launch a long-running cluster or a cluster that terminates after running any steps that you specify.
Having the Cluster option, your cluster will keep on running till you choose to terminate it.
Releaseemr-5.30.0For the EMR release version to be utilized upon the cluster creation.
ApplicationsCore HadoopChooses open-source applications from the a great data ecosystem for installing on the cluster.
Instance typem5.xlargeChooses which EC2 instance type is going to be initialized for the instances running in the cluster.
Number of instances3To choose how many EC2 instances are going to be initialized. Every instance reflects a node that is found in the EMR cluster. A minimum of  node is needed, and it will correspond to the master node.
EC2 key pairChoose an optionChooses which EC2 key pair is going to be used for performing the connection to the nodes located in the cluster over an SSH connection. It is better if you go ahead and create then specify an EC2 key pair on your own so that it’s something unique and well known to you.
PermissionsDefaultFor choosing which AWS Identity and Access Management roles this cluster is going to be using. You are capable of selecting Custom for the sake of specifying the roles you need. It is better for you to rely on the default roles as a start.

AWS