EC2 Instances Status Check Alarms - CloudWatch Alarms

EC2 Instances: AWS Status Check Alarms

EC2 Instances: AWS Status Check Alarms

How to Create and Edit Status Check Alarms?

It is possible to utilize the status check metrics for creating status check alarms in CloudWatch alarms in order to notify you when an instance gets a failed status check.

Create a Status Check Alarm through the Console

Follow the below process for the sake of configuring an alarm that will send you a notification through your email, or stop, terminate, or even recover an instance whenever it fails in a status check.

How to create a status check alarm using the console?

  1. Go to the Amazon EC2 console through this link https://console.aws.amazon.com/ec2/.

    EC2 Instances Status Check Alarms - EC2 Console

    EC2 Instances Status Check Alarms – EC2 Console

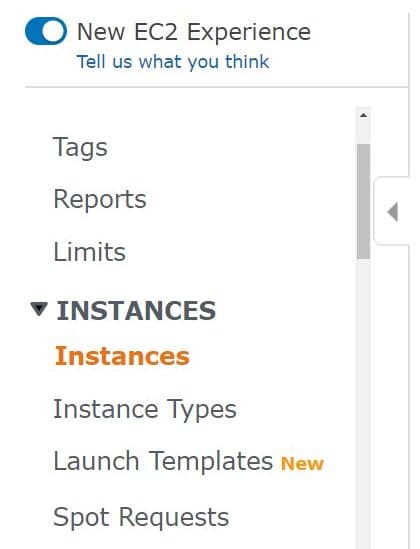
  2. From navigation pane, select Instances.
AWS Status Check Alarms - Select an EC2 Instance

AWS Status Check Alarms – Select an EC2 Instance

  1. Choose an instance, select the Status Checks tab, then click Create Status Check Alarm.
EC2 Instances Status Check Alarms - Click on Create Status Check Alarm

EC2 Instances Status Check Alarms – Click on Create Status Check Alarm

  1. Choose to Send a notification to. Select an already existing SNS topic, or otherwise click create a topic to create a new one. If you choose to create a new topic, inside With these recipients, type in your email address + addresses of other needed recipients while being separated by commas.
EC2 Instances Status Check Alarms - Add Recipients

EC2 Instances Status Check Alarms – Add Recipients

  1. It is optional to click on Take the action, then choose the action you’d want to take.
EC2 Instances Status Check Alarms - Choose an Action

EC2 Instances Status Check Alarms – Choose an Action

  1. For Whenever, choose the status check you want to get notified about.
EC2 Instances Status Check Alarms - Choose Status Check to get Notified

EC2 Instances Status Check Alarms – Choose Status Check to get Notified

If you have previously chosen Recover this instance during the prior step, choose Status Check Failed (System).

  1. In the section named For at least, specify what number of periods you’d like to evaluate and in consecutive section periods, choose the evaluation period duration prior to the triggering of the alarm and the sending of an email.
EC2 Instances Status Check Alarms - Enter Consecutive Periods

EC2 Instances Status Check Alarms – Enter Consecutive Periods

  1. As an optional step, In the section named Name of alarm, change the default name with a new name for the chosen alarm.
EC2 Instances Status Check Alarms - Enter a Name for the Alarm

EC2 Instances Status Check Alarms – Enter a Name for the Alarm


  1. Click on Create Alarm.
EC2 Instances Status Check Alarms - Click on Create Alarm

EC2 Instances Status Check Alarms – Click on Create Alarm

Important Note

In case you have decided to add an email address to the list of recipients or otherwise went with creating a new topic, Amazon SNS will send you a subscription confirmation email message to every new specified address. Every one of the recipients needs to confirm the subscription by selecting the link included in that message. Alert notifications are going to be merely sent to the confirmed addresses.

In case you find yourself in need of making changes to an instance status alarm, you may simply choose to edit it.

Edit an AWS Status Check Alarm Using the Console

How to edit a status check alarm through the console?

  1. Go straight to the Amazon EC2 console using this link https://console.aws.amazon.com/ec2/.
  2. From under the navigation pane, select Instances.
  3. Choose one of the instances and select ActionsCloudWatch Monitoring, and Add/Edit Alarms.
EC2 Instances Status Check Alarms - Add,Edit Alarms

EC2 Instances Status Check Alarms – Add,Edit Alarms

  1. From inside the Alarm Details dialog box, select a name of an alarm.
  2. From inside the Edit Alarm dialog box, perform the required changes you want, then click on Save.

Create an AWS Status Check Alarm Through AWS CLI

In the below-mentioned example, you will see that the alarm is going to publish a notification to an SNS topic, arn:aws:sns:us-west-2:111122223333:my-sns-topic, as soon as the instance fails one of the following cases: the instance check or the system status check for a minimum of 2 consecutive periods. The CloudWatch metric which gets utilized here is the StatusCheckFailed.

How to create a status check alarm through the AWS CLI?

  1. Choose an already existing SNS topic or go ahead and start creating a new one.
  2. Utilize the below stated list-metrics command for the sake of viewing all of the available Amazon CloudWatch metrics for your Amazon EC2.

AWS Sloudwatch list-metrics –namespace AWS/EC2

  1. Utilize the below stated put-metric-alarm command for the goal of creating the alarm.

aws cloudwatch put-metric-alarm –alarm-name StatusCheckFailed-Alarm-for-i-1234567890abcdef0 –metric-name StatusCheckFailed –namespace AWS/EC2 –statistic Maximum –dimensions Name=InstanceId,Value=i-1234567890abcdef0 –unit Count –period 300 –evaluation-periods 2 –threshold 1 –comparison-operator GreaterThanOrEqualToThreshold –alarm-actions arn:aws:sns:us-west-2:111122223333:my-sns-topic

The period refers to the time frame taken in seconds, during which the Amazon CloudWatch metrics will get collected. In this mentioned example, the period used is 300, which means 60 seconds taken and multiplied by five minutes.

The evaluation period refers to the number of utilized consecutive periods during which the value of the metric is required to always be compared to the threshold. In this example, the value used is 2. The alarm actions mean the actions to be performed as soon as this alarm is triggered. In this example, the alarm to send an email is going to be configured through the use of Amazon SNS.

See Also

AWS lambda pricing vs ec2


Locking an S3 Object - Go to Object Lock Section

Locking an S3 Object

Locking an S3 Object


For locking an S3 Object go over the steps listed in the following tutorial.

With Amazon S3 object lock, you can store objects in Amazon S3 using a write-once-read-many (WORM) model. You can use Amazon S3 object lock to prevent an object from being deleted or overwritten for a fixed amount of time or indefinitely.

Before you lock any objects, you have to enable a bucket to use Amazon S3 object lock. You enable object lock when you create a bucket. After you enable Amazon S3 object lock on a bucket, you can lock objects in that bucket. When you create a bucket with object lock enabled, you can’t disable object lock or suspend versioning for that bucket.

To lock an Amazon S3 object:

  1. Login to the Management Console and head to the S3 console at https://console.aws.amazon.com/s3/.
  2. From the Bucket name list, start by choosing the name of the bucket you want to work with.

    Locking an S3 Object - Select a Bucket

    Locking an S3 Object – Select a Bucket

  3. From the Name list, select the name of the object for placing a lock on.

    Locking an S3 Object - Enter a Bucket Name

    Locking an S3 Object – Select an Object

  4. Click on Properties.
Locking an S3 Object - Select on Bucket Properties Tab

Locking an S3 Object – Select on Bucket Properties Tab

  1. Select Object lock.

    Locking an S3 Object - Go to Object Lock Section

    Locking an S3 Object – Go to Object Lock Section

  2. Select retention mode. The Retain until date may be changed. A legal hold may also be enabled.
Locking an S3 Object - Change Object Lock Properties

Locking an S3 Object – Change Object Lock Properties

  1. Click the Save


S3 Object Locks Management:

It allows you to store objects in Amazon S3 by the following model: write once, read many (WORM).

It can be used for performing the following options on the object lock status of objects:

– View

– Configure

– Manage

Viewing Lock Information:

Object lock status can be viewed through GET Object or HEAD Object commands, that give back object version’s retention mode (Retain Until Date) and legal-hold status.

s3:GetObjectRetention permission is required for viewing object version’s retention period and mode.

s3:GetObjectLegalHold permission is required for viewing object version’s legal hold status.

When we GET or HEAD an object version without the required permissions for viewing lock status, this request will still succeed. (information that you don’t have permission to view isn’t returned)

If a bucket has a default retention configuration and you would like to view it, you will need to request its object lock configuration. In order to do so, you will need to have the s3:GetBucketObjectLockConfiguration permission. (In case of requesting for object lock configuration for a bucket with no object lock, an error shall be returned)

S3 inventory reports can be configured for all the bucket’s objects to have the below:

– Retain Until Date

– Object lock Mode

– Legal Hold Status

Bypassing the Governance Mode:

You can perform operations on object versions that are locked in governance mode as if they were unprotected if you have the s3:BypassGovernanceRetention permission.

Some of those operations are:

– Deletion of an object version

– The shortening of retention period

– The removal of object lock through adding a new lock of empty parameters

By clearly stating in the request that you wish to bypass a governance mode, you will be able to bypass it. To do so, you will need to include x-amz-bypass-governance-retention:true header along with the request. Management Console will directly apply this header for all requests that are placed through the console with permission to bypass governance mode.

By bypassing governance mode, the object version’s legal hold status will not be affected whatsoever. When a legal hold is enabled on an object version, it will remain in force and not allow any requests to overwriting and deleting object version.

Configuring Events and Notifications:

S3 events may be configured for object-level operations through the utilization of an object lock bucket. In the case the following calls have object lock metadata: PUT Object, HEAD Object, and GET Object, their events will contain the values of those metadata. In case the object lock metadata gets’ either added or updated for a specific object, events will also be triggered due to those actions. Such events will take place when you choose:

– PUT or GET object retention

– The legal-hold information

AWS CloudTrail will help you utilize the event notifications in order to start:

– Tracking access to object lock configurations and data

– Tracking changes to object lock configurations and data

– Generating alerts based on this data

How to Set Retention Limits:

Through a bucket policy, maximum and minimum allowable retention periods can be set for your bucket. This is done with the help of the condition key of: s3:object-lock-remaining-retention-days. In the bellow bucket policy, we have a minimum retention period of ten days being set.

{

“Version”: “2012-10-17”,

“Id”: “<Policy1436912751980>“,

“Statement”: [

{

“Sid”: “<Stmt1436912698057>“,

“Effect”: “Deny”,

“Principal”: “*”,

“Action”: [

“s3:PutObjectRetention”

],

“Resource”: “arn:aws:s3:::<example-bucket>/*”,

“Condition”: {

“NumericGreaterThan”: {

“s3:object-lock-remaining-retention-days”: “10”

}

}

}

]

}


When a bucket is the destination bucket for a replication policy, in order to set up retention periods for object replicas, the following action must be included in the bucket policy: s3:ReplicateObject.

Delete Markers + Object Lifecycles:

It’s not possible to delete a protected object version, but there’s the choice to create a delete marker for it.

By putting a delete marker on an object, you will still not be able to delete any of its versions, yet it causes Amazon S3 to work so as if the object was actually deleted.

It’s important to know the following:

– WORM-Protection does not accompany delete markers no matter what the retention period or the legal hold that are on this object.

– On protected objects and placing delete markers, configurations for lifecycle management configurations remain normally functional.

– Lifecycle configuration does not cause deletion or overwriting of Protected object versions.

Obtaining an S3 Object Lock with Replication:

Follow the below steps to achieve the following options across buckets that are found in different or similar Regions:

– Automatically enabling object lock + replication

– Asynchronously copying locked objects + retention metadata

With replication, source bucket objects get replicated to another destination bucket.

For setting up the object lock + replication, select one of the below ways:

First Option: Enabling the object lock firstly.

  1. Go first and enable object lock either for: destination bucket only, or source and destination bucket both together.
  2. Start setting up replication between: source bucket and destination bucket.

Second Option: Setting up replication firstly.

  1. Start by setting up replication between: source bucket and destination bucket.
  2. Then, get the object lock enabled for: destination bucket only, or both source bucket and destination bucket.
Locking an S3 Object - Object Lock Disabled

Locking an S3 Object – Object Lock Disabled

For finishing step 2, you are going to have to contact AWS Support, to check that replication has a perfect configuration.

Prior to contacting AWS Support, the below requirements must be reviewed for the set-up of object lock with replication:

  • Object lock should be enabled on the destination bucket.
  • You must grant two new permissions on the source S3 bucket in the AWS Identity and Access Management (IAM) role that you use to set up replication.

Two new permissions:

– s3:GetObjectRetention

– s3:GetObjectLegalHold.

A role would satisfy the requirement when there’s s3:Get* permission on it.

s3 object key

How to create a job on Amazon S3

Posted in S3
AWS CloudTrail View Events in Console - Event History in CloudTrail Console

AWS CloudTrail: View Events in Console

AWS CloudTrail: View Events in Console

You can view events in console using the AWS CloudTrail console which provides you with the ability to check the latest ninety days of API events and activity records in a Region, and download a file having this information or specific data according to filters and chosen time range.

AWS CloudTrail View Events in Console - Download Event

AWS CloudTrail View Events in Console – Download Event

When 90 days pass, they will not be viewed in Event history.

It’s possible to search for and filter events using types of resources of specific services.

Customizing the view of Event history can be easily made through choosing specific columns to get displayed in the console.

Event history cannot simply be deleted by users.

Trails allow you to view events logged to them for an unlimited time while they are stored in a configured S3 bucket.

Keep in Mind:

In order to keep a continuous record of events and activity, you will have to start creating a trail. By doing so, you will benefit from the below integrations:

– Logging Insights events, for the sake of identifying and responding to any unusual activity occurring when performing write management API calls.

– Analyzing service activity using Athena queries.

– Monitoring trail logs with notification of particular activity occurrences using CloudWatch Logs.

Viewing CloudTrail events

  1. Login to Management Console then go straight to CloudTrail console using the link https://console.aws.amazon.com/cloudtrail/home/.
AWS CloudTrail View Events in Console - Event History in CloudTrail Console

AWS CloudTrail View Events in Console – Event History in CloudTrail Console

  1. From navigation pane, select the option Event history.
AWS CloudTrail View Events in Console - View Event History

AWS CloudTrail View Events in Console – View Event History

Your list of events shall appear filtered having the newest event appearing first in the list. In order to check out additional event you will need to continue on scrolling down.

By default, Event history to exclude read-only events. If you don’t want this filter, or in case you’d like to add other filters, you will simply need to alter filter settings.

How to Display CloudTrail Events?

Event history display may be customized through the selection of specific columns that are needed to be displayed in the console.

The below listed columns will be displayed by default:

– Resource type

– User name

– Resource name

– Event time

– Event name


Keep in Mind:

You cannot change the order of columns is not capable of being altered nor can users delete events from Event history.

Customizing columns in Event history

  1. Login to the Management Console. Go to the CloudTrail console using this link https://console.aws.amazon.com/cloudtrail/home/.
  2. In the navigation pane, select Event history.
AWS CloudTrail View Events in Console - Event History in CloudTrail Console

AWS CloudTrail View Events in Console – Event History in CloudTrail Console

  1. Click on the gear icon.
AWS CloudTrail View Events in Console - Show,Hide Columns for Event History

AWS CloudTrail View Events in Console – Show,Hide Columns for Event History

  1. Choose which columns you’d like to display using the Show/Hide Columns. Remove whatever columns you don’t need. After completing you’re check, click on Save.

    AWS CloudTrail View Events in Console - Attribute Filters for Event History

    AWS CloudTrail View Events in Console – Attribute Filters for Event History

How to Filter CloudTrail Events?

The default display of events in Event history uses the Read only attribute filter, which is specified as false, in order not to include the read-only events in your list of displayed events.

It may be removed in order to show read events and write events at the same time.

In case you decide to go for viewing nothing other than read events, simply set the value to become as true.

Different attributes may be used for filtering events along with time range.

Keep in mind:

Just 1 attribute filter + time range filter can be applied.

Multiple attribute filters cannot be applied together.

AWS CloudTrail View Events in Console - Attribute Filters for Event History

AWS CloudTrail View Events in Console – Attribute Filters for Event History

– Event name

May be filtered on IAM events. For example: EC2 events, like RunInstances, or CreatePolicy.

AWS access key

Access key ID which signed the request. In case a request was made with temporary security credentials, it will be the access key ID of those temporary credentials.

– Read only

Category of read type for an event. Events can be read or write. In case they are specified as false, there won’t be any read events shown. (such an attribute filter will apply with a value of false.

– Event ID

CloudTrail ID, which is unique for every event.

– Event source

Which service had the request. For example: s3.amazonaws.com or iam.amazonaws.com. It’s possible to check all available event sources upon selecting Event source filter.

– Resource name

Name/id, such as i-1234567 for an Instance, or auto-scaling-test-group for an Auto Scaling group.

– User name

User identity which was referenced by event, such as: IAM role name, service role, or IAM user.

– Resource type

Resource type which was referenced by event, such as a DBInstance for RDS and an Instance for EC2. They are different for every service.

Time range

For the sake of filtering events (last 90 days).

In case no events were logged according to the attribute or the time you needed to find, then the list would appear as empty.

1 attribute filter may be added other than the time range. In the case that you tend to select another attribute filter, the time range you have set will be preserved.

Check out the below steps to learn the way of filtering by attribute:

Filtering by attribute:

  1. Click on Select attribute, and enter or select a value for the Enter lookup value
AWS CloudTrail View Events in Console - Select Attribute Filters for Event History

AWS CloudTrail View Events in Console – Select Attribute Filters for Event History

  1. For the sake of removing an attribute filter, click on the “X” which can be shown on the right-side attribute filter box.

Check out the below steps to learn the way of filtering by:

– Start date and time

– End date and time

Filtering by start date and time, and end date and time:

  1. Click on Select time range.

    AWS CloudTrail View Events in Console - Select Time Range

    AWS CloudTrail View Events in Console – Select Time Range

  1. For the sake of removing a time range filter, select the calendar icon which is located right side of Time range box, and select the Remove
AWS CloudTrail View Events in Console - Calendar for Time Range

AWS CloudTrail View Events in Console – Calendar for Time Range

creating a trail on AWS CloudTrail

AWS CloudTrail Create A Trail - Trail Process

AWS CloudTrail Create Trail

AWS CloudTrail Create Trail

There are a couple of limitations that accompany the view of events that show recent activity through the CloudTrail console and some of which include:

– Can only view according to recent activity

– Not every event which is capable of being recorded through CloudTrail may be viewed

– Limited view of events to the Region of sign in

You will need to create a trail in order to be able to create continuous recordings of activity while having information for every single Region.

It is recommended that the first trail must be one which logs every management event in every single Region, without logging data events.

Management event examples:

– Security events: IAM CreateUser – AttachRolePolicy

– Resource events: RunInstances – CreateBucket

First off, you must go ahead and create an S3 bucket for the sake of storing your log files there for the trail, which will be a way of creating the trail in CloudTrail console.

Important for you to know:

In the following tutorial, you are going to learn how to create your very first trail. According to what number of trails found in your account, and the way they get configured, the upcoming steps may possibly incur some expenses. Also, CloudTrail is going to store your log files in one of your chosen S3 buckets.

  1. Login to your Management Console through your configured IAM user for CloudTrail administration. Then, go to the CloudTrail console through the following link https://console.aws.amazon.com/cloudtrail/home/. From Region selector, select the Region where you’d like to create your trail. It’s going to be Home Region for the trail.
AWS CloudTrail Create Trail - Trail Region Selector

AWS CloudTrail Create Trail – Trail Region Selector

Keep in mind:

Home Region: only possible Region for viewing and updating your trail upon its creation, regardless of whether this trail is going to log events in every single Region.

AWS CloudTrail Create Trail - Select Trails

AWS CloudTrail Create Trail – Select Trails

AWS CloudTrail Create Trail - Click on Create Trail Button

AWS CloudTrail Create Trail – Click on Create Trail Button

  1. From under navigation pane, click on Trails. From Trails page, select the option Get Started Now. In case of not noticing such an option, click on Create Trail.
  2. For the section Trail name, type in a name for the trail. It is better to choose a name which lets you directly understand the reason behind the creation of this trail.
AWS CloudTrail Create Trail - Enter a Trail Name

AWS CloudTrail Create Trail – Enter a Trail Name

  1. For Management Events, specify the Read/Write events as All. Do not change the Yes default value, as your Log AWS KMS events
AWS CloudTrail Create Trail - Set Management Events

AWS CloudTrail Create Trail – Set Management Events

  1. For Data Events, don’t change anything, because we don’t need our trail to log data events.
AWS CloudTrail Create Trail - Set Data Events

AWS CloudTrail Create Trail – Set Data Events

  1. As for Storage Location, when you go to the Create a new S3 bucket, click on Yes. Now, when you get to S3 bucket, specify a name for your bucket.
AWS CloudTrail Create Trail - Set Storage Location

AWS CloudTrail Create Trail – Set Storage Location

Keep in mind always:

Choose a globally unique S3 bucket name.

  1. For the section Tags, supply custom tags to the trail created, for they are capable of aiding you in finding your required CloudTrail trails along with multiple resources, like S3 buckets having CloudTrail log files.
AWS CloudTrail Create Trail - Add Tags

AWS CloudTrail Create Trail – Add Tags


Important notes

– It’s possible to add tags to trails created in the CloudTrail console

– It’s possible to create an S3 bucket for storing log files in CloudTrail console

– It’s not possible to add tags to an S3 bucket through CloudTrail console

  1. Click on Create.

Viewing Log Files

After fifteen minutes of the creation of 1st trail, the first set of log files will be delivered to the S3 bucket for this trail. It’s possible to check out these files and find out what data they hold.

  1. From navigation pane, click Trails., then from the the Trails page, discover the name of your newly created trail.

Important to know:

Check that you’re signed into your configured IAM user for CloudTrail administration, or you wouldn’t get enough permissions for being able to view trails in CloudTrail console or the S3 bucket which has this trail’s log files.

  1. From the row accompanied with this trail, look for the value of S3 bucket, and click on it.
  2. At the highest level of log files, this bucket will be opened and shown by the S3 console. Since we have attempted to create a trail which logs events in every Region, the display will get opened at the exact level which lets you view every single Region’s folder. Click on the folder of the Region you intend to get its log files reviewed.
  3. Change the bucket folder structure to the following: day, month and year the year, which you wish to get the logs of activity in this Region checked. In the specific day you choose, you will find multiple files whose name begins with the account ID you possess, and then ends with “.gz” as an extension.

Example:

– Account ID: 122223333441

– File names will be as such: 122223333441_CloudTrail_us-west-2_2TutorialsEXAMPLE.json.gz.

For getting those files viewed, start by downloading them, unzipping them, and finally opening them in a JSON file viewer or just a simple text editor. “.gz” or “JSON” files can be viewed directly through specific browsers. It’s better to rely on JSON viewer, because it’s simpler for parsing the data in CloudTrail log files.

Global service events such as IAM and sign-in will get logged in a particular Region. For our example, they will be logged in the Region US West (Oregon), which corresponds to the folder us-west-2. Go all the way to this specific folder, while choosing your required day, month and year. Now as you browse through those log files, you are going to discover “ConsoleLogin” events and they are going to look somewhat like this:

{

“eventVersion”: “1.05”,

“userIdentity”: {

“type”: “IAMUser”,

“principalId”: “AKIAIOSFODNN7EXAMPLE”,

“arn”: “arn:aws:iam::123456789012:user/Ugur_Major”,

“accountId”: “122223333441”,

“userName”: “Ugur_Major”

},

“eventTime”: “2019-06-10T17:14:09Z”,

“eventSource”: “signin.amazonaws.com”,

“eventName”: “ConsoleLogin”,

“awsRegion”: “us-east-1”,

“sourceIPAddress”: “203.0.113.67”,

“userAgent”: “Mozilla/5.0 (Windows NT 10.0; Win64; x64; rv:60.0) Gecko/20100101 Firefox/60.0”,

“requestParameters”: null,

“responseElements”: {

“ConsoleLogin”: “Success”

},

“additionalEventData”: {

“LoginTo”: “https://console.aws.amazon.com/console/home?state=hashArgs%23&isauthcode=true”,

“MobileVersion”: “No”,

“MFAUsed”: “No”

},

“eventID”: “2681fc29-EXAMPLE”,

“eventType”: “AwsConsoleSignIn”,

“recipientAccountId”: “122223333441”

}

In this log file entry you will discover:

– Identity of logged in IAM user (Ugur_Major)

– Date of log in

– Time of log in

– Login success

– IP address of log in

– Operating system

– Browser software

– No use of any multi-factor authentication

Watch AWS CloudTrail tutorial

how to manage events on aws cloud trail

AWS CloudTrail Manage Your Events - Managing AWS Cloudtrail Events

AWS CloudTrail Manage Your Events

AWS CloudTrail Manage Your Events

Go over the following steps to learn how you can use AWS CloudTrail for managing your Events.

How to View Event Details using AWS CloudTrail?

  1. Click on one of the events that are found in the list in order to check its details.

    AWS CloudTrail Manage Your Events - Check Event Details

    AWS CloudTrail Manage Your Events – Check Event Details

  2. In case there are multiple referenced resources for an event, you can find the extra resources found at the end of the details pane.
AWS CloudTrail Manage Your Events - Check Event Referenced Resources

AWS CloudTrail Manage Your Events – Check Event Referenced Resources

  1. A couple of referenced resources may be accompanied with links. Select this link in order to go to this resource’s console.
AWS CloudTrail Manage Your Events - Check Event Link

AWS CloudTrail Manage Your Events – Check Event Link

  1. Click on the button View Event located under the details pane to view your event in a JSON format.
  2. Select this event once more so that you can close the details pane.

How to Download Events?

Recorded event history is capable of being downloaded either in CSV or in JSON formats. Use filters and time ranges to reduce the size of the file you download.

Keep in Mind:

Event history files represent data files carrying information, like resource names, capable of being configured.

Part of this data can be:

– Commands in programs such as CSV injection.

This means that events that are imported to a spreadsheet program after getting exported to CSV may warn you about security problems arising.

Important:

Disable such content to ensure that your system will remain secure. Keep on disabling macros and links macros from whatever event history files you choose to download.

Now, carry on reading to learn how to download event history files:

  1. Use a specific filter, then add a time range for your required events.

Example: Set your event name as StartInstances, then a particular time range to show the last 2 activity days.

AWS CloudTrail Manage Your Events - Use Event Filter

AWS CloudTrail Manage Your Events – Use Event Filter

  1. Click on the download button and select either Download CSV or Download JSON. Then, you will see that your download will start.
AWS CloudTrail Manage Your Events - Download Event Button

AWS CloudTrail Manage Your Events – Download Event Button

AWS CloudTrail Manage Your Events - Download Events

AWS CloudTrail Manage Your Events – Download Events

Keep in mind:

It may take some time for your download to finish. To speed things up, prior to downloading, select a particular filter which gets straight to the point of what you need or specify a smaller time range in order to get more accurate results.

  1. Upon finishing the download, click on the downloaded file to check out your required events.
  2. If you wish to cancel this download, simply click on Cancel download.

How to View Resources Referenced with Config?

Using “Config” you get to record:

– Configuration details

– Relationships

– Changes made to resources

AWS CloudTrail Manage Your Events - Check Event Resources Referenced Config Timeline

AWS CloudTrail Manage Your Events – Check Event Resources Referenced Config Timeline

From under Resources Referenced, click on the following symbol found in the Config timeline column in order to check the resource using Config console:

AWS CloudTrail Manage Your Events - Config Timeline Symbol

In case its color is grey and looks like this:

AWS CloudTrail Manage Your Events - Config Off Symbol

This means that Config is off, otherwise not recording this resource type. Click on this symbol in order to open the Config console for enabling this service or for the sake of beginning with recording the chosen resource type.

In case you get a Link not available comment in the column, this will mean that this resource is not capable of being viewed due to 1 of the below-listed causes:

  • This resource got created and deleted directly.
  • This resource type isn’t supported.
  • A different account owns this resource.
  • This resource type has lately gotten support without yet becoming available using the CloudTrail console. In this case, it’s possible to search for it using the Config console for the sake of checking its timeline.
  • This resource got lately updated or created.
  • A different service owns this resource (Exp: managed IAM policy).


Let’s take an Example:

  1. Config gets configured for the sake of recording IAM resources.
  2. IAM user gets created with the name Kit-user. In the Event history page, you can view the CreateUser event and Kit-user for the IAM resource. By clicking on the Config symbol, you will be able to check out this IAM resource using Config timeline.
  3. Later on, start updating the user name to become Kit-admin.
  4. The event history page is going to display the UpdateUser event while stating Bob-admin to be an updated IAM resource.
  5. It’s possible to select the symbol in order to go to the timeline and view the Kit-admin IAM resource. It’s not possible to select the symbol for Kit-user, since this resource has altered its name. Config hence starts to record your updated resource.


CloudTrail logs will be recorded as JSON format. They carry information regarding the requests made for your account’s resources, like the following:

– Which user performed this request

– Which services were used

– What actions were performed

– The parameters for each action

The event data is enclosed in a Records array.

The below example illustrates 1 log record of an event having an IAM user named Ugur_gu who called the StartLogging API using the console for the sake of starting a procedure of logging.

{

“eventVersion”: “1.05”,

“userIdentity”: {

“type”: “IAMUser”,

“principalId”: “AIDAJDPLRKLG7UEXAMPLE”,

“arn”: “arn:aws:iam::123456789012:user/Ugur_gu”,

“accountId”: “123456789012”,

“accessKeyId”: “AKIAIOSFODNN7EXAMPLE”,

“userName”: “Ugur_gu”,

“sessionContext”: {

“sessionIssuer”: {},

“webIdFederationData”: {},

“attributes”: {

“mfaAuthenticated”: “false”,

“creationDate”: “2019-06-18T22:28:31Z”

}

},

“invokedBy”: “signin.amazonaws.com”

},

“eventTime”: “2019-06-19T00:18:31Z”,

“eventSource”: “cloudtrail.amazonaws.com”,

“eventName”: “StartLogging”,

“awsRegion”: “us-east-2”,

“sourceIPAddress”: “203.0.113.64”,

“userAgent”: “signin.amazonaws.com”,

“requestParameters”: {

“name”: “arn:aws:cloudtrail:us-east-2:123456789012:trail/My-First-Trail”

},

“responseElements”: null,

“requestID”: “ddf5140f-EXAMPLE”,

“eventID”: “7116c6a1-EXAMPLE”,

“readOnly”: false,

“eventType”: “AwsApiCall”,

“recipientAccountId”: “123456789012”

},

… additional entries …

While this next example illustrates 1 log record where Insights event took place as the Systems Manager API UpdateInstanceAssociationStatus got called a number of unusual times.

2 events are present in an Insights event record:

– 1 event which marks the beginning of this insight, otherwise the beginning of this unusual activity

– 1 other event which marks the end of the insight

Value of eventCategory = Insight.

insightDetails block: It shows the event source, event state, event name, Insights context, Insights type, along with statistics.

{

“Records”: [

{

“eventVersion”: “1.07”,

“eventTime”: “2019-10-17T10:05:00Z”,

“awsRegion”: “us-east-1”,

“eventID”: “aab985f2-3a56-48cc-a8a5-e0af77606f5f”,

“eventType”: “AwsCloudTrailInsight”,

“recipientAccountId”: “123456789012”,

“sharedEventID”: “12edc982-3348-4794-83d3-a3db26525049”,

“insightDetails”: {

“state”: “Start”,

“eventSource”: “ssm.amazonaws.com”,

“eventName”: “UpdateInstanceAssociationStatus”,

“insightType”: “ApiCallRateInsight”,

“insightContext”: {

“statistics”: {

“baseline”: {

“average”: 1.7561507937

},

“insight”: {

“average”: 50.1

}

}

}

},

“eventCategory”: “Insight”

},

{

“eventVersion”: “1.07”,

“eventTime”: “2019-10-17T10:13:00Z”,

“awsRegion”: “us-east-1”,

“eventID”: “ce7b8ac1-3f89-4dae-8d2a-6560e32f591a”,

“eventType”: “AwsCloudTrailInsight”,

“recipientAccountId”: “123456789012”,

“sharedEventID”: “12edc982-3348-4794-83d3-a3db26525049”,

“insightDetails”: {

“state”: “End”,

“eventSource”: “ssm.amazonaws.com”,

“eventName”: “UpdateInstanceAssociationStatus”,

“insightType”: “ApiCallRateInsight”,

“insightContext”: {

“statistics”: {

“baseline”: {

“average”: 1.7561507937

},

“insight”: {

“average”: 50

},

“insightDuration”: 8

}

}

},

“eventCategory”: “Insight”

}

]

}

Watch the tutorial for managing events on AWS CloudTrail

Role Creation for SAML 2.0 Federation (Console) - Select roles from IAM Console

Role Creation for SAML 2.0 Federation (Console)

Role Creation for SAML 2.0 Federation (Console)

Needed Procedure prior to the Creation of a Role for SAML:

For the sake of preparing for the creation of a role for SAML 2.0 federation, you will need to follow the below steps:

  1. Prior to heading for the creation of a role for SAML-based federation, you will need to get a SAML provider created in IAM.
  2. Get the policies ready for the role which is going to be assumed by SAML 2.0–authenticated users. A SAML federation role will be having the following 2 policies:

– Role trust policy to define the role’s assumers.

– IAM permissions policy to define resources and actions that allowed to be accessed by or denied for the federated user.

Upon the creation of a trust policy for the required role, 3 values need to be utilized making sure that ensure that this role is only assumable by your own app and nothing else.

  • Action element: action sts:AssumeRoleWithSAML.
  • Principalelement: {“Federated”:ARNofIdentityProvider} Instead of ARNofIdentityProvider place the ARN of SAML identity provider which was previously created in the first step.
  • Conditionelement: condition StringEquals. It used in order to test that the saml:aud SAML response’s attribute is the same as that of SAML federation endpoint.

The below is an example of a trust policy which was designed for a specific SAML federated user:

{

“Version”: “2012-10-17”,

“Statement”: {

“Effect”: “Allow”,

“Action”: “sts:AssumeRoleWithSAML”,

“Principal”: {“Federated”: “arn:aws:iam::ACCOUNT-ID-WITHOUT-HYPHENS:saml-provider/PROVIDER-NAME“},

“Condition”: {“StringEquals”: {“SAML:aud”: “https://signin.aws.amazon.com/saml”}}

}

}

Instead of placing principal ARN replace it with the actual ARN for the SAML provider which was created in IAM. It’s going to include a provider name and an account ID.

How to Create a Role for SAML?

Upon the completion of the previously required steps, it’s now possible to get the SAML-based federation role created.

Creating an SAML-based federation role:

  1. Login to Management Console and head straight to IAM console through the following linke https://console.aws.amazon.com/iam/.
  1. From navigation pane, select Roles then click on Create role.
  2. Select SAML 2.0 federation role type.
Role Creation for SAML 2.0 Federation (Console) - Choose a SAML 2.0 Provider

Role Creation for SAML 2.0 Federation (Console) – Choose a SAML 2.0 Provider

  1. At SAML Provider, select which role provider you want for your role.
Role Creation for SAML 2.0 Federation (Console) - Select SAML 2.0 Federation Provider

Role Creation for SAML 2.0 Federation (Console) – Select SAML 2.0 Federation Provider

  1. Click on the SAML 2.0 access level method.

– Select the option Allow programmatic access only for the sake of creating a role which is capable of getting assumed programmatically from either API or CLI.

– Select the option Allow programmatic and AWS Management Console access for the sake of creating a role which is capable of getting assumed programmatically as well as through the console.

Both ways will create similar roles, but the role which is capable of being even assumed through the console contains a trust policy that is associated with a specific condition. This specific condition will explicitly make sure that the SAML:aud attribute is specified as https://signin.aws.amazon.com/saml.

  1. In the case that you choose to get a role for programmatic access created, select an attribute from the ones found in Attribute list.
Role Creation for SAML 2.0 Federation (Console) - Select SAML 2.0 Federation Role Attribute

Role Creation for SAML 2.0 Federation (Console) – Select SAML 2.0 Federation Role Attribute

After this, enter in Value box a specific value to be added to the role. This will the access of this role to only users from the identity provider that has a SAML assertion which contains the attributes which were set by you. You will need to set a minimum of 1 attribute for the sake of making sure that this role will be limited to a chosen user subset from your company.

Role Creation for SAML 2.0 Federation (Console) - Select SAML 2.0 Federation Role Value

Role Creation for SAML 2.0 Federation (Console) – Select SAML 2.0 Federation Role Value

In the case that you choose to create a role for programmatic access along with console access, the SAML:aud attribute will be directly included and specified to the SAML endpoint URL which represents this link https://signin.aws.amazon.com/saml.

  1. For the sake of including additional attribute-related conditions to this trust policy, select the Add condition (optional), then choose your extra condition, and finally set a particular value.
Role Creation for SAML 2.0 Federation (Console) - Select SAML 2.0 Federation Role Condition

Role Creation for SAML 2.0 Federation (Console) – Select SAML 2.0 Federation Role Condition

Keep in mind the following:

In the list you will find the generally relied on SAML attributes. More attributes are supported by IAM for being utilized in the creation of conditions. In case you require a condition, which is not found in the list, you are capable of adding this condition manually. In order to do this manually, you will need to get the trust policy edited after the role creation.

Role Creation for SAML 2.0 Federation (Console) - Click on Next,Permissions

Role Creation for SAML 2.0 Federation (Console) – Click on Next: Permissions

  1. Go over the SAML 2.0 trust data then click on Next: Permissions.
  2. Your IAM account has a list of managed and customer managed policies. Choose which policy you’d like to utilize for the permissions policy or select the option Create policy for opening a new browser tab and start creating a new policy. Upon completing with the policy creation, get this tab closed then head back to the original tab. Choose the check box which is located beside the permissions policies you selected for your web identity users. In case you’d prefer you get the possibility to choose no policies, but attach them to the role another time. The default is that a role will have no permissions.
  3. It’s optional to get a permissions boundary set as a more advanced feature.

Head to Set permissions boundary section and select the option Use a permissions boundary to control the maximum role permissions. Choose which policy you’d like to utilize for permissions boundary.

  1. Click on Next: Tags.
  2. It’s optional to get metadata added to your role through attaching tags as key–value pairs.
  3. Click on Next: Review.
  4. As a Role name, enter a unique role name of your choice, which won’t be distinguishable by case. ( APPLICATION and application cannot be both created as role names). Since it’s possible for different resources to reference your role, you will not be able to get the name edited after its creation.
  5. It is optional as Role description, to enter a description of your choice for this role.
  6. Go over the role then click on Create role.

create a a policy using visual editor