AWS S3 Inventory Reports

How to Configure AWS S3 Inventory Reports

How to Configure AWS S3 Inventory Reports

S3 inventory overview

  • Flat file list of your objects and metadata, which is a scheduled alternative to the Amazon S3 synchronous List API operation.
  • S3 Inventory provides our buckets or objects sharing a similar prefix, with the following output files for listing objects and metadata (daily or weekly).
  • Comma-separated values (CSV)
  • Apache optimized row columnar (ORC)
  • Apache Parquet (Parquet)

Running S3 Inventory report is an important step for many compliancy requirements although efficient cost visibility and cost reduction strategy can be quite challenging for most organizations. If you want to reduce your S3 spending start with reviewing your data transfer costs:

  1. Use CloudFront,
  2. Redesign object locations,
  3. Apply managed lifecycle for all S3 Objects,
  4. Review and cleaning S3 Objects that are never accessed

Alternatively, you can get instant visibility on all of the above with our AWS Savings Report (Hey! It’s free). The report will instantly give you the visibility on the cost of your S3 service and help you to reduce the overhead/wasteful spending significantly.

For Inventory configuration follow the steps below:

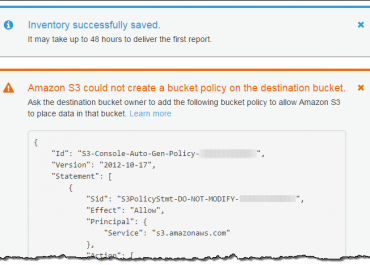
The first initiated report may take up to a total of 48 hours.
1. Login to the Management Console and go directly to the S3 console from the following link https://console.aws.amazon.com/s3/.
2. From the Bucket name list, select the bucket that you wish to configure its S3 inventory.
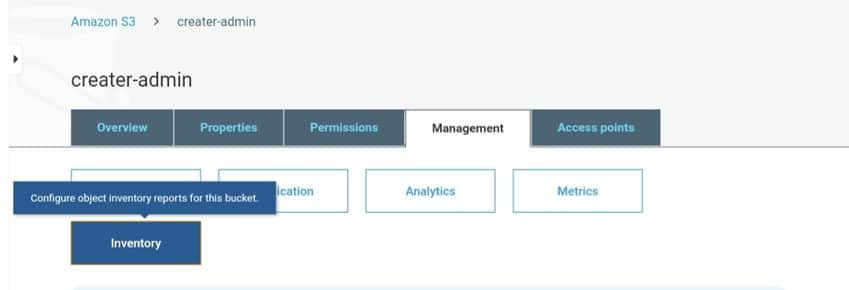
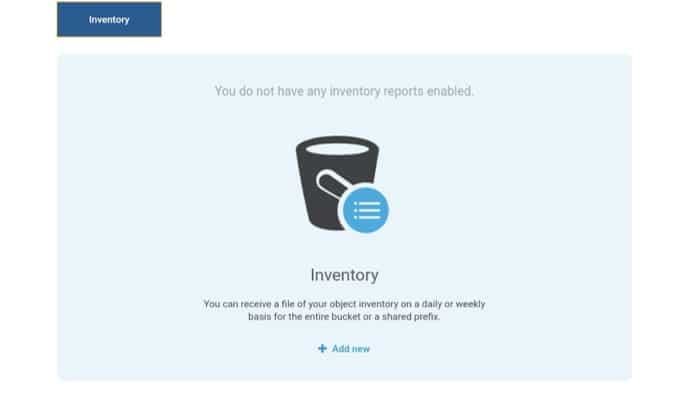
3. Select the Management tab, and click on Inventory.

Configure AWS S3 Inventory - inventory

Configure AWS S3 Inventory Report – inventory

4. Select the Add new option

Configure AWS S3 Inventory - add new

Configure AWS S3 Inventory Reports- add new

5. Fill in a specific name for inventory and start setting it up through those steps:

Configure AWS S3 Inventory - inventory set up

Configure AWS S3 Inventory – inventory set up

  1. You can have the option to add a prefix for the filter to objects found in inventory who have names beginning with identical strings.
  2. Select which destination bucket you would like the reports to get saved in. It has to be in the exact Region as that of the bucket whose inventory is being set up. It could be found in another account.
  3. You can have the option to select a prefix for your destination bucket.
  4. You have the choice to select how often to generate your chosen inventory.

For the Advanced settings section, you have the option to set the below:


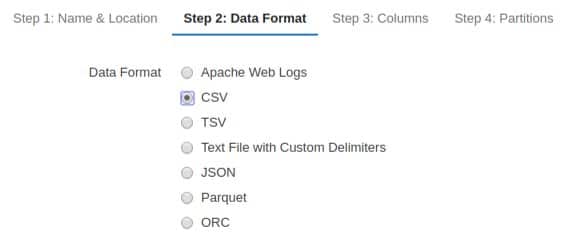
  • Select one of the following: ORC, CSV or Parquet output file format for inventory.
  • Select the option Include all versions in the Object versions list to get all versions. (Default: only the current versions are included)

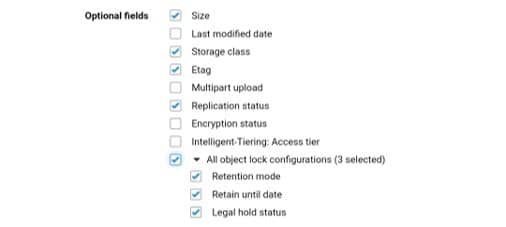
  • In the Optional fields, you can choose any of the below to have included with inventory report:


Configure AWS S3 Inventory - optional fields

Configure AWS S3 Inventory – optional fields

  • The Size: in bytes.
  • The Last modified date: the latest date when either created or last modified.
  • The Storage class: class where object is stored.
  • The ETag: hash of your object. Shows alterations made to contents of an object solely, not the metadata. It could be an MD5 digest of object data, depending on the way this object was created and encrypted.
  • The Multipart upload: Shows an object was uploaded as a multipart upload.
  • The Replication status: Replication status of an object.
  • The Encryption status: Server-side encryption which encrypted an object.

The Object lock configurations: Object lock status, which has the bellow settings:

  • “Retention mode”: Level of protection of an object (Governance or Compliance)
  • “Retain until date”: Date when locked object can no longer be deleted.
  • “Legal hold status”: A locked object’s legal hold status.


  • In Encryption section, select the server-side encryption option you want for encrypting your inventory report, or simply select None:


Configure AWS S3 Inventory - encryption

Configure AWS S3 Inventory Reports – encryption

      • “None”: No encryption for inventory report.
      • “AES-256”: Encryption through server-side encryption of S3-managed keys (SSE-S3). (Works with a 256-bit Advanced Encryption Standard (AES-256))
      • “AWS-KMS”: Encryption through server-side encryption of Key Management Service (KMS) customer master keys (CMKs).

For encrypting inventory list file with SSE-KMS, give S3 permission for using KMS CMK.

  1. Click on Save button.
Configure AWS S3 Inventory - save

Configure AWS S3 Inventory – save


What does S3 Inventory Consist of?

An inventory list file has:

-List of objects found in the source bucket

-Metadata for every object

Inventory lists are stored inside the destination bucket:

-As a CSV file (compressed with GZIP)

-As an Apache optimized row columnar (ORC) file (compressed with ZLIB)

-As an Apache Parquet (Parquet) file (compressed with Snappy)

Inventory list lists objects of S3 bucket with the bellow metadata for every single object listed:

  • The Bucket name: Name of bucket that this inventory is for.
  • The Key name: Unique object key name for identifying an object in the bucket. CSV file format gives a key name which is URL-encoded that should be decoded before getting used.
  • The Version ID: The object’s version ID number, upon enabling versioning on this bucket.
  • The IsLatest: Its value is Truefor current version objects.
  • The Size: Size (in bytes).
  • The Last modified date: Object creation date or the last modified date, whichever is the latest.
  • The ETag: The entity tag is a hash of the object, reflecting alterations merely made to contents of the object (not to metadata). It could be an MD5 digest of the object data. Being so, relies on the way of creation of the object and encryption.
  • The Storage class: Where an object is stored.
  • The Intelligent-Tiering access tier: Access tier which may be frequent or infrequent for objects stored in the Intelligent-Tiering.
  • The Multipart upload flag: Its value is Truefor objects uploaded with a multipart upload.
  • The Delete marker: Its value is True for delete marker objects. (directly found in your report if it’s configured to include every version).
  • The Replication status: Its value can be “PENDING”, “COMPLETED”, “FAILED”, and “REPLICA”.
  • The Encryption status: Its value can be “SSE-S3”, “SSE-C”, “SSE-KMS”, and “NOT-SSE”. Objects that are server-side encrypted have an “SSE-S3”, “SSE-KMS”, and “SSE” that comes with customer-provided keys, “SSE-C”. Having a NOT-SSEis for objects that have no server-side encryption.
  • The Object lock Retain until date: Locked objects may not be deleted until this date.
  • The Object lock Mode: Has a value of “Governance” or “Compliance” for locked objects.
  • The Object lock Legal hold status: Has a value of  “On” for legally held objects, or simply set “off” if not.

It is advised that you get a lifecycle policy created for deleting the old inventory lists.

AWS S3 Inventory provides you a combined view of your S3 buckets and helps your compliance needs, to calculate the cost of each bucket you can use AWS cost and usage reports or our S3 Cost calculator to forecast any planned changes.

uploading files to S3 bucket

How to Setup S3 Inventory

How to Setup S3 Inventory

How Setup S3 Inventory

This article provides a detailed overview of S3 object keys and metadata, and also highlights a few of the use cases in general.

What is S3 Inventory

  • It’s a tool provided by AWS for managing & maintaining blob storage.
  • While S3 inventory is a very helpful tool for compliance and regulatory needs, it won’t provide information regarding spending (or) what will be the cost estimates if a bucket lifecycle policy is applied.
  • You can use CloudySave S3 Cost Calculator to evaluate your S3 costs.
  • S3 Inventory can be used for auditing & reporting on the replication & encryption status of objects for the following needs: regulatory, business and compliance.
  • This process simplifies and speeds up business workflows & big data jobs, by considering a scheduled operation to synchronous List API.

It outputs the following:

How to Setup S3 Inventory - output

Output files for listing objects and their metadata can be set daily/weekly basis for entire buckets (or) shared prefix within bucket.

How to Setup S3 Inventory - output files

  • The weekly report is generated every seven days after the primary report is finished.
  • Multiple inventory lists can be generated for a single bucket.


Configuration Options:
  • Choosing which object metadata to include-to.
  • Choosing to list all object versions (or) just current/active versions.
  • Choosing a destination to store inventory-list file outputs.
  • Generating inventory on either a daily/weekly basis.
  • Encrypting the inventory-list file is optional.


S3 inventory can be queried by standard SQL using:


Setting Up S3 Inventory?

S3 Inventory typically consists of the following:

  • Source Bucket: where inventory lists the objects.
  • Destination Bucket: where the inventory “list file” is stored.
Source Bucket Characteristics

Objects that are listed by the inventory get stored in this bucket. Inventory lists have the options to be made either for a whole bucket (or) just filtered by object key name.

Source bucket:
  • Objects listed in the inventory
  • Configuration for inventory
Destination Bucket Characteristics

This is where S3 inventory list files get updated. For grouping inventory-list files in one place of the destination bucket, an object key name can be given in the configuration.

Destination bucket:
  • Stores inventory file lists.
  • Manifest files can list every file in the inventory list that is stored in the destination bucket.
  • It should have a policy that allows it to grant permission to S3 for verifying bucket ownership & permission to write files on it.
  • Same Region as that of the source bucket.
  • It has the ability to be identical to the source bucket.
  • It can also be owned by a different AWS account.


S3 Inventory Perks:
  • Managing the blob storage easily.
  • Creating lists of objects found in a bucket. (with a defined schedule)
  • Configuring multiple inventory lists for one bucket.
  • Publishing inventory lists of a destination bucket to: ORC, CSV and Parquet files.
To set up an inventory:
  • Via Management Console (simplest way)
  • Using REST API.
  • Using AWS CLI.
  • Using AWS SDKs.


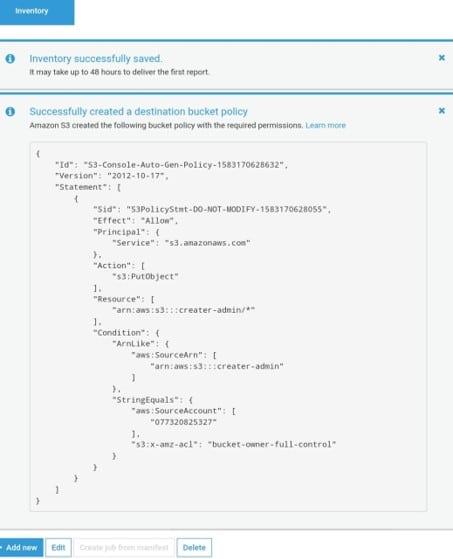
Adding bucket-policy to destination bucket (via console)

How to Setup S3 Inventory - destination bucket

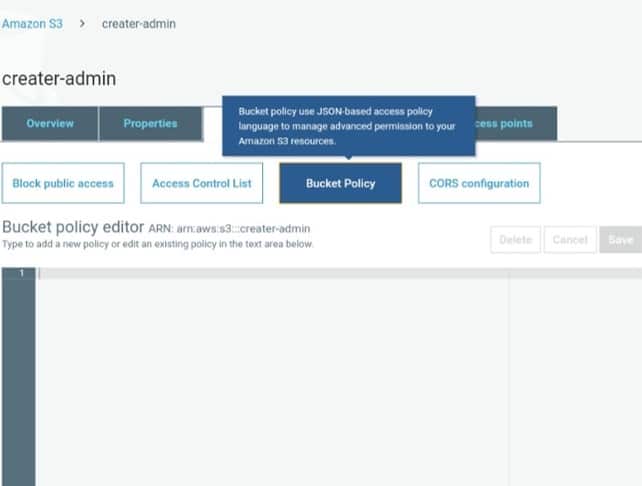
Create a bucket policy to give permissions to Amazon S3 for having the ability to write objects to the bucket which is found in the specified location.


Start with configuring an inventory to list objects in one source bucket and then publishes this list to a different destination bucket.

How to Setup S3 Inventory - settings

Configuring an inventory list for a source bucket you should:

  • Choose a destination bucket for storing the list.
  • Choose to generate the list either daily/weekly.
  • Configure object metadata object to include.
  • Choose listing every object version or just the current ones.


An inventory list file can be chosen to get encrypted through:

  • Amazon S3 managed key (SSE-S3)
  • AWS Key Management Service (AWS KMS) (Step 3 for more details)
  • Customer-managed customer master key (CMK).

For configuring an inventory list through S3 API use one of the following:

  • PUT Bucket inventory configuration.
  • REST API
  • AWS CLI
  • AWS SDKs


The inventory list file is encrypted by SSE-KMS, by giving permission to the usage of CMK which is found in KMS.

How to Setup S3 Inventory - SSE-KMS

Encryption for inventory list file through:

  • AWS Management Console
  • REST API
  • AWS CLI
  • AWS SDKs

Permission must be granted to Amazon S3 for using AWS KMS customer managed CMK to encrypt inventory files. This can be done by modifying key policy for customer-managed CMK used for the encryption of inventory files.


Giving S3 Permission to allow Using Your KMS CMK for Encryption purposes

  • A key policy should be used to grant S3 permissions for allowing encryption.
  • Customer managed AWS KMS customer master key (AWS KMS CMK).

Update key policy to use a KMS customer managed CMK for encryption of the inventory-file. Simply start with the following steps.

For giving permissions to encryption through KMS CMK
  1. Via the AWS account, which the customer managed CMK is owned by, login to AWS Management Console.
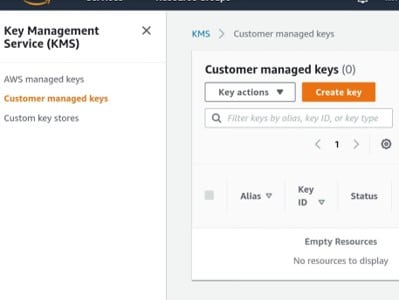
  2. Navigate to AWS KMS Console.
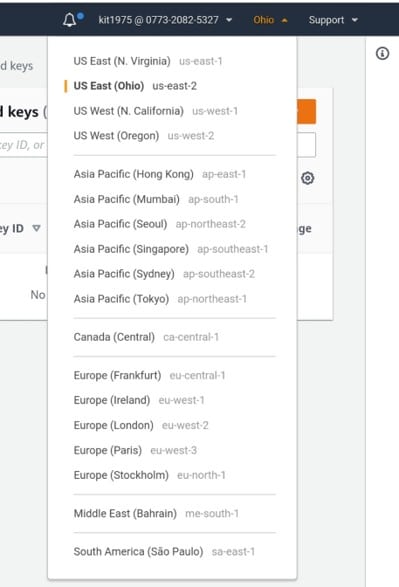
  3. For choosing a different region, head to the Region selector from the top right corner.

How to Setup S3 Inventory - region selector

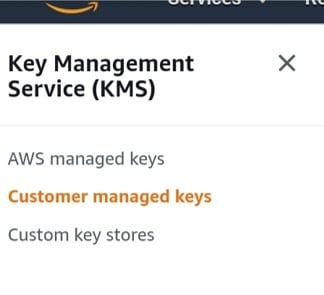
  • From left navigation pane, select Customer managed keys.

How to Setup S3 Inventory - key management service

  • For the Customer managed keys section, select which CMK to be used for the encrypted inventory file.

How to Setup S3 Inventory - customer managed keys

  • From beneath the Key policy section, select the option: Switch to policy view.
  • To update key policy, click Edit.
  • In the Edit key policy field, start adding the below key policy to your already existing key policy.
    {
        “Sid”: “Allow Amazon S3 use of the CMK”,
        “Effect”: “Allow”,
        “Principal”: {
            “Service”: “s3.amazonaws.com”
        },
        “Action”: [
            “kms:GenerateDataKey”
        ],
        “Resource”: “*”
    }
  • Click on “Save changes”.

Use the KMS PUT key policy API(PutKeyPolicy) for fetching key policy copied the key policy to the CMK which is used to encrypt the inventory file.

Here are few awesome resources on AWS Services:

AWS S3 Bucket Details
Configure AWS S3 inventory

Upload Files/Folders to S3 bucket

AWS S3 LifeCycle Management

AWS S3 File Explorer

Setup Cloudfront for S3

AWS S3 Bucket Costs


CloudySave helps to improve your AWS Usage & management by providing full visibility to your DevOps & Engineers into their Cloud Usage.

How to upload files & folders to AWS S3 bucket?

This article provides a detailed overview of uploading files/folders to S3, also highlights few of the use-cases in general.


Uploading Files and Folders to S3 Bucket

An uploaded file is saved as an object. This object is made up of the file’s data and the metadata which describes this object. There is no limit on the #objects added to the bucket.

An S3 object can be of any type (Ex: images, backups, data, movies, etc.) A file can have a size of 160GB at max. For larger files AWS suggests to upload them using AWS CLI, S3 REST API or AWS SDK.

Files can be uploaded by:

  • Dragging and dropping
  • Pointing and clicking

To upload folders, you must drag and drop them (only for Chrome and Firefox browsers).

When a folder is uploaded, the bucket gets its files and subfolders. Then it gets an object key name = uploaded file name + folder name.

For Example, Uploading a folder called /pictures with two files: pic1.jpg and pic2.jpg, The file will be uploaded and assigned with this key name: pictures/pic1.jpg and pictures/pic2.jpg.

  • Key names= folder name (prefix). The part that follows the last “/” is what gets displayed. Example: in a pictures folder the pictures/pic1.jpg and pictures/pic2.jpg objects get shown as pic1.jpg and a pic2.jpg.
  • Uploading individual files with an open folder in the S3 console: when files are uploaded, they get the name of the open folder as prefix for the key names.
  • Example of a folder named review open in the console and you upload a file with the name trial1.jpg, the key name will be review/trial1.jpg, but the object is shown in the console as trial1.jpg in the review folder.
  • Uploading individual files with no open folder in the console: when files are uploaded, only the file name becomes the key name. Example of a file named trial1.jpg, the key name is trial1.jpg.
  • Uploading an object of key name already found in a versioning-enabled bucket, another version of this object gets created instead of getting the already existing one replaced.

How to Upload Files and Folders Using “Drag and Drop”?

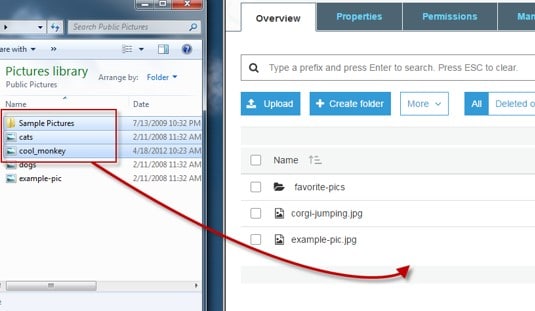
With Chrome/Firefox browsers, you get to choose the folders and files you want to upload, then you simply drag and drop them down into the destination bucket. To drag and drop is just the only possible way for uploading folders.

Uploading folders and files to a bucket by drag and drop:

  • Log into the Management Console and go open the S3 console using this link https://console.aws.amazon.com/s3/.
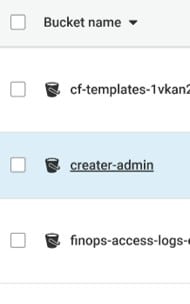
  • From Bucket name list, select the bucket to get your folders and files uploaded to.
upload files and folders to s3 bucket - bucket name

upload files and folders to s3 bucket – bucket name

  • In another window, select all the files and folders for uploading. After that you drag and drop the selection right into the console window that where there’s the list of objects in the destination bucket.
upload files and folders to s3 bucket - upload

upload files and folders to s3 bucket – upload

  • Chosen files get listed in the Upload dialog box.
  • At Upload dialog box, choose to perform one of the following processes:
    1. Drag and drop even more files and folders to the console window at the Upload dialog box. If you wish to add some more files, you may select Add more files (only files, not folders).
    2. For quickly uploading listed files and folders with no permissions granted or removed for specific users or not even having to set public permissions for all the files, click on Upload .
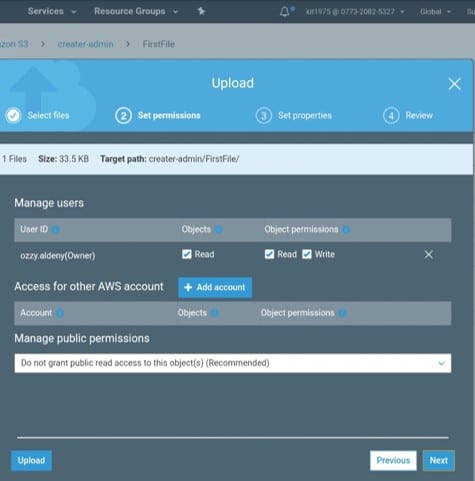
    3. For permissions or properties to the files being uploaded, click on Next.
upload files and folders to s3 bucket - permissions

upload files and folders to s3 bucket – permissions

  • In the Set Permissions page, for Manage users you have the chance to choose the permissions you require for the account owner. Owner= the account root user, not just an IAM user.
  • Select the Add account for granting access to another account.
  • For Manage public permissions you have the ability to allow read access to objects to everyone around the globe, for all uploaded files.
  • Public read access could be granted when there is a subset of use cases for example: using buckets for websites.
  • It is advised not to change the default setting regarding “Do not grant public read access to this object(s).
  • After the object is uploaded, it’s possible to still make extra permission changes.
  • After finishing the configuring process for permissions, click Next.
upload files and folders to s3 bucket - public read access

upload files and folders to s3 bucket – public read access

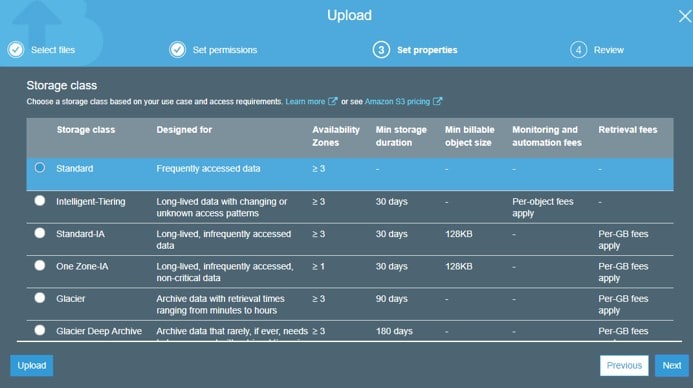
  • For the Set Properties page, select the storage class you want and the encryption method for the files being uploaded. Metadata can also be added or modified. Select a storage class.
  • To encrypt objects in a bucket, only CMKs found in the same Region as the bucket can be used.
  • An external account can be given the ability to utilize an object under the protection of an AWS KMS CMK.
  • For this to happen, click on Custom KMS ARN in the list and fill in the Amazon Resource Name for the external account.
  • Access can further be restricted by administrators (external account) with usage permissions to an object which is protected by your AWS KMS CMK, through the creation of a resource-level IAM pol.
upload files and folders to s3 bucket - storage class

upload files and folders to s3 bucket – storage class

  • Choose the type of encryption you want for the files. For no encryption, select None.
    • Foe encryption using keys managed by S3, select the Amazon S3 master-key.
    • For encryption using AWS KMS, select the AWS KMS master-key, and pick a customer master key from the list.
    • Metadata is represented by: key-value pair, and this metadata comes in two kinds: system-defined and user-defined.To add S3 system-defined metadata to all uploaded objects:Choose a header for Header. (common HTTP headers, like: Content-Type & Content-Disposition). Fill in a specific value for the header, then select Save.
    • Metadata with prefix:  x-amz-meta-will be treated as being user-defined.  (stored with the object, and returned when downloading this object)Adding user-defined metadata to all objects being uploaded: write x-amz-meta- and a custom name in Header field. Fill in a value for header, and select Save. Keys and their values need to be in conformation with the US-ASCII standards. (can be as large as 2 KB)
    • Object tagging: to categorize storage.Tag: a key-value pair.Key and tag values: case sensitive. (up to 10 tags per object)
    • Adding tags to all objects being uploaded: write a tag name for Key. Fill in a specific value for the tag, and click on Save.
    • Click on Next.
    • From Upload review page, make sure that all of your selected settings are correct, then click on the Upload button. For making additional corrections and alterations, click on Previous.
    • If you want to check out the progress of upload, click on In progress from the bottom browser window.
    • For checking history of uploads + other operations, click on Success.

Uploading Files by Pointing and Clicking

These steps show the way to upload files into a bucket through Upload .

    • Log into the Management Console and go to the S3 console through this link https://console.aws.amazon.com/s3/.
    • From the Bucket name list, click on the bucket name you wish to get your files uploaded to.
    • Click on the Upload button.
    • From the Upload dialog box, click on Add files.
    • Go ahead and select some files to start uploading, and click on
    • When your files get listed in the Upload dialog box, you can choose to perform one of those operations:-Select Add more files, for adding additional files.-Select Upload , to directly get your listed files uploaded.-Select Next if you want to start setting permissions and properties for your files.In order to start setting permissions or properties, begin by following with Step 5 of Uploading folders and files to a bucket by drag and drop.

Here are few awesome resources on AWS Services:
AWS S3 Bucket Details
AWS S3 Bucket Versioning
AWS S3 LifeCycle Management
AWS S3 File Explorer
Create AWS S3 Access Keys
AWS S3 Bucket Costs
AWS S3 Custom Key Store

  • CloudySave is an all-round one stop-shop for your organization & teams to reduce your AWS Cloud Costs by more than 55%.
  • Cloudysave’s goal is to provide clear visibility about the spending and usage patterns to your Engineers and Ops teams.
  • Have a quick look at CloudySave’s Cost Caluculator to estimate real-time AWS costs.
  • Sign up Now and uncover instant savings opportunities.
Posted in S3
s3 bucket versioning, mfa requirement, permissions

Enabling Versioning, MFA Requirement and Permissions for S3 Bucket

Enabling Versioning, MFA Requirement and Permissions for S3 Bucket


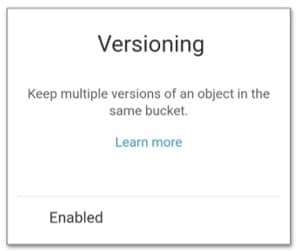
Versioning gives you the ability to maintain various versions of one object in the same chosen bucket. Here we are going to learn the way for enabling object versioning on a specific bucket of your choice.

How can we enable or disable versioning on a bucket?

    1. Log into the Management Console and go to the S3 console by following this link https://console.aws.amazon.com/s3/.
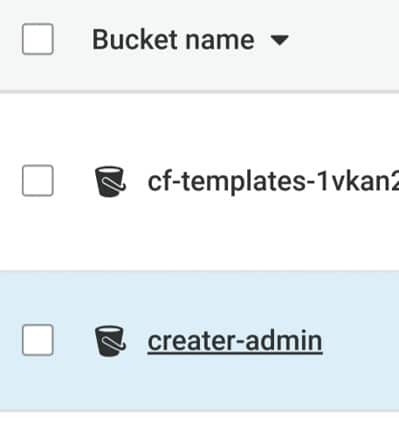
    2. From the Bucket namelist, select the bucket which you would like to have versioning enabled for.
aws s3 bucket name list

aws s3 bucket name list

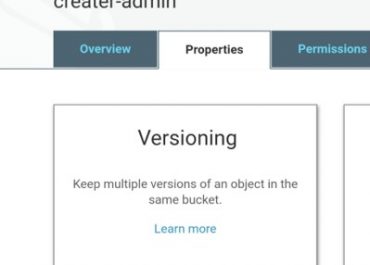
    1. Select Properties.

s3 bucket select properties

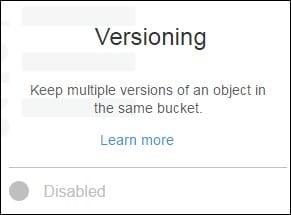
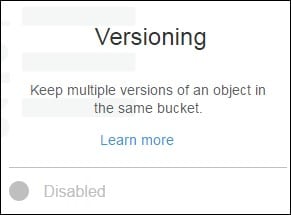
    1. Select Versioning.
s3 bucket versioning - disabled

s3 bucket versioning – disabled

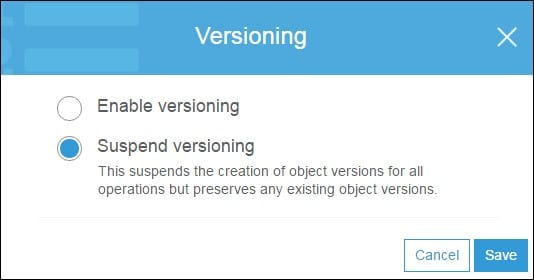
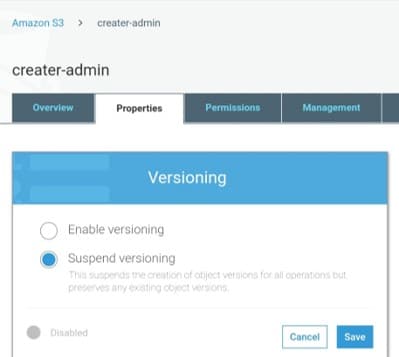
  1. Select the Enable versioningchoice or the Suspend versioning choice, and click on the save button.
s3 bucket - suspend versioning

s3 bucket – suspend versioning

Important

Multi-Factor Authentication can be utilized with the enablement of versioning. For using Multi-Factor Authentication while versioning is enabled, an AWS account’s access keys must be given as well as a valid code coming from the same MFA device used for the account, so that an object could be deleted completely or so that you choose either suspension or reactivation of versioning. MFA Delete needs to be enabled for the usage of MFA while versioning is enabled, but it’s not possible to go ahead and enable MFA Delete through AWS Management Console. The CLI or API should be used for enabling the MFA Delete.

How to get the MFA Requirement:

– MFA-protected API access is supported by S3

-Having this feature gives us the ability to enable MFA for the access allowed to S3 resources

– MFA allows for an additional security level to be applied to the AWS environment that you’re working with.

MFA is a:

-Security feature

-It asks of the users to admit their physical possession for a given MFA device

-It asks users to provide it with a valid MFA code

-MFA can be required by the users in case of the need for setting requests to access their S3 resources.

-MFA requirement may be enforced through the aws:MultiFactorAuthAge key in a specific bucket policy

-IAM users may now get the ability to access and go to their S3 resources through their temporary credentials which were given by the STS

-MFA code is asked to be provided when the STS request is being made by the user

As soon as S3 gets a request with a specific multi-factor authentication, the aws:MultiFactorAuthAge key will give a number which shows how many seconds ago did the credential get created.

In case this credential had not been created by an MFA device, it will be absent which means its = null.

-If you wish, you can get the chance to add a condition for checking this number in your bucket policy, just like the example below shows. By doing so, your bucket policy will start denying all S3 operations made on the /FirstFile folder which is found in the creater-admin bucket in the case that this request was not authorized through MFA.


{

"Sid": "",

"Effect": "Deny",

"Principal": "*",

"Action": "s3:*",

"Resource": "arn:aws:s3:::creater-admin/FirstFile/*",

"Condition": { "Null": { "aws:MultiFactorAuthAge": true }}

}

The Null condition in the Condition block evaluates to true if the aws:MultiFactorAuthAge key value is null, indicating that the temporary security credentials in the request were created without the MFA key.

-The following bucket policy is an extension of the preceding bucket policy. It includes two policy statements. One statement allows the s3:GetObject permission on a bucket (creater-admin) to everyone. Another statement further restricts access to the creater-admin/FirstFile folder in the bucket by requiring MFA.


{

"Sid": "",

"Effect": "Allow",

"Principal": "*",

"Action": ["s3:GetObject"],

"Resource": "arn:aws:s3:::creater-admin/*"

}

-Also, a numeric condition could be relied on for limiting duration of validity for the aws:MultiFactorAuthAge key, without taking into consideration how long the security credential’s lifetime was upon the authentication of this request. In the following example code line we can see how this bucket policy checks when the temporary session had been created. The policy will further deny all possible operations in case the aws:MultiFactorAuthAge key value shows that this temporary session had been for longer than 3600 seconds.


{   {

"Sid": "",

"Effect": "Deny",

"Principal": "*",

"Action": "s3:*",

"Resource": "arn:aws:s3:::creater-admin/FirstFile/*",

"Condition": {"NumericGreaterThan": {"aws:MultiFactorAuthAge": 3600 }}

}}

{ {

Cross-Account Upload Permissions While Owner Has Full Control

-Owners have the ability to grant permission to other accounts for uploading objects to their bucket

-But as bucket owners they should have total control of the objects being uploaded to their chosen bucket

The policy below states that a chosen account (888888888888) will be denied when uploading objects if he does not grant the bucket owner total control access. The “creater-admin” bucket owner is identified by his chosen email: owner@amazon.com.

StringNotEquals condition shows that the s3:x-amz-grant-full-control condition key for the sake of expressing the requirements.


{

"Sid":"111",

"Effect":"Allow",

"Principal":{"AWS":"888888888888"},

"Action":"s3:PutObject",

"Resource":"arn:aws:s3:::creater-admin/*"

},

{

"Sid":"112",

"Effect":"Deny",

"Principal":{"AWS":"888888888888" },

"Action":"s3:PutObject",

"Resource":"arn:aws:s3:::creater-admin/*",

"Condition": {

"StringNotEquals": {"s3:x-amz-grant-full-control":["emailAddress=owner@amazon.com"]}

}}

{

"Sid":"111",

"Effect":"Allow",

Permissions for S3 Inventory and S3 Analytics

-S3 inventory: for lists of objects in a bucket

-S3 analytics export: for output files of the data being utilized in analysis

-Name of the bucket which the inventory lists objects for: source bucket

-Name of the bucket where both the inventory file and the analytics export file get written: destination bucket

A bucket policy needs to be created and set for destination bucket during the stages of:

-Setting up inventory for a bucket

-Setting up its analytics export

In the below example, S3 permission is given for writing objects which are referred to as: PUTs from source bucket of account “8888888888” to the destination bucket.

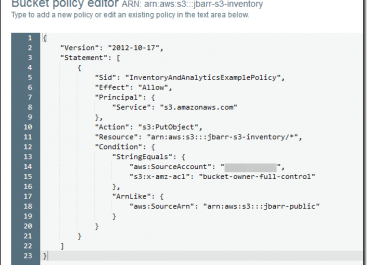
Such a bucket policy is used on destination bucket at the stage of setting up both the S3 inventory and S3 analytics export.


{

"Sid":"InventoryAndAnalyticsExamplePolicy",

"Effect":"Allow",

"Principal": {"Service": "s3.amazonaws.com"},

"Action":["s3:PutObject"],

"Resource":["arn:aws:s3:::destination-bucket/*"],

"Condition": {

"ArnLike": {

"aws:SourceArn": "arn:aws:s3:::source-bucket"

},

"StringEquals": {

"aws:SourceAccount": "8888888888",

"s3:x-amz-acl": "bucket-owner-full-control"

}       }}

s3 versioning


aws s3 versioning

AWS S3 Versioning

S3 Versioning

For having many variants of an object in one bucket.

Used to maintain, find, and bring back all the versions of your objects that are found in the bucket.

Bring back both application failures and unintentional user actions.

As an example: Two objects can be present while having the same key, but they will have version IDs which are different:

image.gif (version 333222) and image.gif (version 425234).

Versioning-enabled buckets pave the way for the recovery of accidental actions:

  • Deleting an object: does not remove it permanently, but gives it a delete marker, as the current object version. Previous versions can easily be restored.
  • Overwriting an object: will get you a new object version found in the same bucket. Previous versions can easily be restored.

Object expiration lifecycle policy in a non-versioned bucket:

To keep the same permanent, delete behavior with versioning, you should add a noncurrent expiration lifecycle policy. This policy in the version-enabled bucket will manage the deletes of the noncurrent object versions.

Three states for buckets:

-Unversioned (default state)

s3 versioning - multiple versions

s3 versioning – multiple versions

-Versioning-enabled

s3 versioning - multiple versions enabled

s3 versioning – multiple versions enabled

-Versioning-suspended

s3 versioning - multiple versions suspended

s3 versioning – multiple versions suspended


When a bucket gets version-enabled, you will not be able to bring it back to its unversioned state anymore, but you can suspend its versioning.

All of a bucket’s objects get in the versioning state. When a bucket is first enabled for versioning, its objects become versioned forever with their own unique version ID.

  • The version ID is null for objects already found in a bucket before it gets in the version state. The existing objects do not get altered, but the only thing which changes is how they are handled in the upcoming requests.
  • Bucket users have the ability to suspend versioning for the sake of stopping object versions.

Configuring Versioning on a Bucket:

It can be done by any of those methods:

  • The Amazon S3 console.
s3 versioning - multiple versions suspended versioning

s3 versioning – multiple versions suspended versioning


  • Programmatically, by the AWS SDKs.

REST API is called by both the console and the SDKs to configure buckets versioning.

REST API calls can also directly be made when necessary from your code, but this can be a harder method since it will need you to authenticate those requests using codes.

Every created bucket is by default unversioned and contains a versioning sub resource which holds empty versioning configuration.

<VersioningConfiguration xmlns=”http://s3.amazonaws.com/doc/2020-02-20/”> </VersioningConfiguration>

For the enablement of versioning, a request must be sent to Amazon S3 that has a versioning configuration with a status.

<VersioningConfiguration xmlns=”http://s3.amazonaws.com/doc/2020-02-20/”>   <Status>Enabled</Status> </VersioningConfiguration>

For the suspension of versioning, the status value must be set to Suspended.

The people who get to configure the versioning state of this bucket are the following:

-The bucket owner,

-An AWS root account which has created the bucket

-Authorized users

How to use MFA Delete:

Optionally, a user gets the chance to:

-Add an additional layer of security through configuring a bucket for the enablement of multi-factor authentication Delete. This layer needs extra authentication for doing any one of those operations:

  • Changing the bucket’s versioning state
  • Permanently get an object version deleted

The extra authentication forms needed together for MFA Delete are the following:

  • Security credentials
  • The concatenation of:

– Valid serial number

– Space

– Six-digit code displayed on an approved authentication device

In Case your credentials are attacked or get under any threat, MFA Delete will grant you added security.

MFA Delete can be enabled or disabled through the same API used for the configuration of versioning in this bucket. MFA Delete configuration is kept in the versioning sub resource which was used to store bucket’s versioning status.

Accidental bucket deletions can be stopped by MFA Delete through those steps:

  • Asking for physical possession of MFA device and its MFA code.
  • Having an additional layer of security and friction to this action.

<VersioningConfiguration xmlns=”http://s3.amazonaws.com/doc/2020-02-20/”>   <Status>VersioningState</Status>  <MfaDelete>MfaDeleteState</MfaDelete>  </VersioningConfiguration>

Who can enable versioning?

– The bucket owner

– The AWS root account which first created the bucket

– All other authorized IAM users

Who can enable MFA Delete?

– The bucket owner (root account)

MFA Delete can be used through a hardware or through a virtual MFA device so that you get to generate the required authentication code.

Both the MFA Delete and the MFA-protected API access are:

-Features for granting protection and safety against various situations

MFA Delete: configured on a bucket for making sure that ensure data in the bucket will not be deleted unintentionally.

MFA-protected API access: utilized for case sensitive resources to enforce an additional authentication factor which is the MFA code. Temporary credentials of MFA can be asked to be provided when attempting to perform specific operations for those sensitive resources.

What is S3 object key

s3 object key

S3 Object Key and Metadata

AWS S3 Object Key and Metadata

This article provides a detailed overview of S3 object keys and metadata and also highlights a few of the use cases in general.

AWS S3 Highlights
  • S3 will not only charge for the storage but also for requests, data retrievals, data transfer and replication.
  • It’s advisable to use AWS S3 object Tagging, which might cost around $0.01 per 10,000 tags per month.
  • We suggest using the S3 pricing calculator to calculate and estimate your AWS S3 spending.

CloudySave AWS Savings Report provides the complete cost visibility of S3 service, which includes all details about storage, requests & data-transfer costs. This report greatly assists in understanding the overhead/wasteful costs.


When reviewing data-transfer costs, please consider taking the following actions:

  • Using Cloud Front or redesigning object locations.
  • Applying managed lifecycle for all S3 Objects.
  • Reviewing and cleaning S3 Objects that are never accessed.

.

An S3 object includes the following:
  • Data: data can be anything(files/zip/images/etc.)
  • A key (key name): unique identifier
  • Metadata: Set of name-value pairs that can be set when uploading an object and can no longer be modified after a successful upload. To change metadata, AWS suggests making an object copy and setting the metadata again.


What are S3 Object Keys?
  • Upon creation of objects in S3,  a unique key name should be given to identify each object in the bucket.
  • For Example, when a bucket is highlighted in S3 Console, it shows the list of items that represent object keys. Key names come as Unicode characters with UTF-8. (max limit: 1024 bytes)

S3 data model:
  • Flat structure.
  • Create a bucket.
  • The bucket stores the objects.
  • No hierarchy (no sub buckets or subfolders)

Nonetheless, by utilizing name prefixes & delimiters, a logical hierarchy can be made just like how the S3 console does. The console allows the concept of folders.

For Example, let’s consider a bucket (creator-admin) is made up of four objects which have these object keys:

  • FirstFile/assignment.rar
  • SecondFile/DAL.xlsx
  • ThirdFile/challenges.pdf
  • visit.pdf

s3 object key metadata

  • The key name prefixes (FirstFile/, SecondFile/, and ThirdFile/) represents the folder structure with S3 bucket.
  • As the visit.pdf key does not have any prefix, the S3 console presents that as an object. Navigating inside folders presents its contents.

s3 buckets and objects

  • S3 takes buckets and objects with no hierarchy. Yet, prefixes and delimiters present in object key names can allow S3 console and SDKs to get a hierarchy and start folders.

All you need to know about S3 Object Key Naming:
  • Use any UTF-8 character.
  • Few characters may cause problems (wrt. particular protocols and applications)

The upcoming guidelines might maximize compatibility with: -DNS -XML parsers -Web safe characters -Other APIs etc.


What are the Safe Characters?

The following characters are commonly used in key names:

  • Alphanumeric Characters such as: “0-9” “a-z” “A-Z”.
  • Special Characters such as: “!” (or) “-“ (or) “_” (or) “.” (or) “*” (or) “,” (or) “(“ (or) “)”


Here are a few examples of S3 object key names which are accepted:
  • 2my-company
  • our.nice_pictures-2020/feb/ourholiday.jpg
  • clips/2020/party/clip1.wmv

Object key names having one period “.”, or two periods “..”, can’t be downloaded through the console but can be managed through AWS-CLI, SDKs or REST API.

Characters That Might Require Special Handling
  • Extra code handling
  • URL encoded
  • Referenced as HEX.

Non-printable characters may not be handled by the browser and require special handling, includes:

  • “&”
  • “$”
  • 0–31 decimal and 127 decimal
  • “@”
  • “=”
  • “:” and “;”
  • “+”
  • Space and particularly multiple spaces
  • “,”
  • “?”

Which characters should you avoid on S3 object key?

Avoid the following characters in a key-name due to significant special handling for consistency across all applications.

  • “”
  • “{” and “}”
  • 128–255 decimal characters
  • “^”
  • “%”
  • “`”
  • “]” and “[“
  • Quotation marks
  • “>” and “<”
  • “~”
  • “#”
  • “|”


What are the types of S3 Object Metadata?

s3 object key

System-Defined:

Every object in a bucket has a set of system metadata which is processed by S3.

System metadata has 2 categories:

  1. Metadata: like object creation date, which is controlled by the system and solely Amazon S3 has the ability to update its value.
  2. Other system metadata: like the storage class configured for an object and objects of server-side enabled encryption, are system metadata with values controlled by you.

Upon the creation of objects, the following may be done: configuring values of system metadata items and updating values when necessary.

Update the status of system-defined metadata:


User-Defined Values:
  • Metadata can be assigned to an object as you upload it.
  • It’s an optional name-value pair for sending a “PUT” or a “POST” request.
  • Optional metadata names, which are defined by the user through the REST API, have to start with “x-amz-meta-” to set them apart from other HTTP headers.
  • Retrieving an object through the REST API, gets that prefix returned (x-amz-meta-). But the prefix is not needed when uploading it through SOAP API.
  • Retrieving through SOAP API removes the prefix, no matter what the API used for uploading this object.
  • Using HTTP, SOAP is deplored, but it is available using HTTPS.
  • SOAP can no longer support the upcoming S3 features, so either starts using the REST API or the AWS SDKs.
  • For the retrieval of metadata by REST API, headers with the same name get combined into a comma-delimited list.
  • Metadata with unprintable characters are not returned, but the x-amz-missing-meta header returns, showing the value of unprintable metadata.

User-defined metadata:

  • Set of key-value pairs
  • Stored by Amazon S3 in lowercase
  • Key-value pairs need to be compliant
  • US-ASCII when using REST
  • UTF-8 when using both SOAP or browser-based uploads through POST


PUT request header:

  • Maximum of 8 KB in size.
  • Its user-defined metadata has a maximum of 2 KB in size
  • size of user-defined metadata= sum of a number of bytes in the UTF-8 encoding of each key and value.

Here are a few awesome resources on AWS Services:

AWS S3 Bucket Details
AWS S3 LifeCycle Management
AWS S3 File Explorer
Setup Cloudfront for S3
AWS S3 Bucket Costs